
Premiere Pro offers a ton of creative tools to spice up your videos, including the invert effect. This powerful tool transforms the colors in your video by flipping them, turning black to white, orange to blue, and so on.
Whether you want to create striking transitions, highlight specific elements, or set a particular mood, this effect offers multiple creative possibilities. Let’s take a look at how you can create and use the invert effect to invert colors for your videos in Adobe Premiere Pro.
How to invert color in Adobe Premiere Pro
There are several ways to invert your colors in Premiere Pro, but the easiest way is to use the premade invert effect. By applying it to your footage in the timeline, you can flip the colors and customize both the intensity and which channels to affect.
Here’s how to use the invert effect in Premiere Pro:
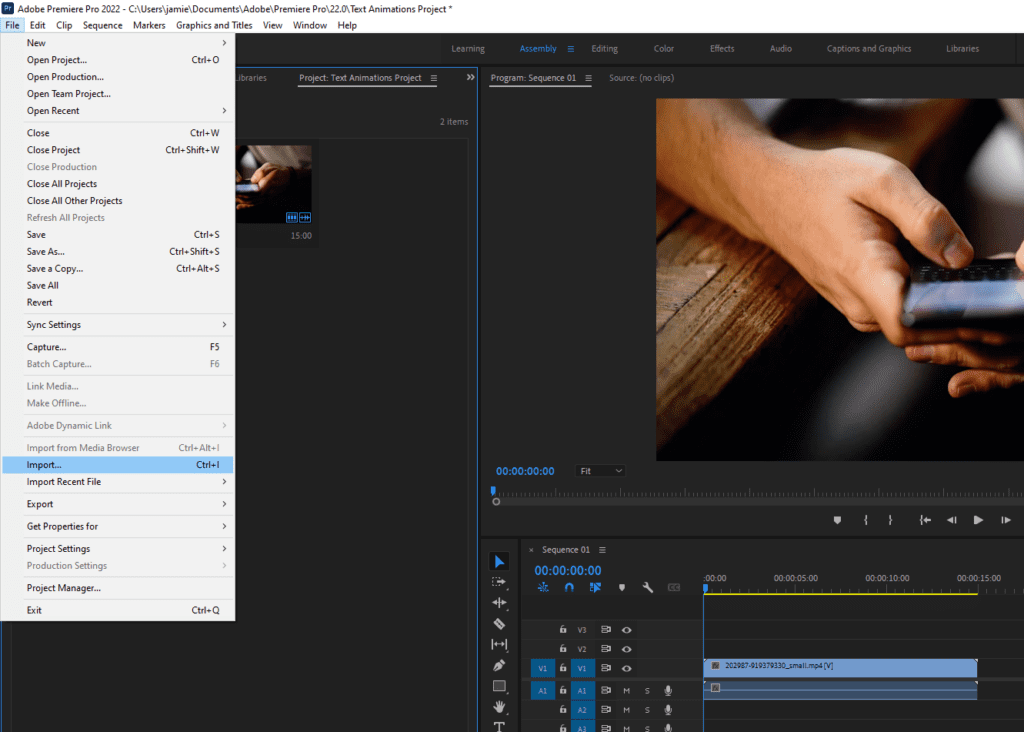
1. Import your clip
The first step is to open your clip in Adobe Premiere Pro. You can do this by selecting File > Import and selecting the file you want. Drag and drop the clip in your Timeline so it’s ready for editing.
2. Apply the Invert effect
After opening the clip, you can apply the Invert effect from the Effects menu. Click Effects > Video Effects > Channel > Invert. Drag Invert onto your clip to apply the effect.

3. Adjust and blend the effect
When it comes to perfecting your invert effect, Premiere Pro offers two main options—Channel and Blend With Original. You can find these under the Invert effect in the Effect Controls window.
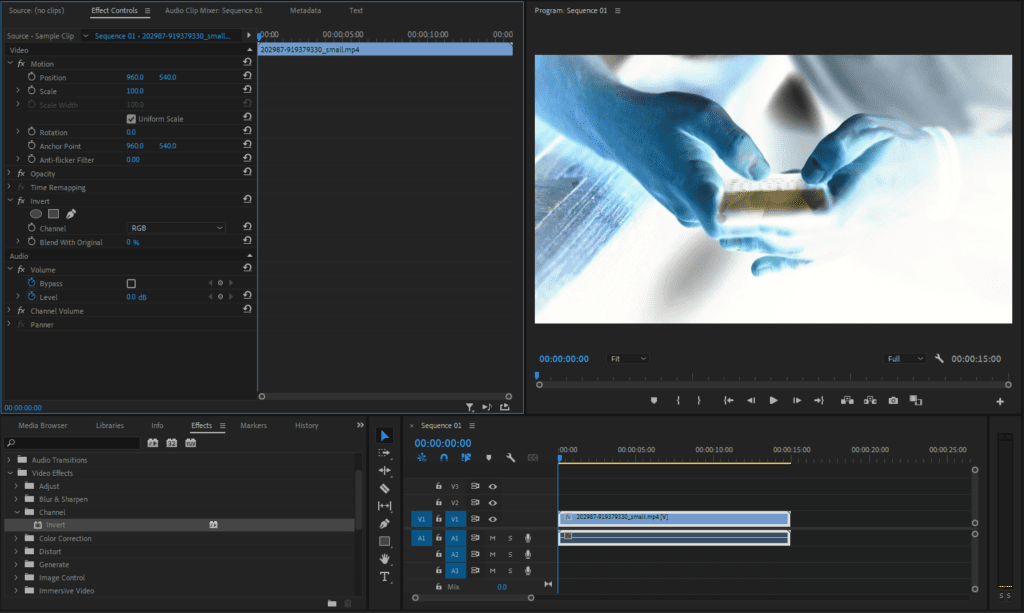
Blend With Original lets you set how intense you want the inversion to be. Setting this to 0 will completely invert your colors while setting it higher will blend the inversion with the original colors for a more balanced look.
Here’s a an example with Blend With Original set to 0%:
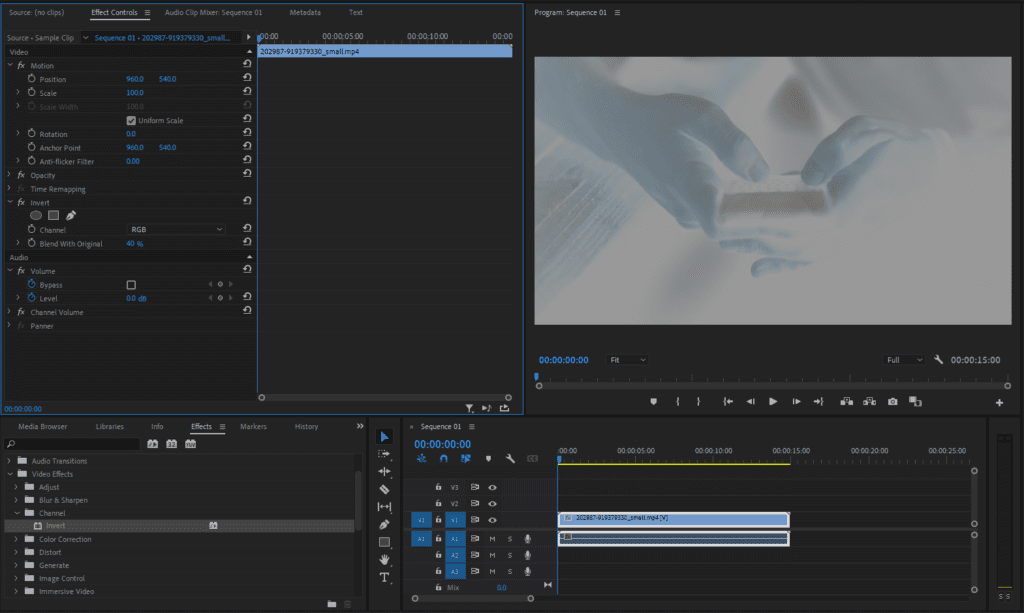
And an example where it’s set to 40%:
4. Change the Channel
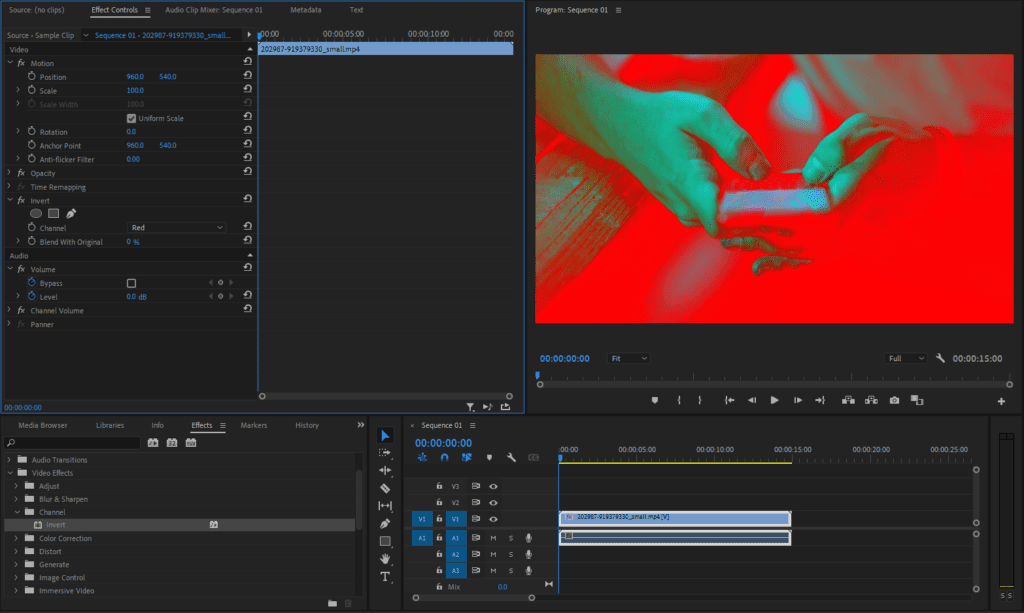
The Channel option lets you choose which colors to selectively invert. For example, if you want to invert only the reds in your clip, press the drop-down menu next to Channel and select Red. You can play around with different settings to get the best result.
Here’s an example where only the red channel is inverted:
5. Play with the shape (optional)
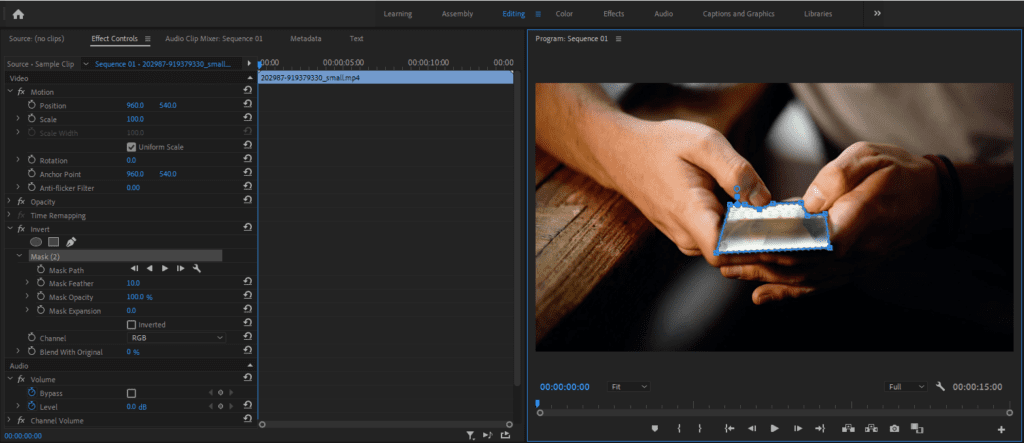
You can use masks to define the shape of your invert effect so that it only applies to a part of your clip. Under Effect Controls, select the Ellipse, Rectangle, or Pen tool and draw a shape around the object that you want to invert. If you’d rather invert the entire scene, you can skip this step.
Here’s what it looks like to mask a small section of the clip (the phone) so that only that area gets inverted:
Editing advice for inverting colors
Color inversion can be a powerful yet shocking effect, so it’s important to use it at the right time and place. Here are some ways you can get the most out of the invert effect:
- Subtlety is key. Use the invert effect sparingly to make the biggest impact. Overuse can become visually overwhelming.
- Combine it with other effects. With so many color options available, you may want to use more than just one. You could combine the invert effect with glitch effects to create a dynamic, disorienting aesthetic. Or you could use it to make text stand out against a high-contrast background.
- Use the Levels effect. Once you’ve applied the invert effect, your video will be negative. However, it might not look good as it will be too dark and grainy. You can fix this by increasing the brightness of your clip using the Levels effect.
- Lower the opacity. By increasing the Blend with Original value, you can create interesting visual overlays without completely losing the original colors of your clip.
- Apply color correction. After you apply the invert effect, use Premiere Pro’s color correction tools to perfect the final look.
While the invert effect is relatively simple, it can be hard to get the exact look that you want. Don’t be afraid to open up a few clips and experiment with the settings until you get it just right.
How do I invert the colors of a video?
There are a few ways to invert the colors of a video. The easiest way is to use the invert effect as explained above. This will flip the colors of your video, making black appear white and vice versa.
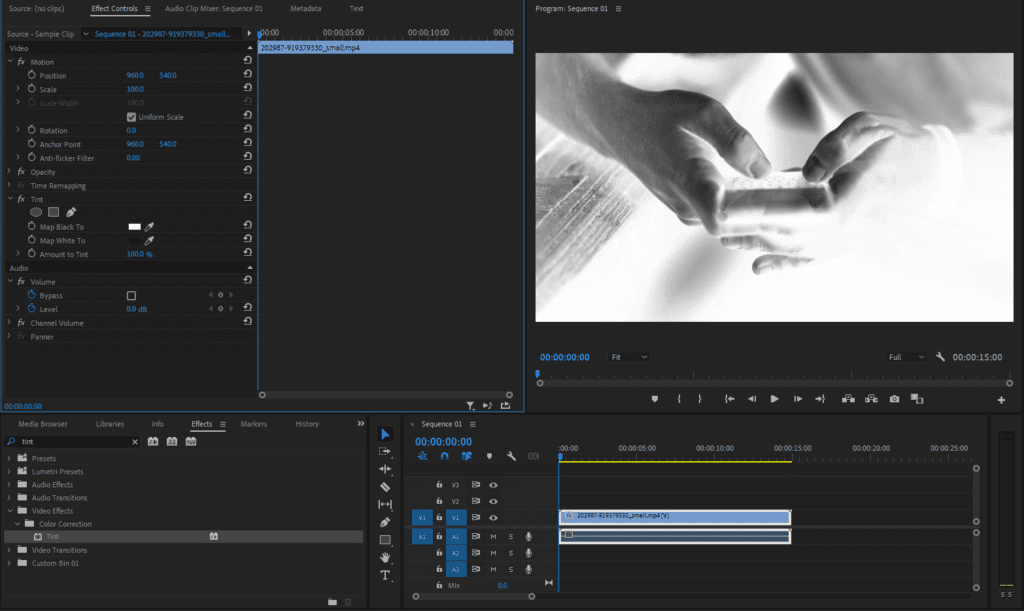
Using the Tint effect
You can also use the Tint effect to invert the colors in your video. Go to the Effects panel and drag the Tint effect onto your clip. In the Effect Controls panel, set Map Black To white and Map White To black. You can also adjust the other colors to fine-tune your results.
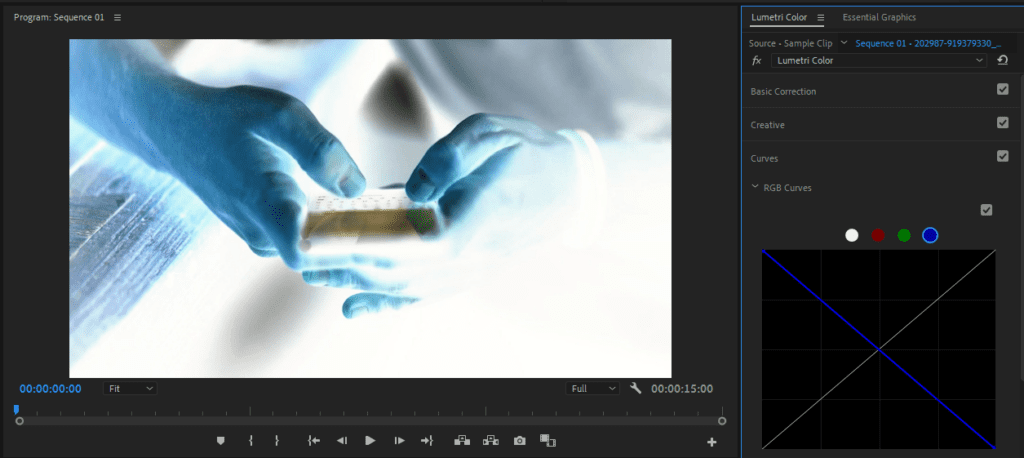
Using Lumetri Color
Finally, you can use the Lumetri Color grading tools to invert colors in more complex and nuanced ways. The best way to do this is by inverting the RGB curves. Drag each of the Red, Green, and Blue curves from the bottom-left corner to the top-left corner, and the top-right corner to the bottom-right corner. This should invert all of the colors in your clip.
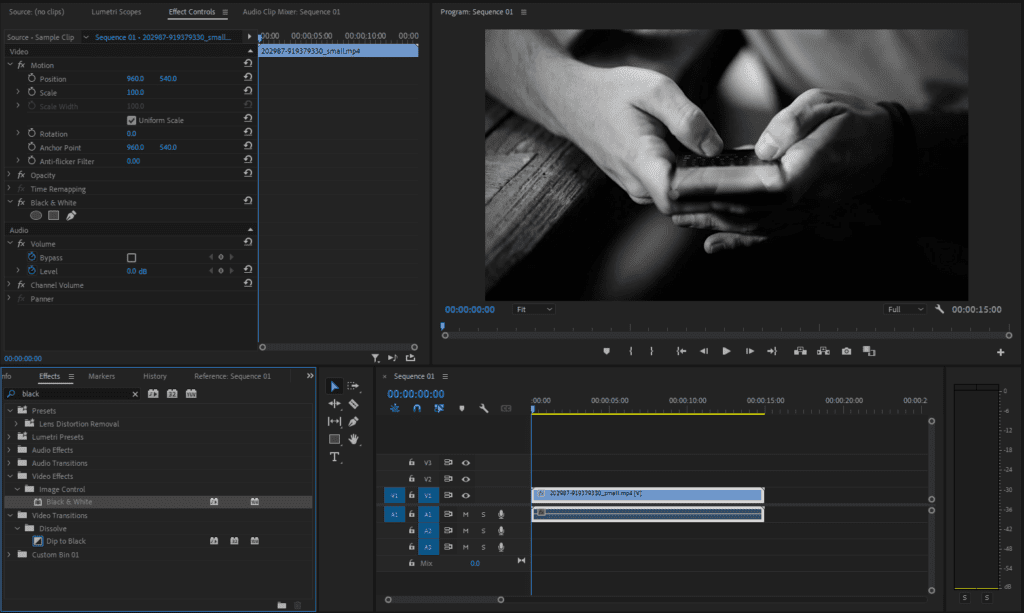
How do you make a video black and white or negative?
To make a clip black and white, all you have to do is apply the Black and White effect. Navigate to Effects > Image Control and drag the Black and White effect onto your clip in the timeline. You might have to play around with the contrast and other color correction settings to get it looking the way you want.
To make a clip negative, you just need to apply the invert effect from Effects > Video Effects > Channel > Invert. You can also use one of the other techniques that we described in the last section.
Premade Premiere Pro templates are a quick and easy way to add effects and visuals to your videos. The bonus of templates is that all the hard work is already done, saving you time that you might have otherwise spent perfecting the look of your videos.
Ways to use the invert effect for videos
There’s more than one use for the invert effect. Here are a few use cases where the invert effect comes in handy:
- Add a stylistic look to your videos. You can use negative contrast to get a film noir-style look and can create a signature visual aesthetic. To get the most out of it, you might need to pair it with another stylistic choice, like black and white or sepia tones.
- Grab your audience’s attention. Suddenly switching up the colors in a shot or scene is an unexpected change that can make viewers pay more attention. This can be especially effective in genres like horror or thriller.
- Highlight specific elements. You could highlight a character or object while keeping the rest of the scene normal. This directs the viewer’s attention to the highlighted element that might otherwise go unnoticed. Likewise, you can use the invert effect to make your text effects stand out more.
- Add a creepy or unsettling tone. Inverted effects are often seen with glitch effects in horror movies to add a dark, creepy tone.
- Illustrate a character’s perspective. Using the invert effect can show how a character perceives the world in a particular scene. For example, you could use it to show that they have a warped perception of reality or a change in mood.
And that’s not all you can do! Don’t be afraid to experiment with effects and styles until you find the perfect combination for your project.
Start downloading Premiere Pro templates today
In Premiere Pro, the invert effect is a versatile tool that flips all colors in a video clip, helping to create visual disruptions or creative transitions. The more you understand how it works and play with different options, the easier it will be to use this effect. With practice, you’ll be able to add a whole new repertoire of effects to use in your video projects.
Explore more Premiere Pro tutorials in our Resource Center and sign up for Storyblocks for unlimited stock content for all of your video projects, including 4K and HD footage, Premiere Pro templates, 100% exclusive music, and more.
Editor’s Note: This post has been updated to include additional information. It was originally published on September 19, 2022.

