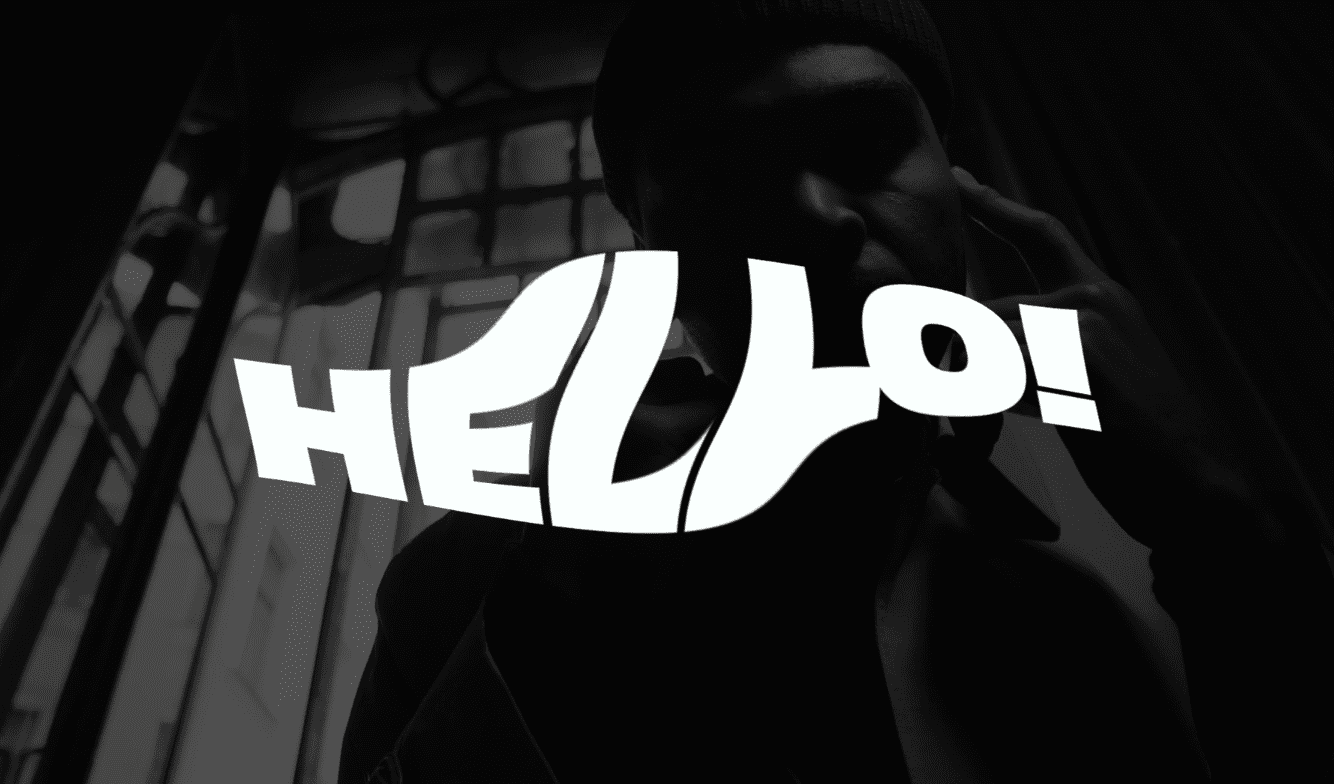
If you’re creating a video project that includes text, adding text effects with Premiere Pro can help make your project more professional and exciting. Whether you’re crafting opening titles, on-screen dialogue, subtitles, end credits, or lower thirds, Premiere Pro has an arsenal of text effects ready for you.
In this tutorial, we’ll take a look at techniques you can use to make your text pop, helping make your next project look more polished and professional.
We organized this tutorial so that you can learn the basics and continue to more advanced techniques. If you want to skip the basics, jump to the techniques of your choice:
Text Effects in Premiere Pro
- How to add text in Premiere Pro
- How to animate text in Premiere Pro
- How to fade text in Premiere Pro
- Types of text effects in Premiere Pro
- How to create rolling credits
- How to add drop shadows
- How to add neon glow to text
- How to add a blur text transition
You can also follow along and learn these text effects with our video tutorial below.
How to add Adobe Premiere Pro text effects
Adding simple text effects in Premiere Pro is easy. Here’s what to do:
1. Add your text
Use the Type Tool (T) to type your text.
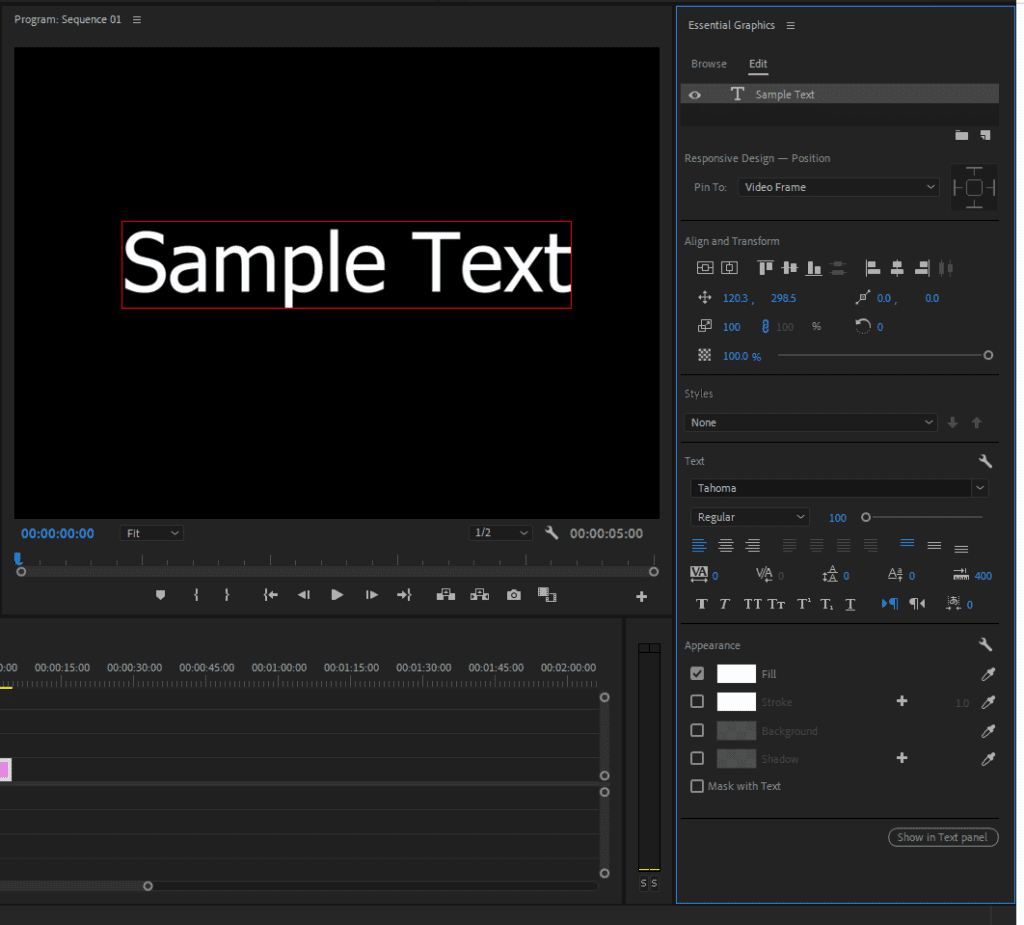
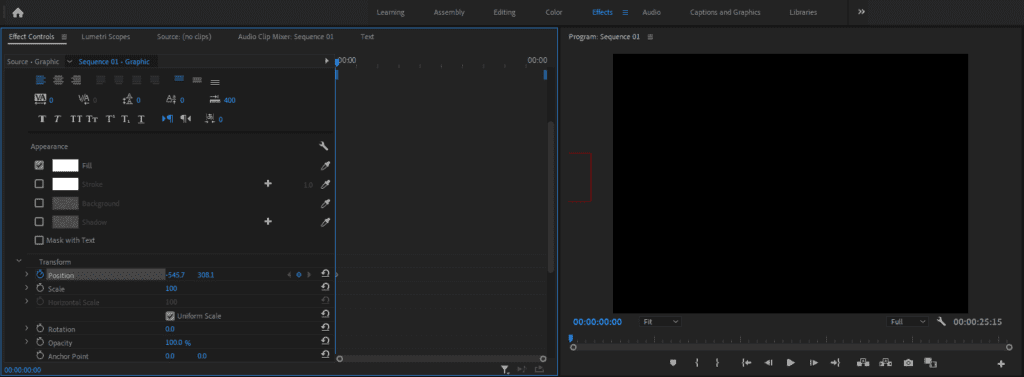
How to edit text in Premiere Pro
Within the Essential Graphics panel, you can center the text with the Align and Transform tools, change the font using the Text tool, and adjust the color or add a drop shadow with the Appearance tool.
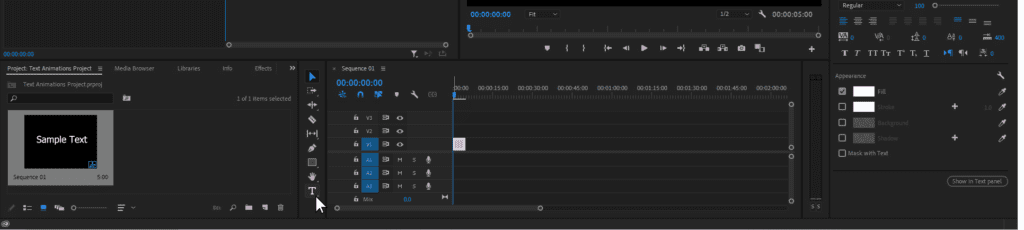
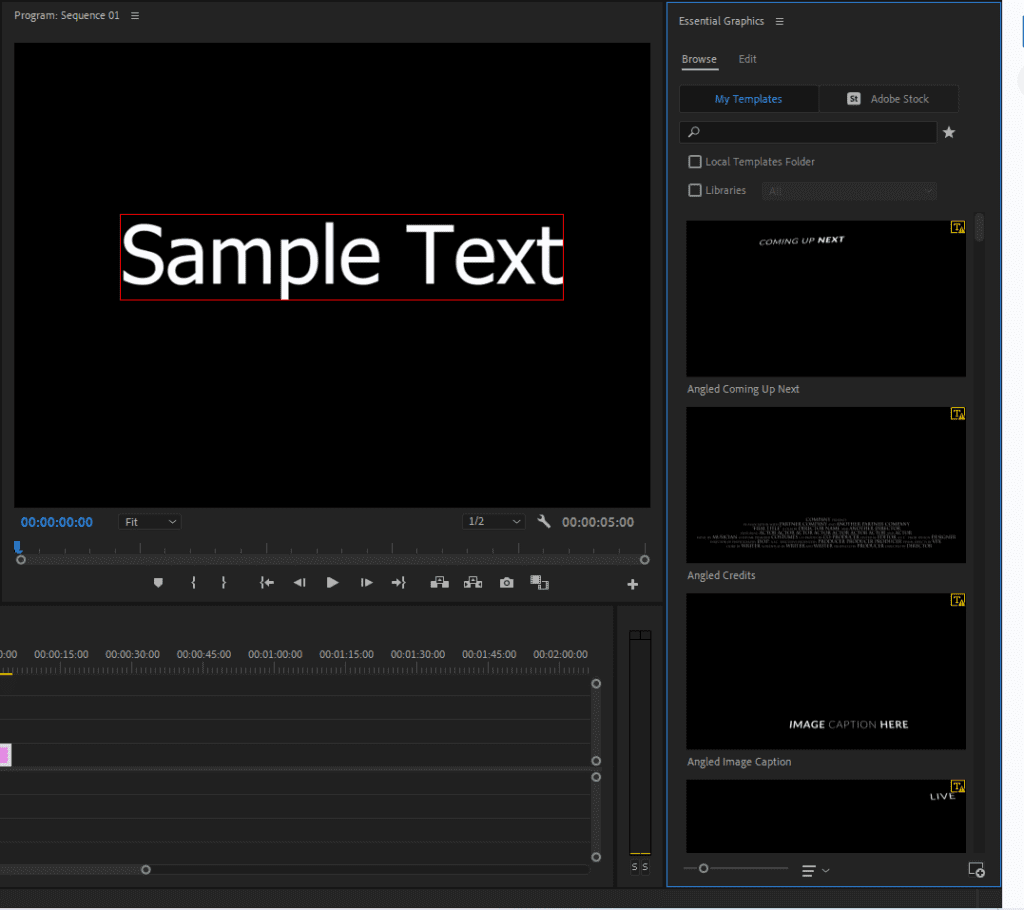
2. Use an animated template
Adobe Premiere Pro comes with some pre-animated text templates within the Essential Graphics panel. Navigate to Graphics > Essential Graphics > Browse to browse through the templates. Once you find one you like, drag it to the timeline where you want it to appear.
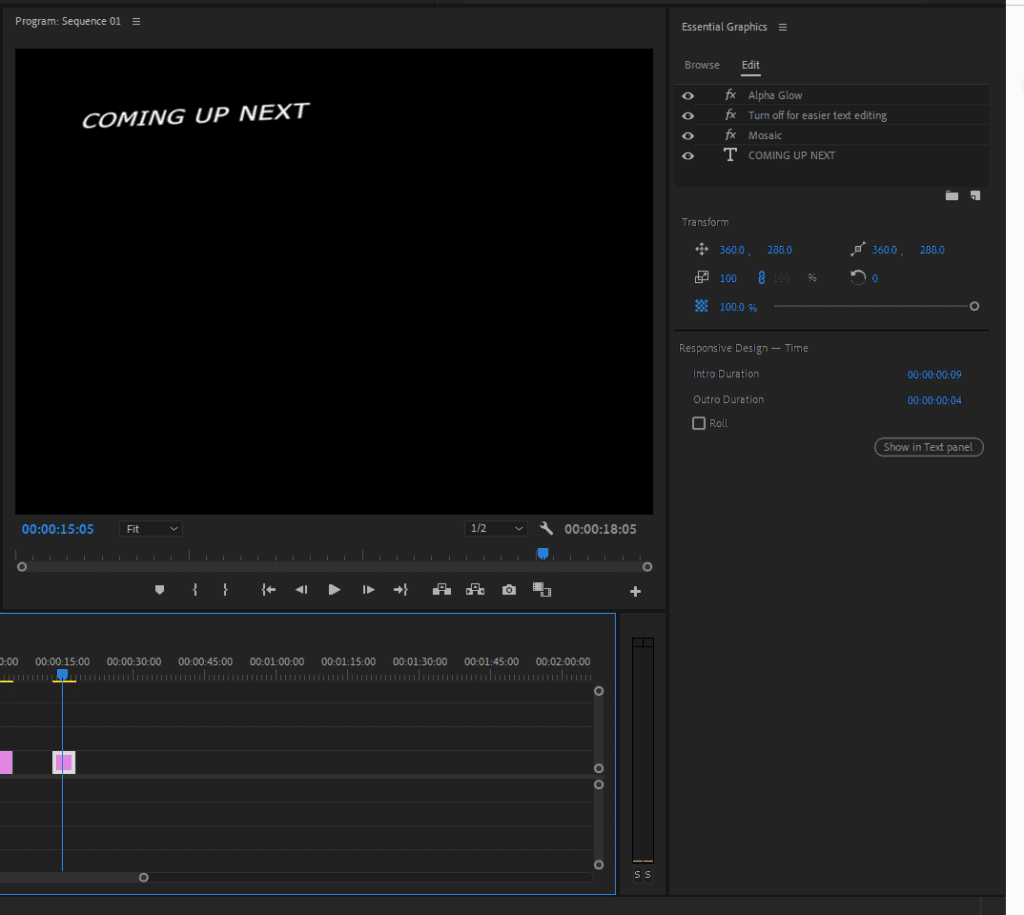
3. Edit the text template
Play back the text animation to see how it looks. Select your text in the timeline, then take a look at the Essential Graphics panel. You can edit the text under the Edit option and use the Transform options to adjust its location, size, and orientation. Depending on the template, you might also be able to adjust its Responsive Design, including the timing of certain effects.
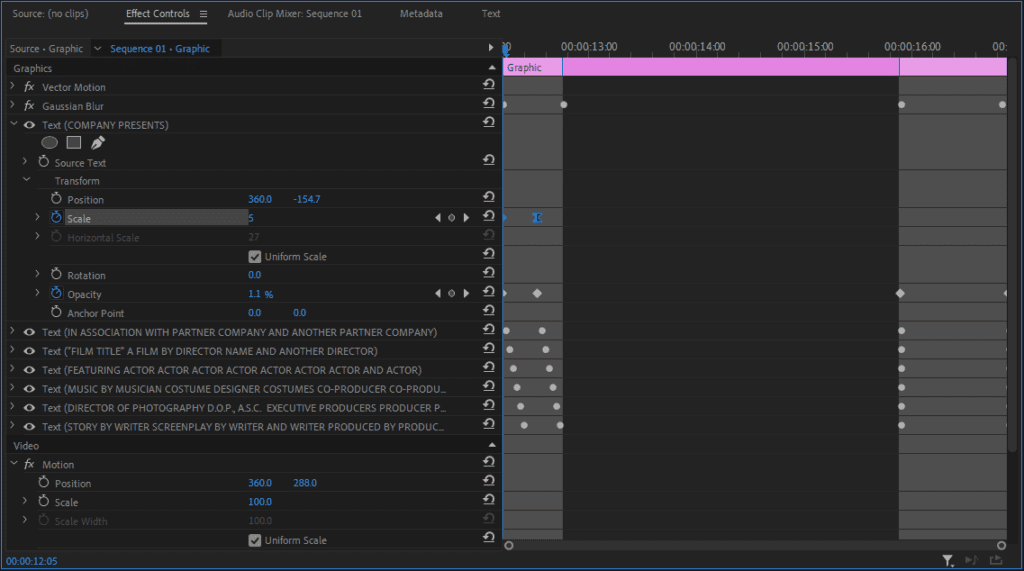
4. Select the text and adjust the keyframes
Open the keyframe box in the Effects Control panel, then select the text layer in your timeline. The keyframe box should now show you the keyframes applied to the text effect. By adjusting the keyframes, you can change how each effect acts in the template.
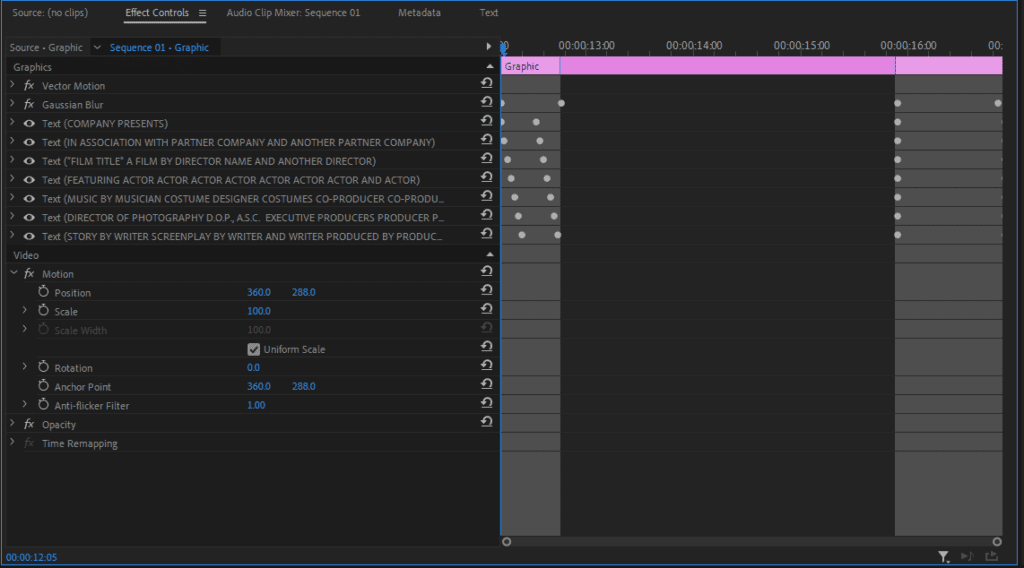
First, find the keyframe you want to adjust. In the example below, the Angled Credits template uses a stack of keyframed effects to zoom, blur, and fade the credits in and out. You can change the speed of each effect, add more effects, or delete particular keyframes to remove that effect altogether.
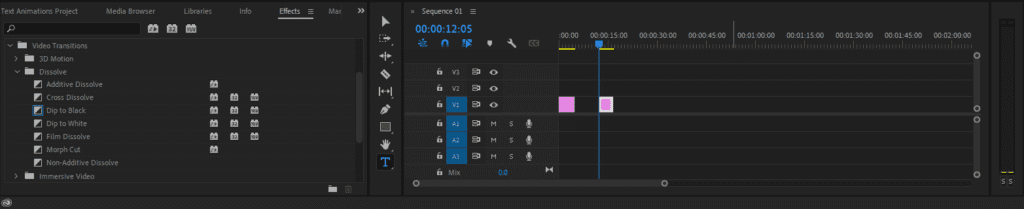
5. Add text transitions (optional)
You can also add Premiere Pro text transitions to make your text appear or disappear in a less jarring way. To add your own transitions, you can use the keyframes as shown above to create specific effects like zooming, fading, or flying off-screen.
You can also add simple transitions by using the Video transitions found in the Effects panel. Just click and drag your desired effect onto the start and end of the clip in your Timeline. For example, adding a Cross Dissolve transition to your text clips will make them dissolve into the next piece of text.
How to animate text in Premiere Pro
Simple text gets the job done, but adding animations to your text can vastly improve your videos. Premiere Pro lets you add basic animations and transitions to catch your audience’s attention and help you get your point across. But if you’re looking to create advanced animations, After Effects can help you create more powerful text animations.
Here are some key animation text effects to try:
Scale text animation effect
The Scale property, found in the Effect Controls panel, helps you adjust the size of your text. Here’s how to use it:
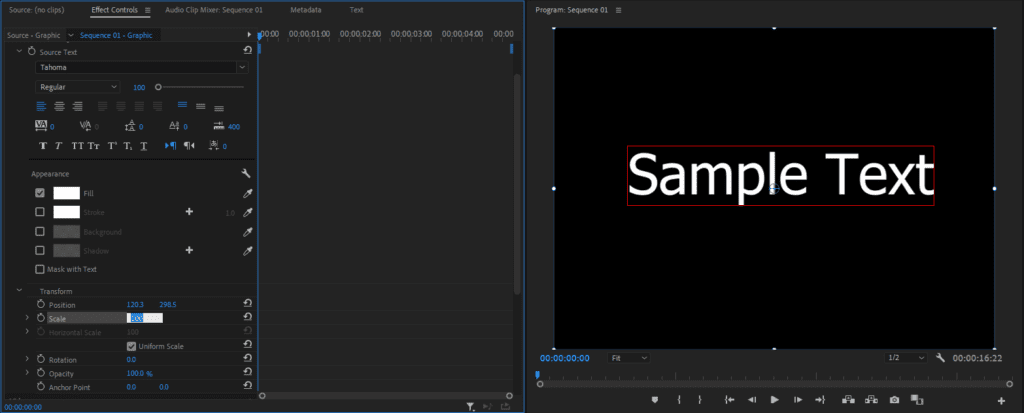
1. Select your text and adjust the Scale setting
Select your text within the timeline, then navigate to the Effects Control panel. Press the drop-down icon next to your text effect to see its settings. Finally, click and drag the value next to Scale to increase or decrease the size of your text. Drag to the right to increase the size and to the left to decrease it. Alternatively, you can double-click the Scale value and type in your desired size.
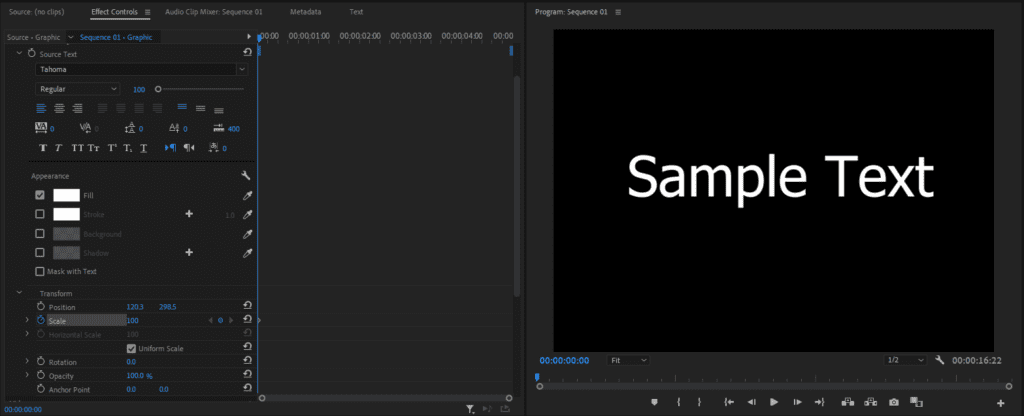
2. Set your first keyframe
To create an animation where your text increases or decreases in size, you need to set two keyframes—one where you want the animation to begin, and one where you want it to end. If you want your text to increase in size, set your first keyframe to a smaller value and the second keyframe to a larger value.
To set your first keyframe, navigate to the keyframes window and drag the playhead to the start of the clip. Then press the Stopwatch icon that’s next to Scale.
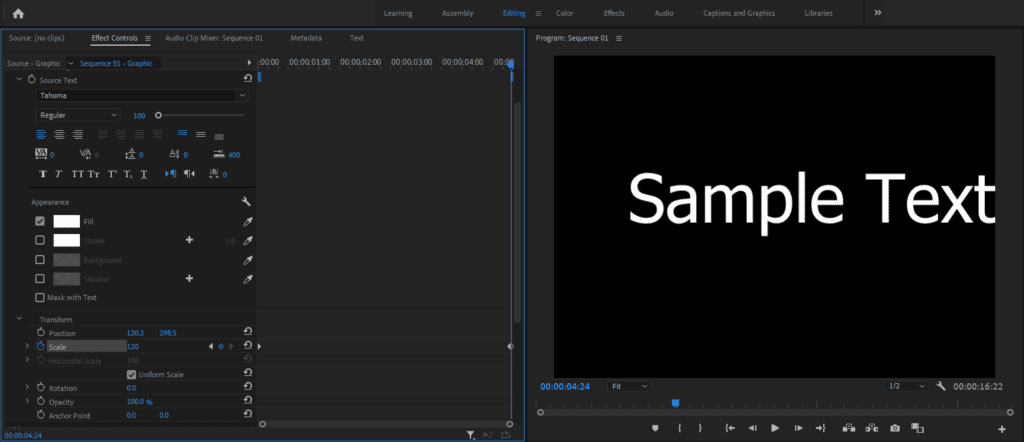
3. Set your final keyframe
Move the playhead to the end of your clip, then set a different Scale value to create the second keyframe.
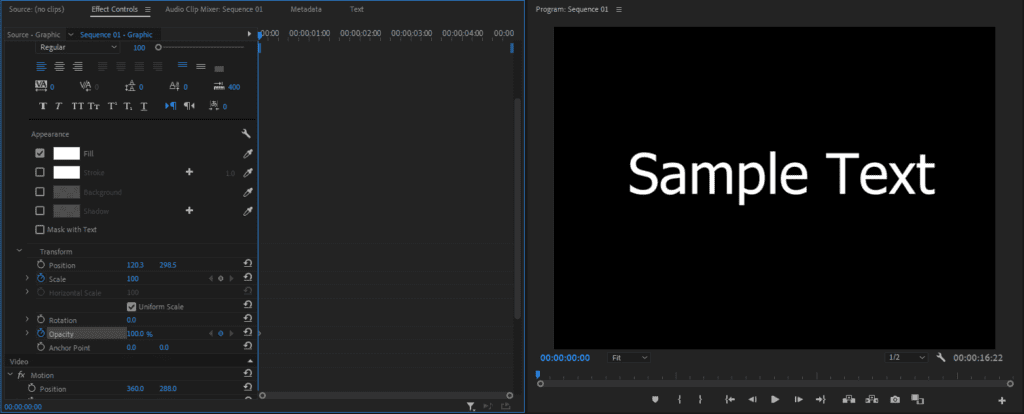
4. Adjust the size of your text
Play around with the Scale value for each keyframe to set the text size you want. Then play back your animation to see how the text grows or shrinks, and change the values until it’s looking the way you want it to. Once you’re done, you should have an impressive animation that changes the size of your text.

Fade text animation effect
If you don’t want your text to just suddenly appear or disappear, a simple fade effect can give you more control. Here’s how to add a fade animation to your text:
1. Navigate to the Effect Controls panel and select your text
Open the Effect Controls panel, select your text in the timeline, then press the drop-down button next to the text effect to expand its settings.
2. Set your first keyframe
Move the playhead to the start of the clip, then press the Stopwatch icon next to Opacity. Set Opacity to 100% if you want it to fade out, or 0% if you want it to fade in.
3. Set your final keyframe
Slide the playhead to the end of the clip, then press the Stopwatch icon again. Set Opacity to 0% if you want it to fade out, or 100% if you want it to fade in.
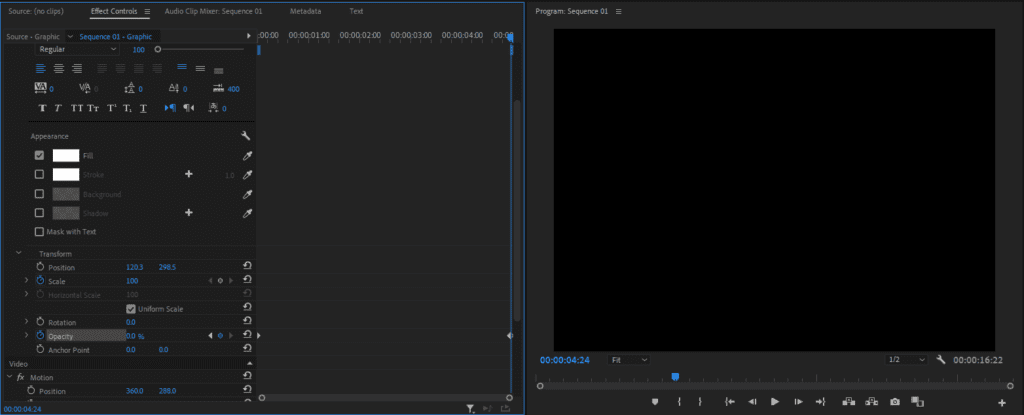
4. Adjust the speed of the fade effect
Move the keyframes closer together to change how quickly the text fades in or out.

You can combine any of these elements, plus others, to create a dynamic text animation. However, be sure you don’t add too many elements that make it difficult to read or follow your text.
What are the types of text effects in Premiere Pro?
There are countless ways to add visually interesting text effects in Premiere Pro—the only limitation is your creativity. Here are some of the more advanced text effects and the steps to create them:
Make a video appear inside the text
An interesting text effect is to have a video appear within the letters of your text. Think back to the Marvel Studios animation at the beginning of every Marvel movie when you can see the movie scenes within the letters. To create a similar effect, check out our tutorial on how to place video within your text.
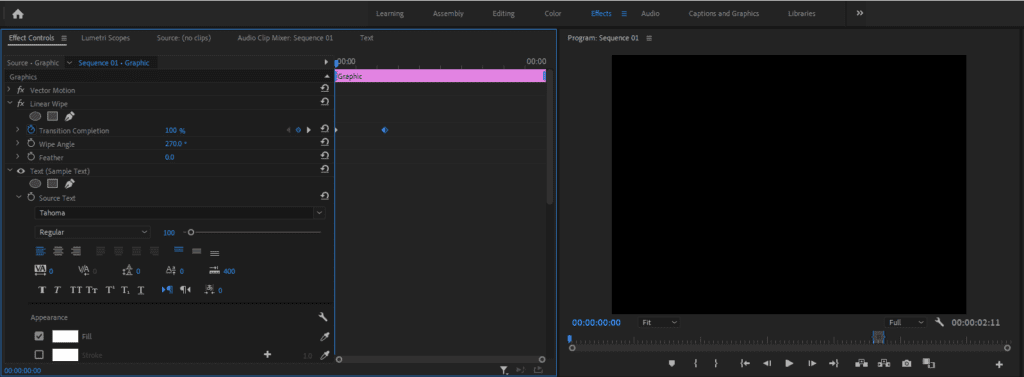
Animate typing text
The typewriter effect in Premiere Pro is where your written text appears letter by letter. It’s created in a similar way to a text reveal, which hides your text under an object and gradually appears as the video plays back.
Here’s an easy way to add the typewriter effect to your text:
1. Create your text
Select the Text (T) icon and click inside the Program Monitor to add text over video. Using the Essential Graphics panel, move the text to where you’d like it to appear.
2. Add the Linear Wipe effect
Open the Effects panel and drag the Linear Wipe effect onto your text layer. Change the Wipe Angle setting to 270 degrees.

3. Set the Linear Wipe keyframes
Move the playhead to the start of the clip, then set Transition Completion to 100%. Then, skip forward a few frames and set the Transition Completion to 0%. Play the effect back to see how it looks.

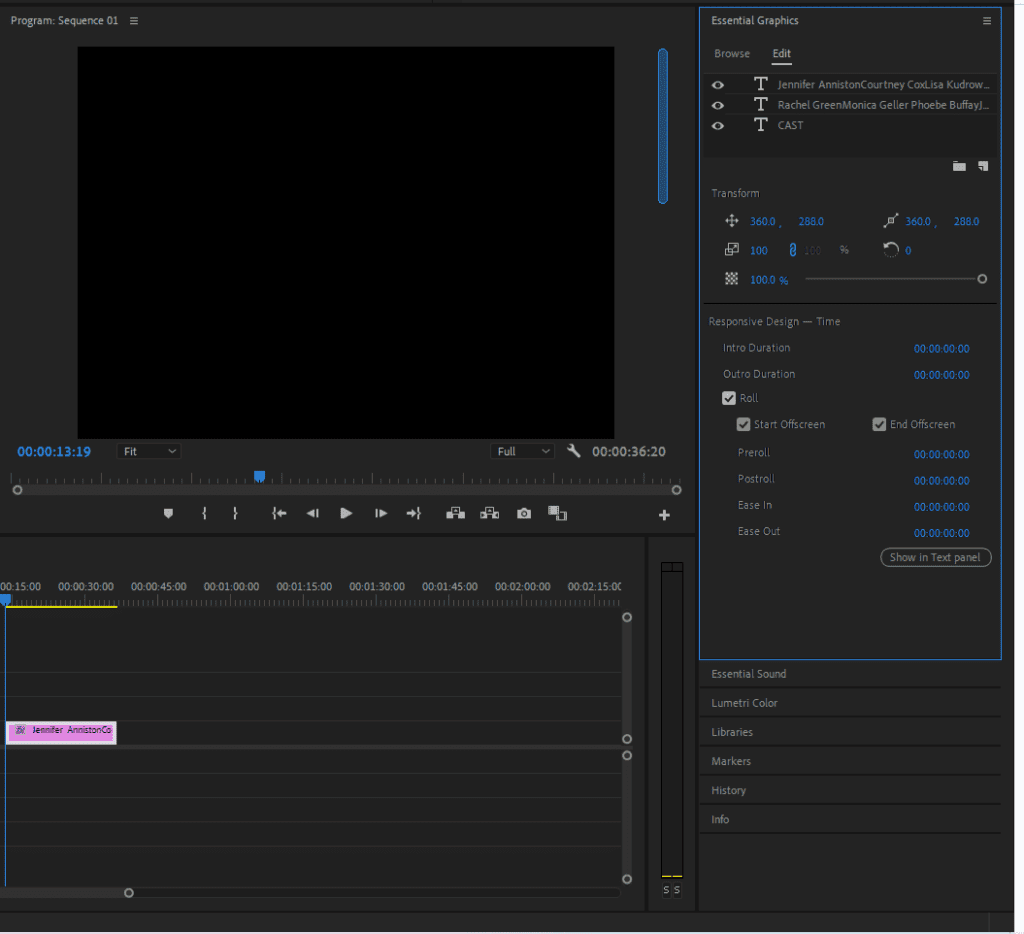
How to create rolling credits
1. Create your text layer
Add your credits and align them to the center using the Align and Transform controls in the Essential Graphics panel.
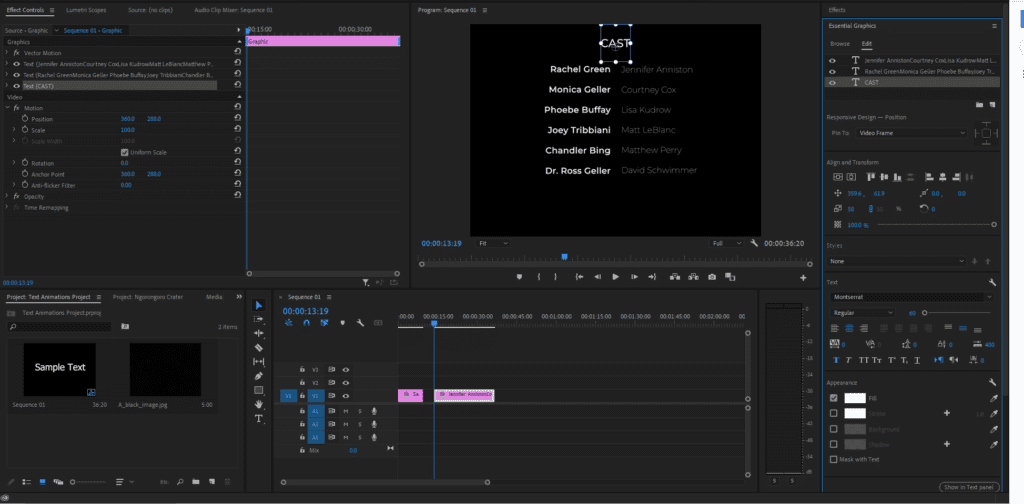
2. Add the rolling effect
In the Essential Graphics panel, check the box next to Roll. You can find this at the bottom of the panel in the Responsive Design section.
3. Change the timing
Finally, you can speed up or slow down your rolling credits by reducing or extending the text layer within your Timeline. Once you’re happy with how it looks, you should have a rolling credits text animation worthy of any movie.

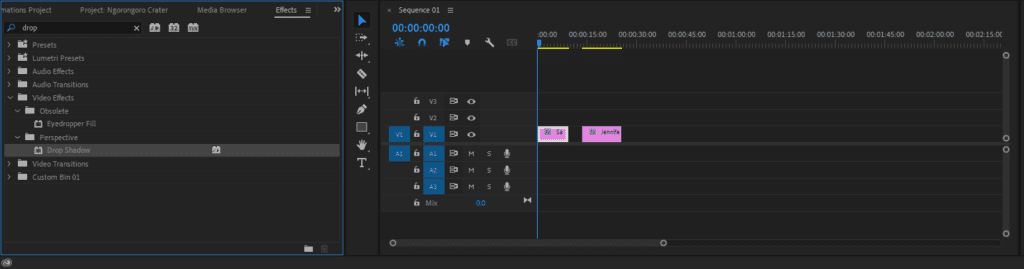
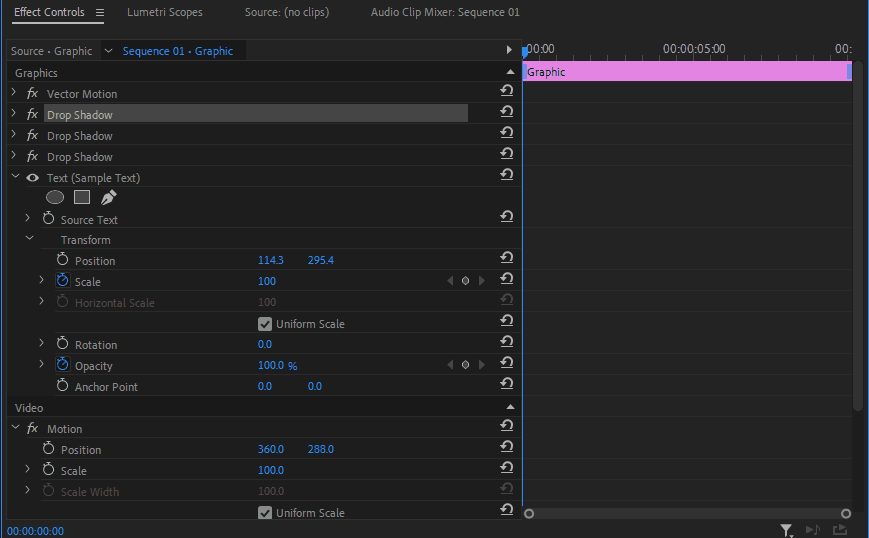
How to add drop shadows
1. Create your text layer
First, use the Text (T) tool to add a text layer to your timeline by clicking in the Preview window.
2. Add a drop shadow effect
Next, navigate to the Effects window and search for the Drop Shadow effect. Click and drag this onto your text layer.
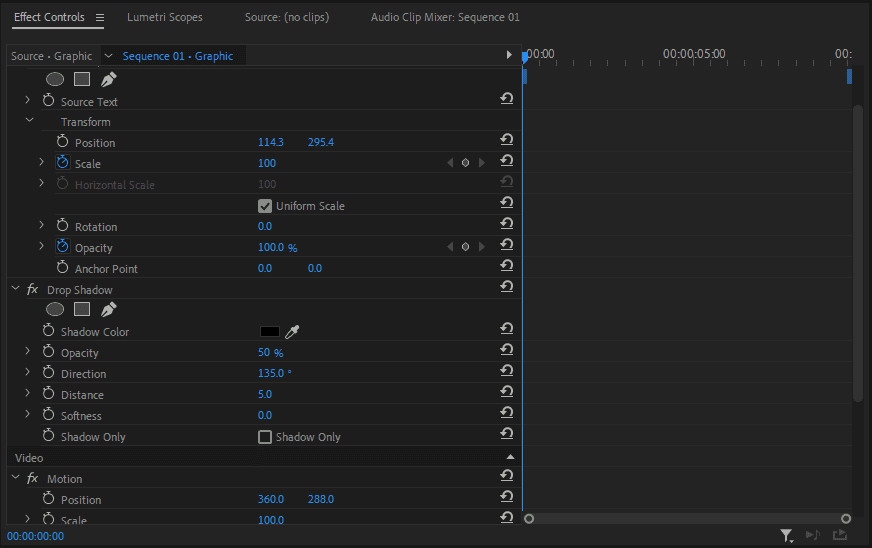
3. Adjust your drop shadow settings
Finally, in the Effect Controls window, use the settings to change the opacity, direction, distance, color, and softness of your shadows.
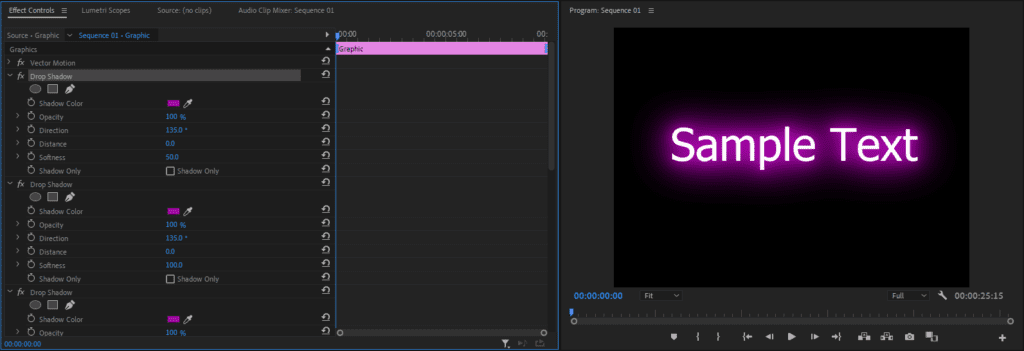
How to add neon glow to text
1. Add your text
First, select the Text (T) tool to add a text layer to your footage. Using a thin, modern font can enhance the glow effect.
2. Add a drop shadow effect
Navigate to the Effects window, then click and drag the Drop Shadow effect onto your text layer.
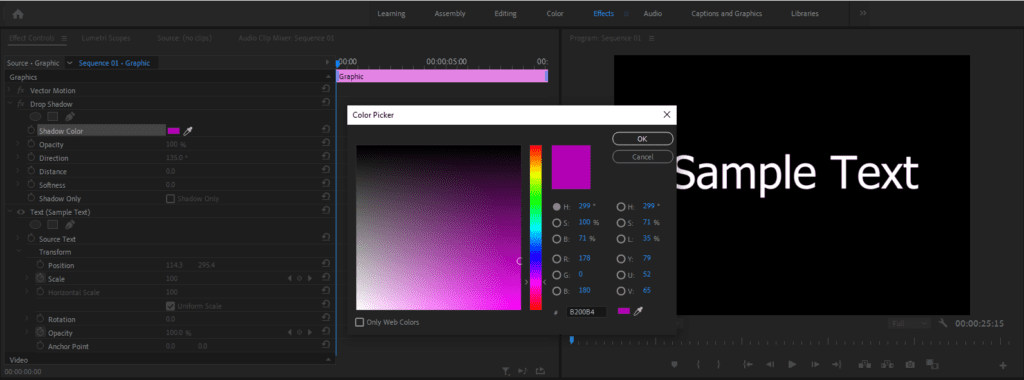
3. Change the color of your drop shadow
In the Effect Controls window, under Drop Shadow, select the color box next to Shadow Color and select the color you want your neon glow to be. Hit OK.
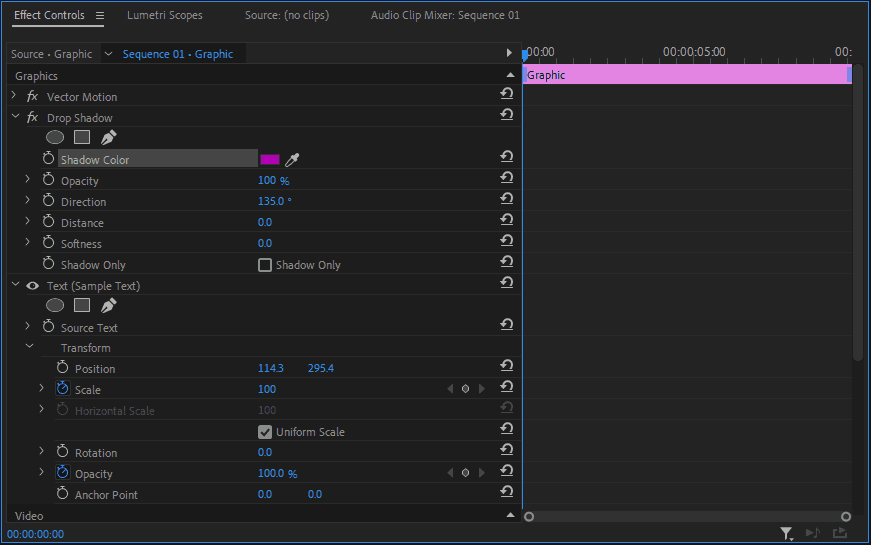
4. Change the opacity and distance settings
While in the Effect Controls window, increase the Opacity to 100% and decrease the Distance to 0.
5. Duplicate the Drop Shadow effect
Copy and paste the Drop Shadow effect until you have a total of three Drop Shadow effects in your Effect Controls panel.
6. Alter the Softness value for each Drop Shadow
By increasing the Softness value for each Drop Shadow, you can create a convincing neon glow. The easiest way is to double the value for each Drop Shadow in turn.
For the first Drop Shadow effect, set the Softness to 50. Set the second Drop Shadow to 100, and the third to 200. You can add more layers to increase the intensity of the neon effect.
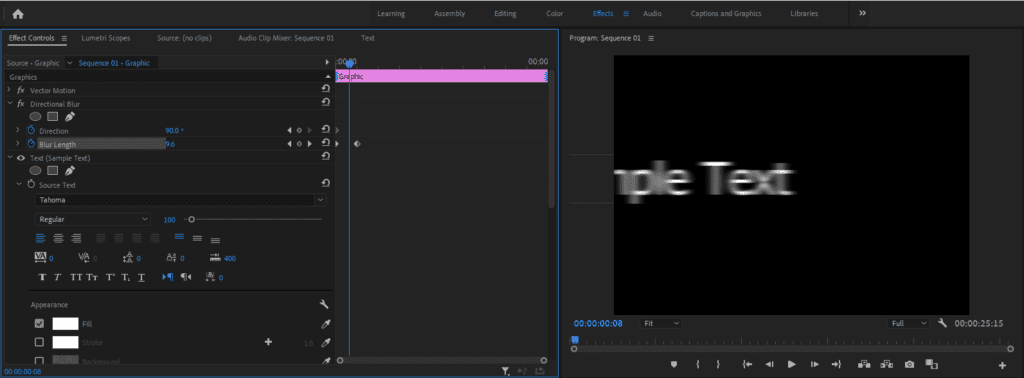
How to add a blur text transition
1. Add your text layer
First, use the Text (T) icon and Essential Graphics panel to create and align your text layer.
2. Add a starting keyframe
Next, in the Effect Controls panel, expand the Transform menu. Create a starting keyframe for Position by selecting the Stopwatch icon next to this setting. Adjust the X coordinate (the left-hand value) until your text is offscreen.
3. Add a second keyframe
Skip ahead a few frames, then use the X coordinate controls to make your text appear in the middle of the screen. This will add a second keyframe for your text layer.

4. Add the Directional Blur effect
Navigate to the Effects window and drag and drop the Directional Blur effect onto your text layer.
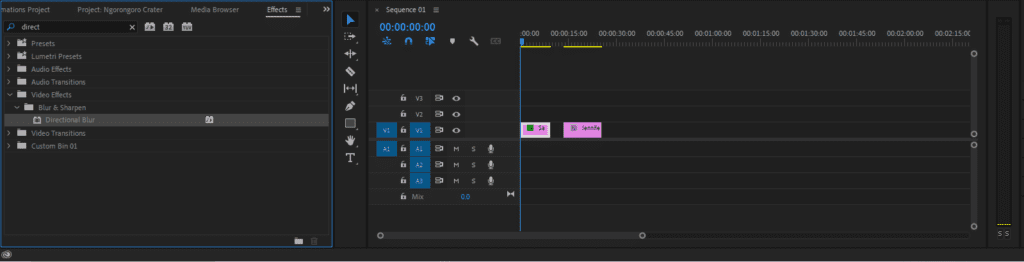
5. Fine-tune the Directional Blur effect
Finally, back in the Effect Controls panel, set the playhead to the start of the clip and change the Direction value for the Directional Blur effect to 90 degrees and the Blur Length to 25. Move the playhead to where the text is centered again, then set Blur Length to 0.

Use Storyblocks templates for easy video content creation
Using templates to add text effects to your video projects is an easy way to add a professional look to your videos. Play around with the text effects in Premiere Pro to see what unique animations or looks you can create. If you’re looking for faster ways to add text animations or effects to your projects, you can find thousands of typography Premiere Pro templates in the Storyblocks library.
With a Storyblocks subscription, you get unlimited downloads of stock content to use in your projects, including 4K and HD footage, Premiere Pro templates, music, sound effects, and more. The Storyblocks plugin also brings the full Storyblocks library right into Premiere Pro for faster project creation and editing.
Want to improve your video content? Sign up for Storyblocks today.
Editor’s note: This post has been updated with additional information. It was originally published on July 25, 2022.

