Using creative text effects in your videos will give them a polished look and feel. You don’t have to be an After Effects wizard to make it happen. There are some effects that you can create right in Adobe Premiere Pro. In this tutorial, I’ll show you how to layer text behind objects in Premiere Pro to achieve a cool depth effect. If you’re looking for footage to use, head over to Storyblocks Video for countless options from our royalty-free library.
By the end of this tutorial, you will understand two different ways of applying this technique. In the first example, we’ll reveal text behind a wall and in the second example, we’ll use a high contrast clip of a dancer in front of our text. Let’s get started.
Creating a Text Reveal Effect
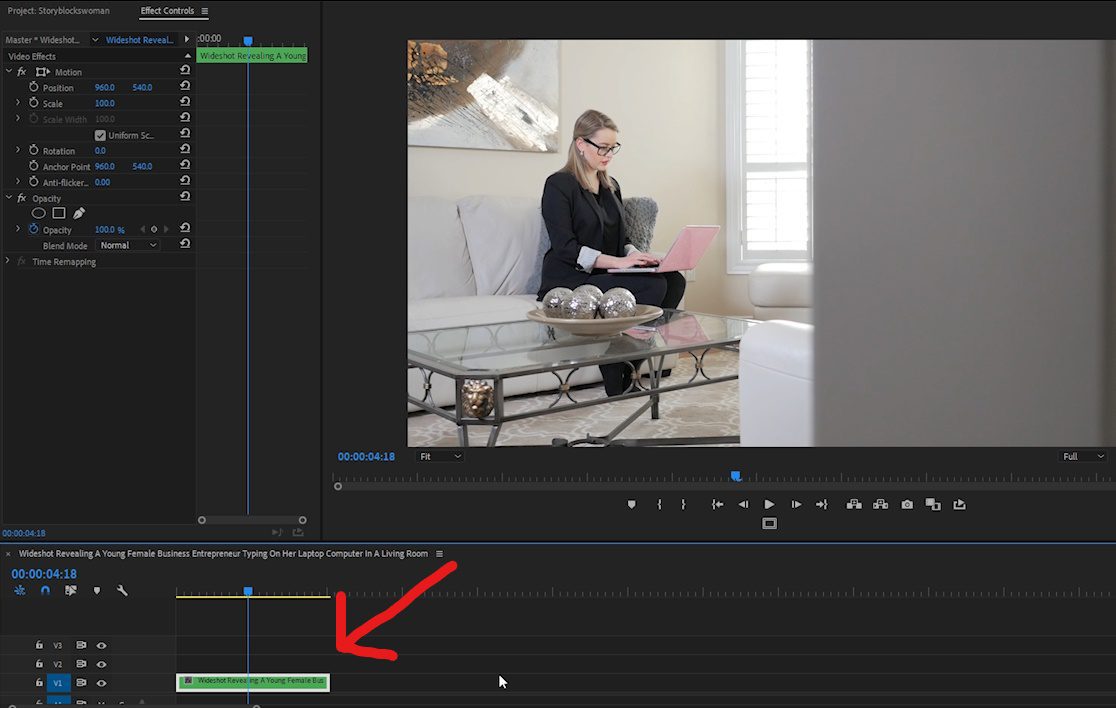
1. Import your footage into Premiere Pro and bring your first clip onto the timeline.
2. Using your Type Tool, type the word(s) you’d like to have on screen, over your clip, on the Program window.
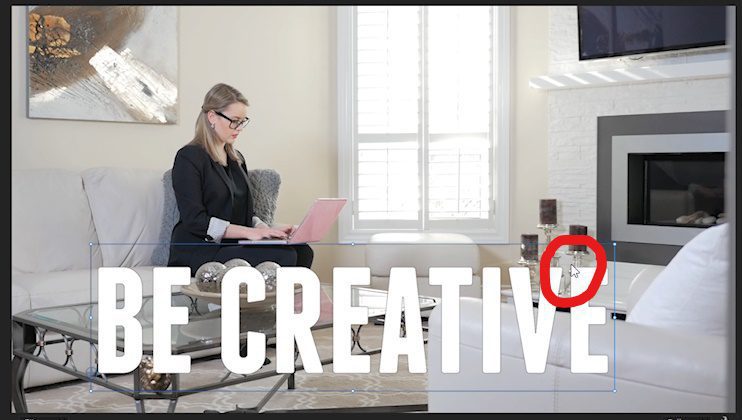
3. Use the Selection Tool to adjust the position of your text, to the bottom center area of the frame.
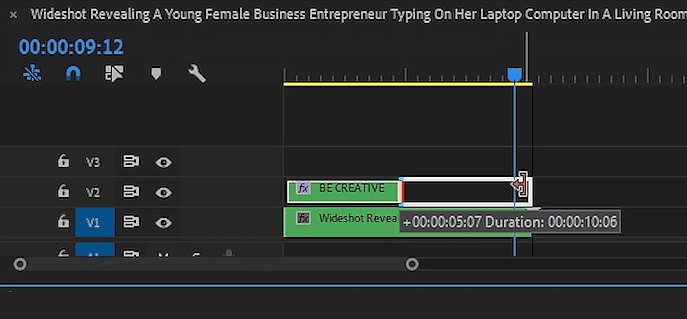
4. On your timeline, adjust the duration of the text layer to match the duration of the video clip.
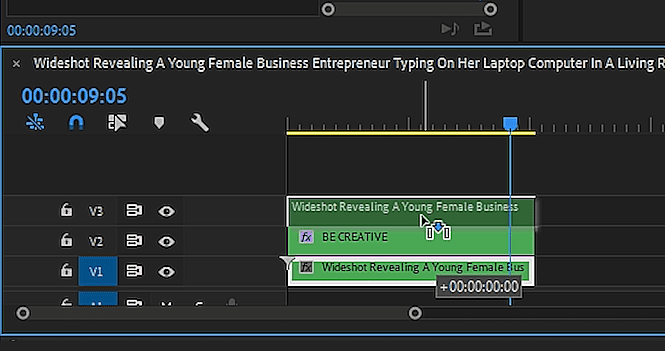
5. Select the clip and on your keyboard and hold down the Alt or Option key while dragging the video clip up to the V3 track. This will create a duplicate clip.
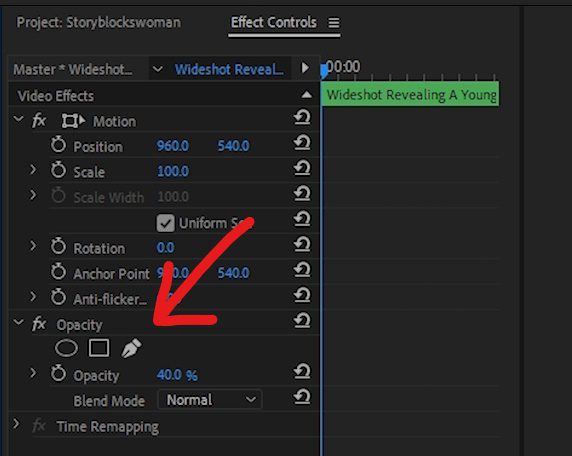
6. Next, in the Effect Controls window, under the Opacity tab, click on the Free Draw Bezier Tool—it looks like a pen.
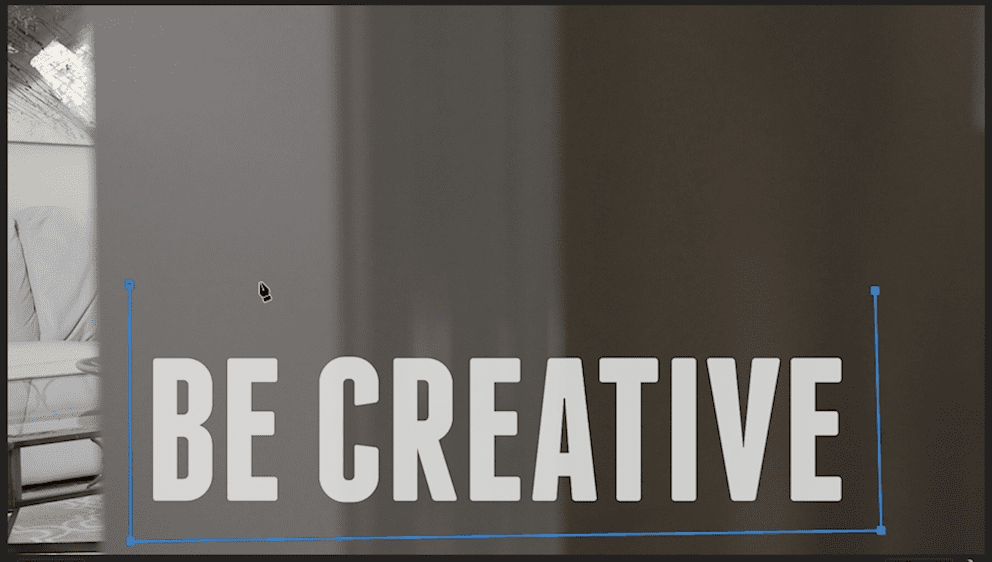
7. Bring your cursor over the Program window and draw a rectangle shape around your text.
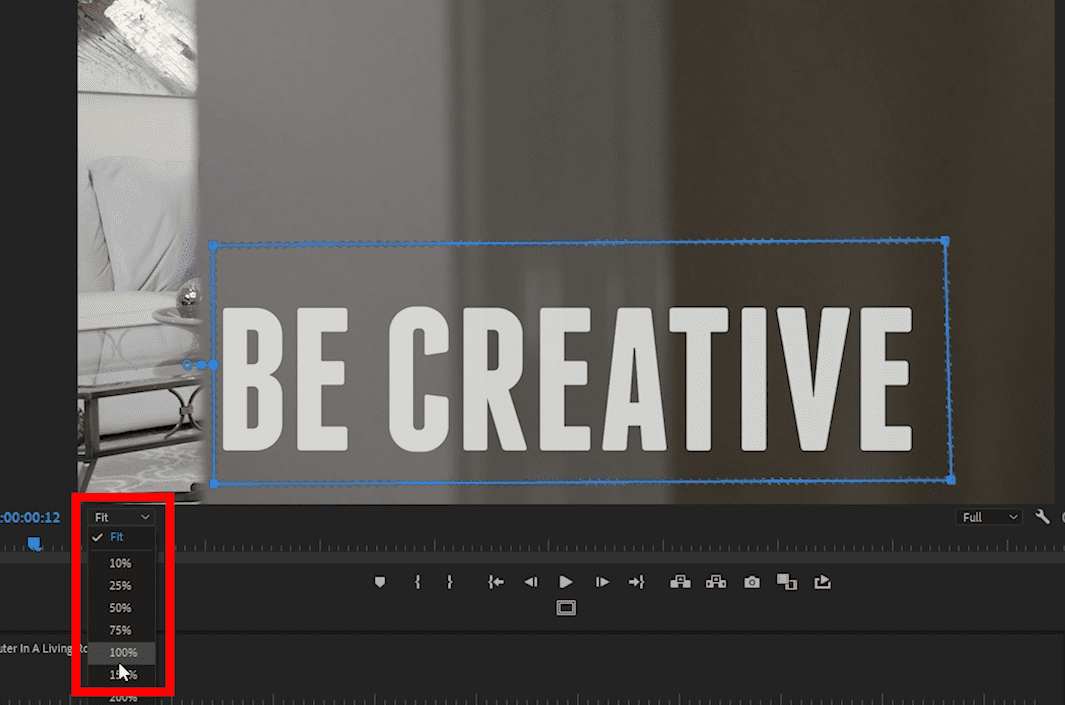
8. To get a closer look as you’re applying this effect, on the Program window, click on the dropdown menu that by default says ‘Fit’ and change it to ‘100%.’
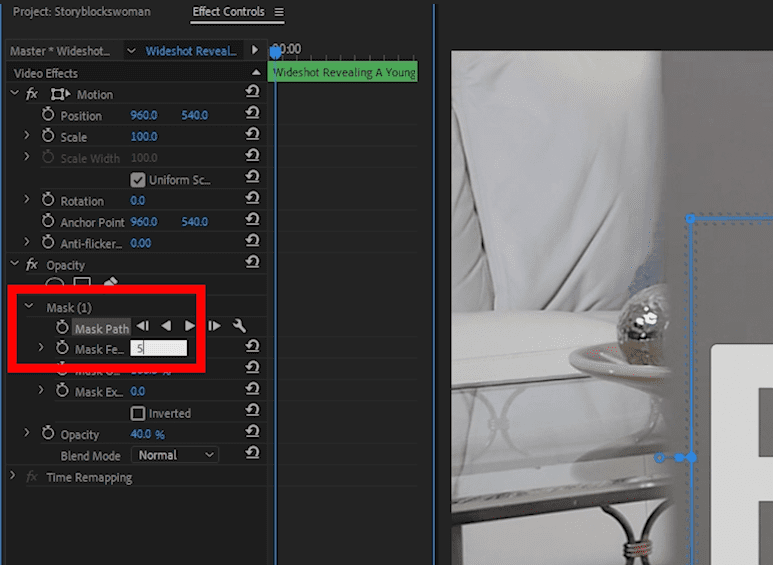
9. Adjust the Mask Feather to best match the sharpness or blurriness of the edge you’re creating a mask over.
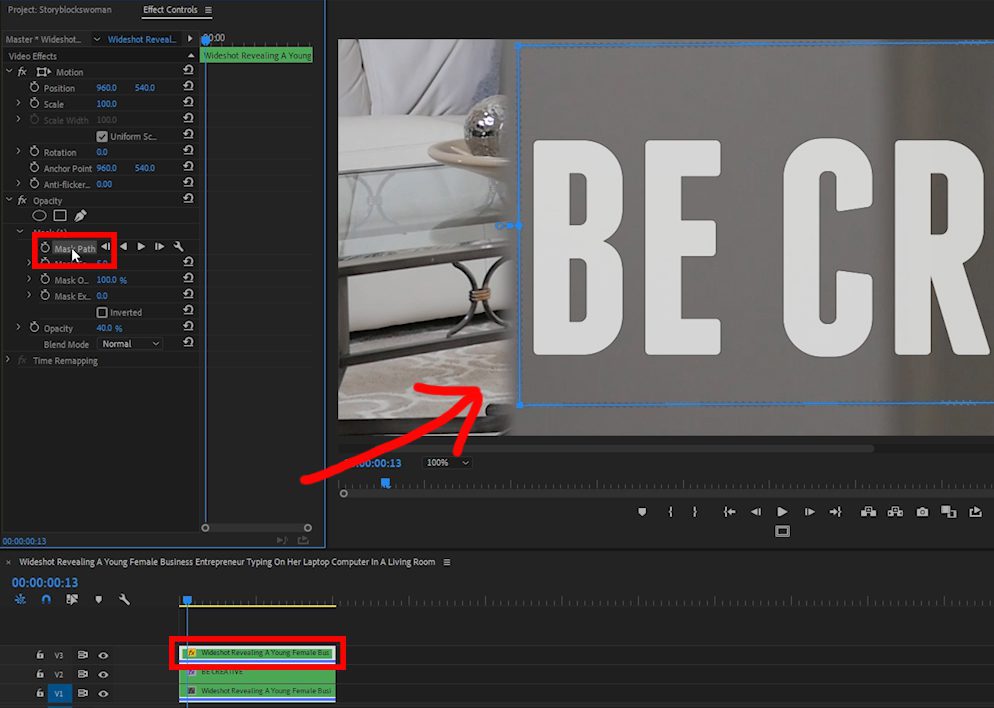
10. Making sure your duplicate clip is selected on your timeline, in the Effect Controls window, click on Mask Path which will show the mask around your text.
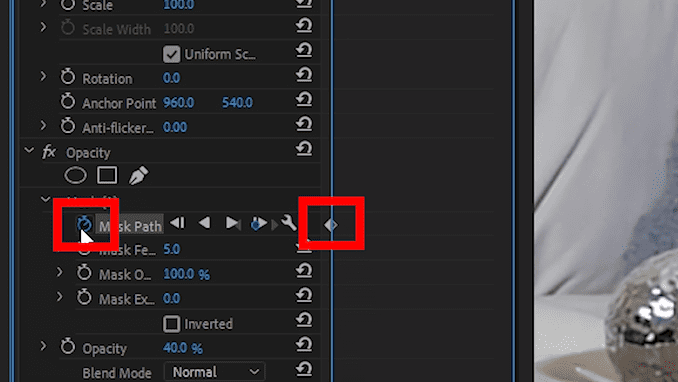
11. When you’re happy with the position of your mask around the text, click on the Mask Path keyframe toggle to apply your first keyframe.
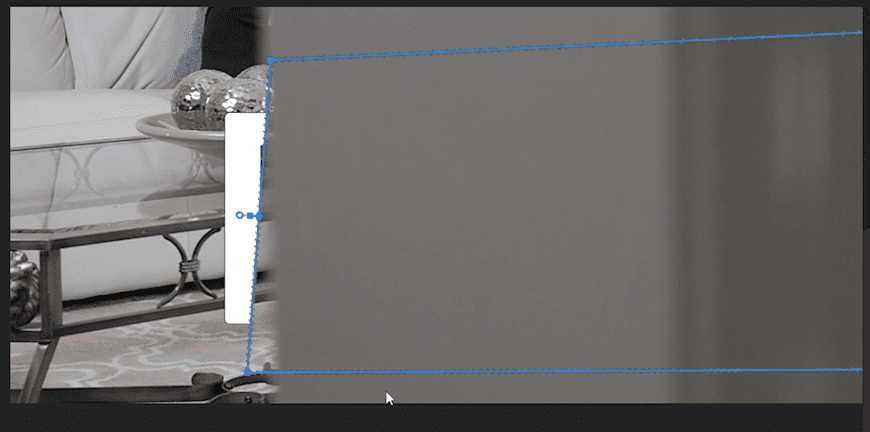
12. Tap the right arrow key on your keyboard 5 times to move 5 frames forward in your clip and adjust the mask position to line up with the edge on the clip you’re referencing. When you do this, another keyframe will automatically be applied to your mask path.
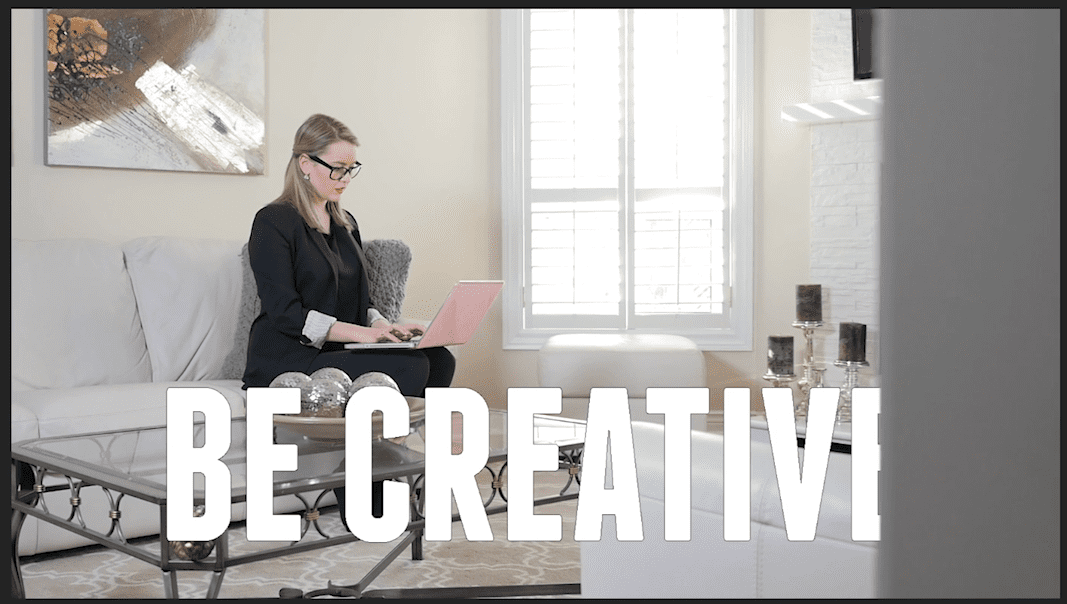
13. Continue moving ahead 5 frames in your clip and adjusting the mask accordingly until you reach the end of the clip.
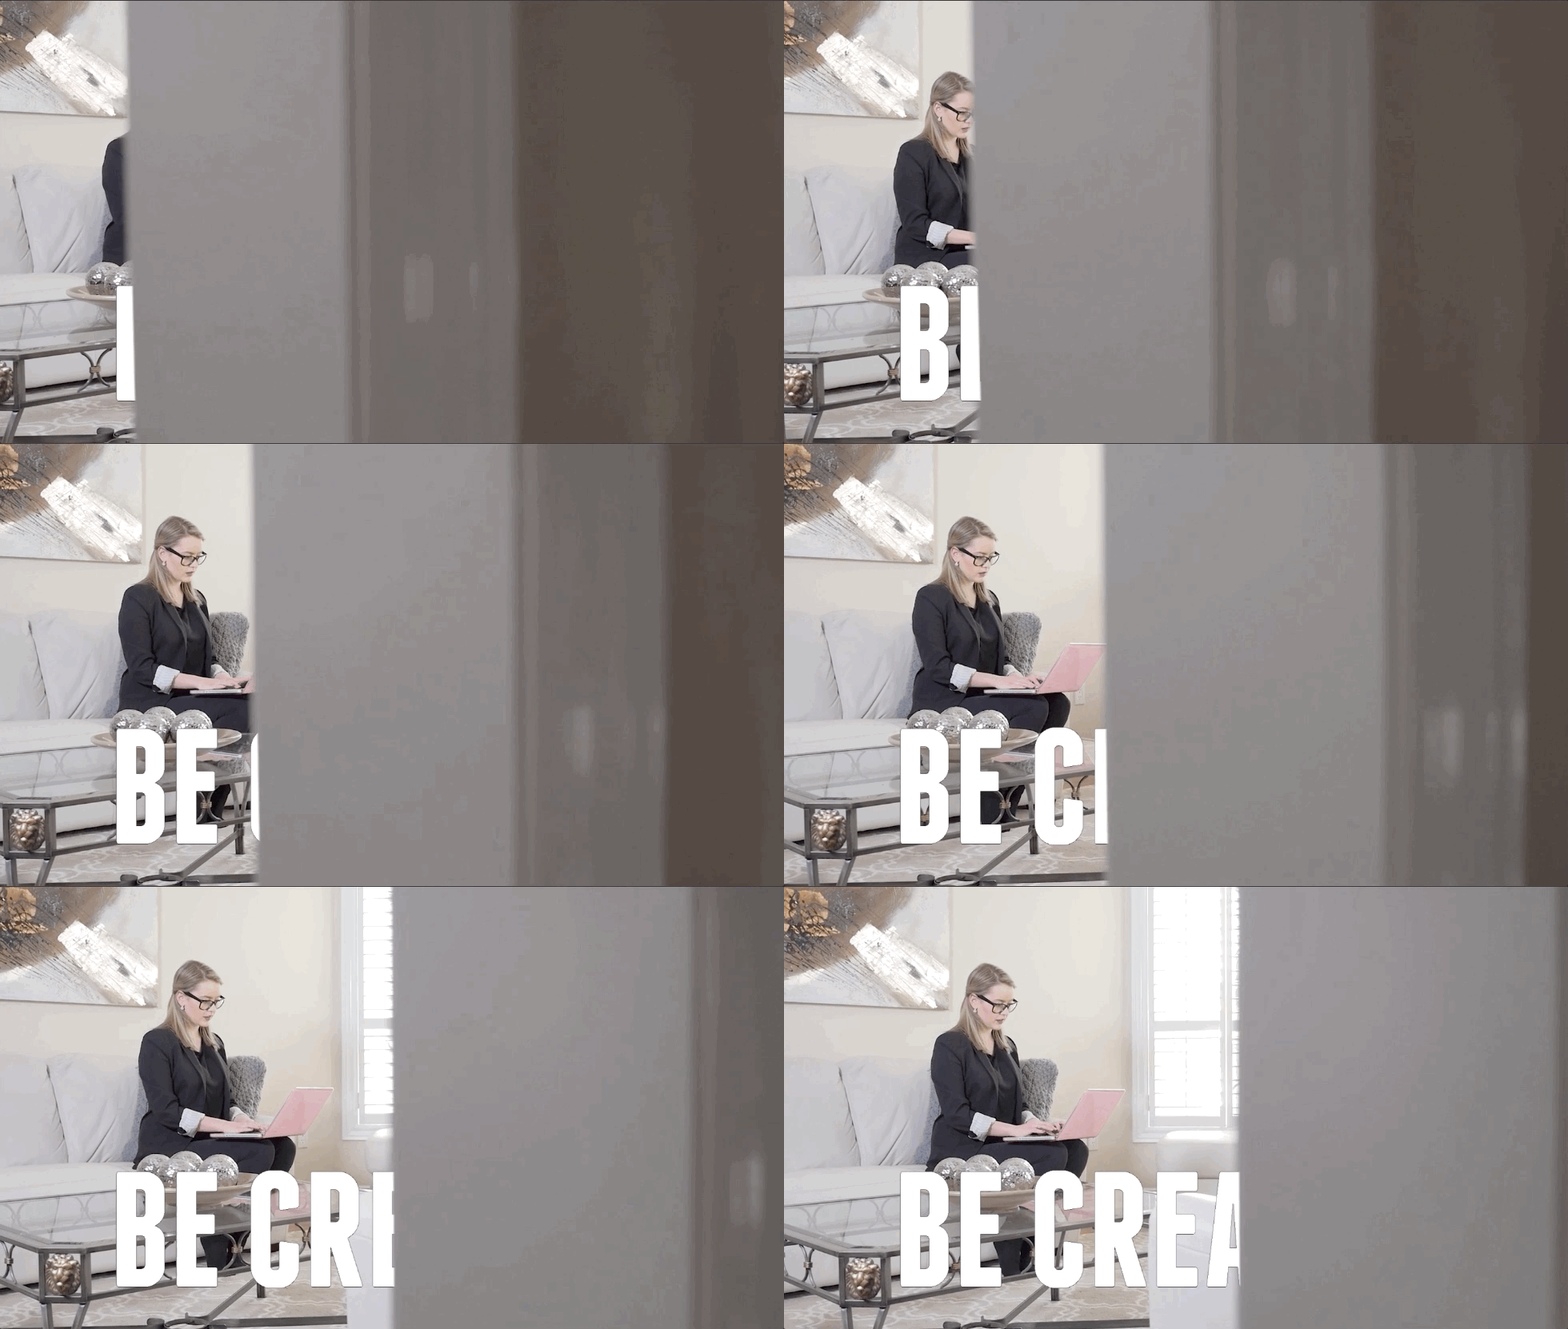
14. And you now have your text behind an object in Premiere Pro!
Layer Text in High Contrast Footage
You can also apply this type of effect to high contrast clips, but in a much faster way. Let’s check out how to do that!
1. With a high contrast clip on your timeline, use the Type Tool to write a word(s) over your clip, on the Program window.

2. Position your text in an area of your frame that has a darker object.
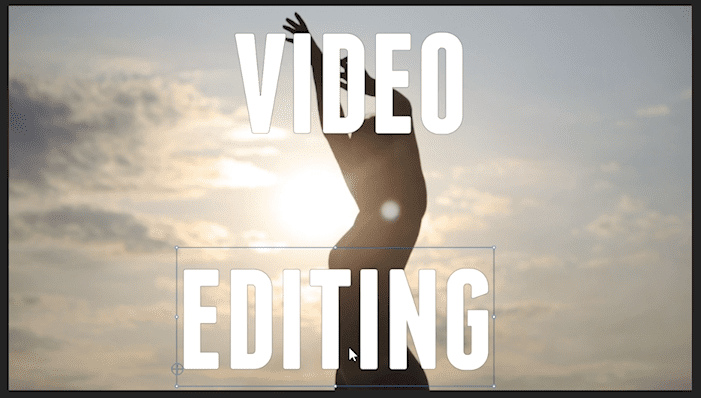
3. Like in the previous example, adjust the duration of the text layer to match the duration of your clip.
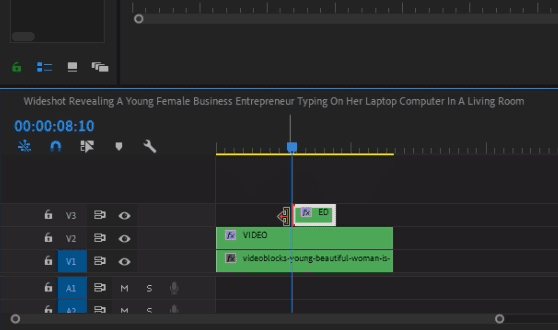
4. With the clip selected on your timeline, hold down the Alt or Option key on your keyboard and drag up onto a new video track. When you let go you’ll have created a duplicate of that clip.
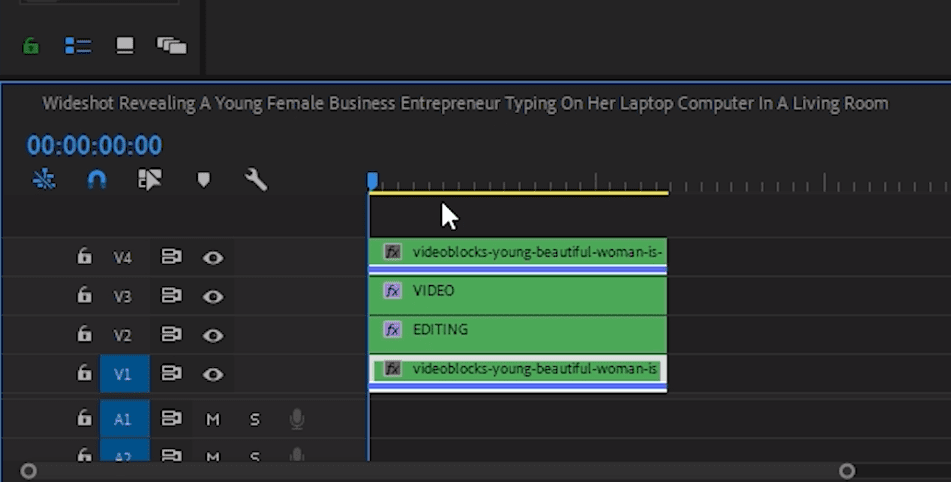
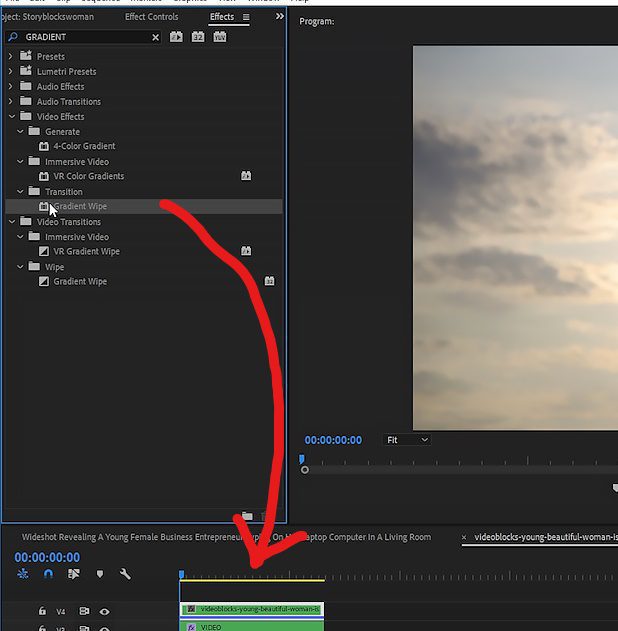
5. In the Effects window, find the Gradient Wipe Tool in the Transition folder, and drag it onto your duplicate clip.
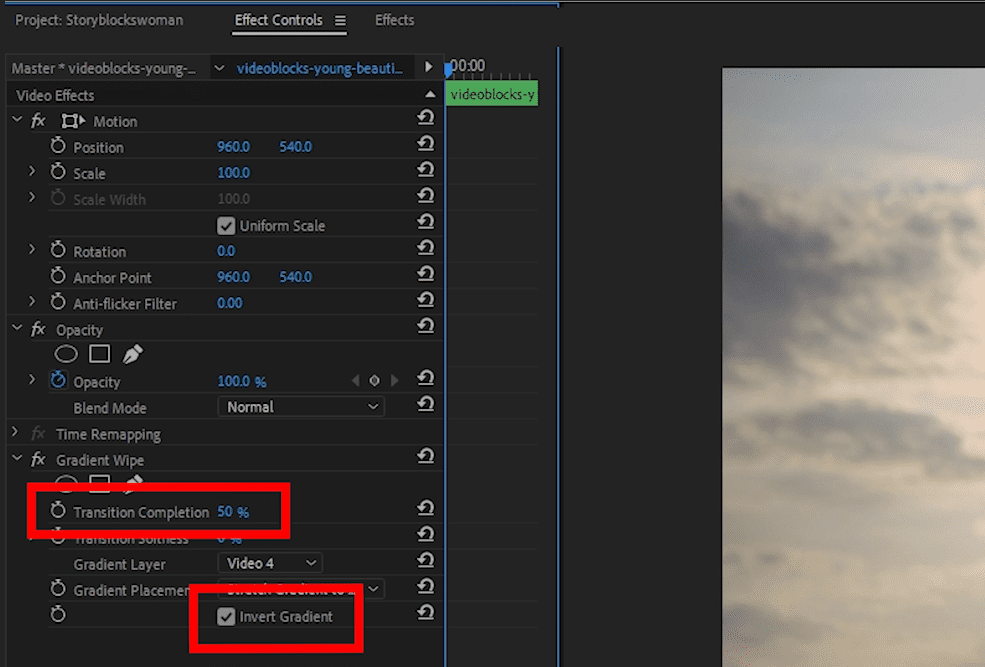
6. Go to your Effect Controls window and under Gradient Wipe, check mark Invert Gradient and change Transition Completion to 50%.
7. And there you go, using a high contrast clip, you now have very quickly put text behind your subject.
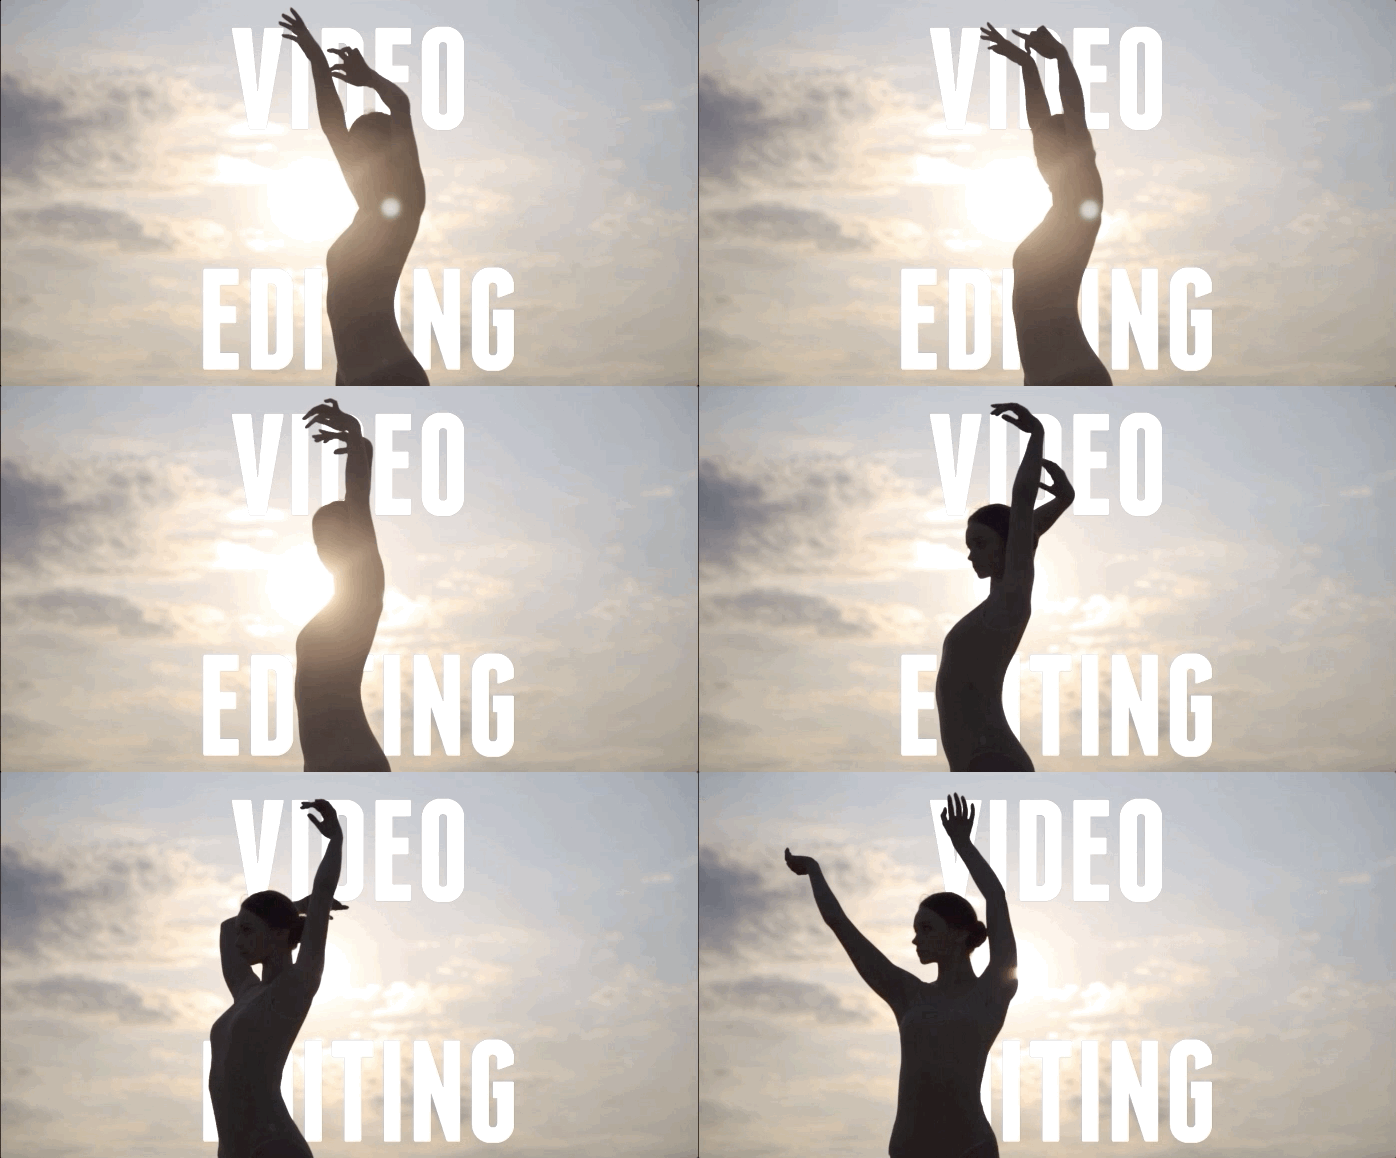
This effect will isolate the darker and brighter spots of your clip and while it only works on certain clips, when it does work, it can save you a lot of time compared to the previous masking example.
And that sums up this tutorial on how to layer text behind objects in Premiere Pro! Check out more of our Premiere Pro tutorials to learn skills like how to place footage inside text.
Want to see more from Alli Saunders? Look for new tutorials to come on the Storyblocks blog or follow Alli and Will on YouTube and Instagram.


