DaVinci Resolve is an incredibly accessible piece of software that’s designed to be intuitive, making it easy for beginners to pick up and edit quickly. Given that, you might wonder if it’s even worth learning DaVinci Resolve’s keyboard shortcuts. After all, learning keyboard shortcuts for new software is like learning a new language.
As a veteran user of DaVinci Resolve, I can safely say that keyboard shortcuts will revolutionize the way you work. Until you know at least a dozen essential keyboard shortcuts, you won’t unlock your full editing potential.
By ingraining these commands into muscle memory, editors can work fluidly, focusing on creative decisions rather than navigating menus. In this guide, we’ll cover all the essential DaVinci Resolve keyboard shortcuts that you should know, along with how to change your keyboard shortcuts.
Table of contents
What are keyboard shortcuts and why are they worth using?
Keyboard shortcuts are a fundamental staple of computer systems. First invented in the 1970s, they have helped and shaped how technologies emerged. From Ctrl+C to Ctrl+V to copy and paste or Alt+F4 to exit a crashed program, keyboard shortcuts are a pivotal function of an operating system.
While Alt+F4 and Ctrl+Alt+Del are tied to the inner workings of your computer, individual software will also often have specific keyboard shortcuts to aid efficiency and perform actions faster.
For example, if I wanted to cut a media clip into two separate timeline files using my mouse, I would need to click the blade tool beneath the viewing window, then go back to my media clip on the timeline and click to slice the clip into two.
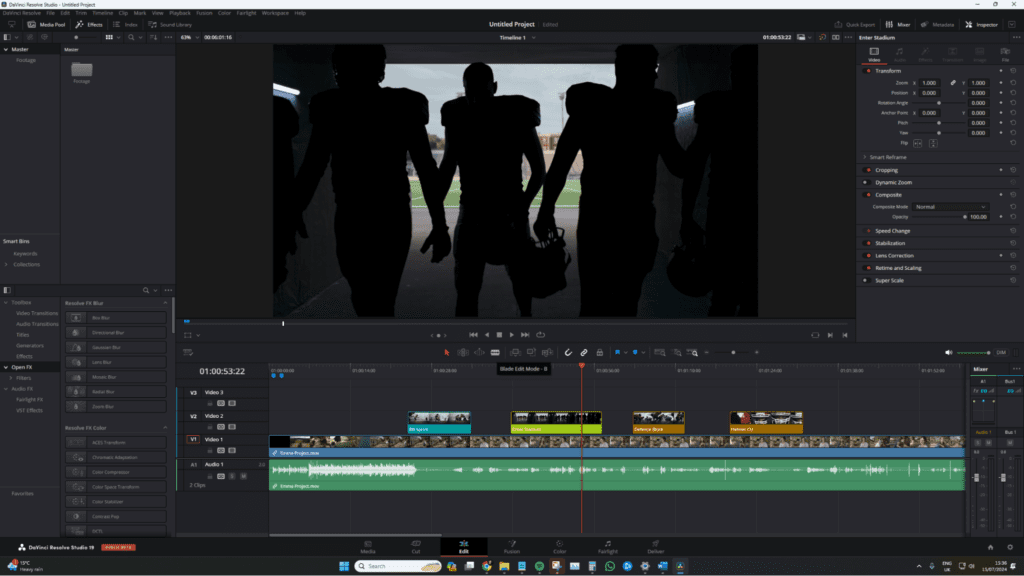
But if I use a keyboard shortcut, I can hit B on the keyboard to switch to the blade tool instantly. Or, if the playhead is already over the spot where I want to split the clip, I could press Ctrl+B, which slices the clip for me while keeping me in my original edit state. With these shortcuts, there’s no need to move the mouse at all.
Now, it’s not like using your mouse is some lengthy task that eats up 10 minutes of your time. At most, you’re saving 3-4 seconds. But think of how many times you’ll be doing these actions over the course of your entire edit. Those 3-4 seconds add up to a considerable amount of time. And many times, your editing speed is what will separate you from the next editor.
Where to find keyboard shortcuts in DaVinci Resolve
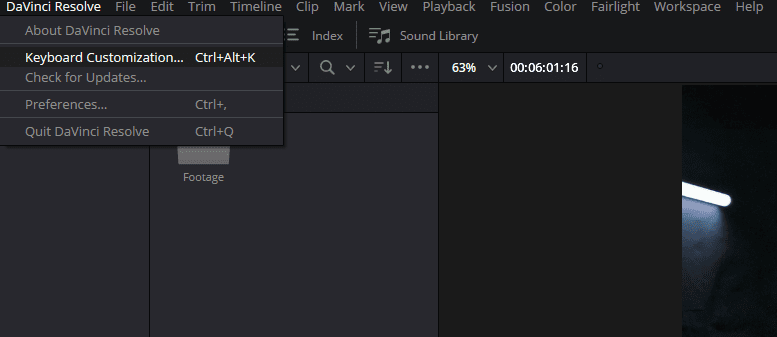
Now, let’s dive into the actual keyboard shortcuts and where you can find them.. In DaVinci Resolve, head to DaVinci Resolve > Keyboard Customization. Of course, this has its own keyboard shortcut, Ctrl+Alt+K or Cmd+Alt+K.
Once you’re in DaVinci Resolve’s Keyboard Customization panel, you’ll be able to see all of the pre-set shortcuts. And while it’s easy to feel overwhelmed at the sheer number of them, just take it one by one.
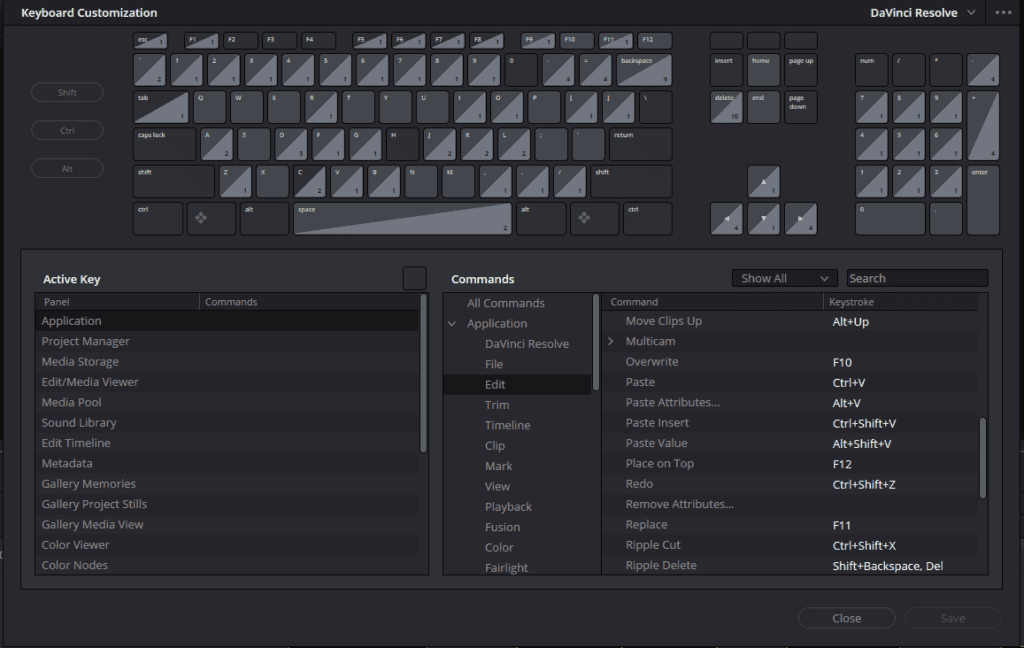
However, just like you wouldn’t become fluent in Italian just for a week-long trip to Rome, there’s no need to learn all of the keyboard shortcuts within Resolve at once.
But even if we stick with just the edit page, there are certainly a substantial number of shortcuts to learn. DaVinci Resolve has over 150 native keyboard shortcuts, and there are hundreds more actions waiting to be assigned shortcuts. In fact, I would bet that you’re likely to run out of key combinations before you can assign each and every shortcut.
The essential DaVinci Resolve keyboard shortcuts for beginners
We could just list all of these shortcuts in this guide, but you can just as easily find all of those in the manual. Instead, as a decade-long user of DaVinci Resolve, let me share the essential DaVinci Resolve keyboard shortcuts that will help you hit the ground running.
Playback shortcuts
- Spacebar: Play/Pause
- J: Reverse playback
- K: Stop
- L: Forward playback
- I: Mark in
- O: Mark out
- Cmd+F / Ctrl+F: Toggle full-screen viewer
- Cmd+/ / Ctrl+/: Toggle loop
- Arrow right/arrow left: Move one frame right/left
- Shift+arrow right/arrow left: Move one second forward/backward
It’s worth noting that some keyboard shortcuts, like J and L, have multiple functions when you double-tap the key. It increases the reverse or forward playback speed.
Pro Tip: When creating your in and out points, you can quickly remove the points by pressing Alt+X. Additionally, when activating the loop, you’ll need to set in and out marks in order for Resolve to know what area it is to loop playback.
Editing shortcuts
- B: Blade tool (Ctrl+B: Cut clip at playhead)
- A: Selection tool
- T: Trim edit mode
- Comma: Nudge clip backward
- Period: Nudge clip forward
- N: Snap mode on/off
- Backspace: Delete (Delete clip without timeline ripple)
- Alt+Arrow up/down: Move clips up/down
- D: Disable clip
- V: Snap to the nearest edit point
- Ctrl+C / Cmd+C: Copy
- Ctrl+ V / Cmd+V : Paste
- Ctrl+X / Cmd+X: Cut
- Ctrl+\ / Cmd+\: Join clip
- Shift+[: Trim start to playhead
- Shift+]: Trim end to playhead
You’ll note that there aren’t many editing tool shortcuts because, unlike Premiere Pro, which has selectable tools for the various trim modes, Resolve works through only one trim edit mode. Instead, the various trim modes will activate depending on where your mouse is positioned while hovering above the clip.
Navigation shortcuts
- Home: Go to start of timeline
- End: Go to end of timeline
- Up Arrow: Go to previous edit
- Down Arrow: Go to next edit
- Ctrl+Plus (+) / Cmd+Plus (+): Zoom in
- Ctrl+Minus (-) / Cmd+Minus (-): Zoom out
- Shift+Z: Toggle zoom to fit
Some of these navigation keyboard shortcuts can also be paired with the mouse scroll wheel. If you hold Shift+Mouse Scroll Wheel, you can increase or decrease the height of the individual tracks. Likewise, if you hold Alt+Mouse Scroll Wheel, you can quickly zoom in and out of the timeline. I personally use this form of navigation more often than the standard keyboard shortcuts.
Markers and annotations
- M: Add marker
- Alt+M / Option+M: Delete marker
- G: Add flag
- Ctrl+M / Cmd+M: Edit marker
One thing to note with the marker shortcut is that pressing M without a clip selected adds a marker to the timeline. When a clip is selected, it adds a marker to the media. If you intend to add meta information to the marker instantly, I would suggest hitting Ctrl+M to add a marker and bring up the info box. It saves you moving your mouse to the marker and double-clicking it.
There isn’t a default shortcut to remove a flag, which is annoying since removing one is a tedious process if you accidentally hit G while editing. Unfortunately, Alt+G is already assigned to an action on the color page. However, Ctrl+Shift+G is available and would be a useful addition to Resolve if this is an issue you run into regularly.
Clip actions
- Ctrl+R / Cmd+R: Change clip speed for creating things like freeze frames
- Ctrl+T / Cmd+T: Add transition
- Alt+T / Option+T: Add video-only transition
- Shift+T: Add audio-only transition
When you add a transition, you can directly affect where it is placed by selecting the clip. If you simply select the clip and hit Ctrl+T, transitions will be added to both ends of the media clip. However, if you select one edit point and then hit Ctrl, it will only be added to that edit point.
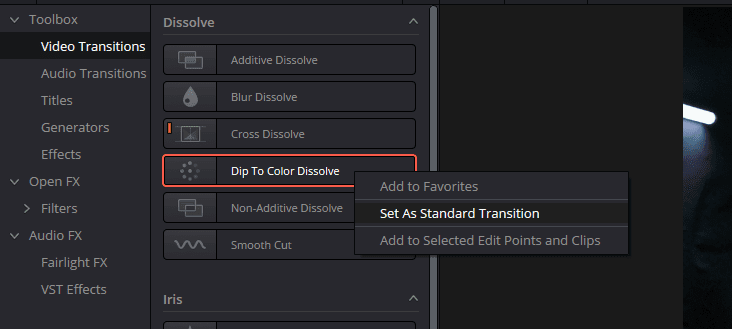
The default transition within DaVinci Resolve is a cross-dissolve, so that’s what will be applied when you use Ctrl+T by default. To change this, simply open the transition panel, right-click the transition you wish to set as default, and then select Set As Standard Transition.
A bonus clip action shortcut is individually selecting either the video or the audio on a linked file—this is where the audio and video move across the timeline as one. You might need to shorten the audio on a linked video and audio file, and pressing the link button or selecting Ctrl+L to unlink all clips on the timeline may be overkill. Instead, hold Alt/Option when selecting either the audio or video on a linked media clip. This will allow you to make individual adjustments without unlinking the entire timeline.
How to change keyboard shortcuts
When transitioning from different software, such as Premiere Pro or Final Cut, it can be hard to adopt a new set of keyboard shortcuts after developing muscle memory for the previous software’s shortcuts. For quite a few years, I kept the blade tool shortcut as S as I used that as my keyboard shortcut to cut clips in Premiere Pro. Ironically, that’s not even the default keyboard shortcut in Premiere!
If you want to keep your original keyboard shortcuts, simply open the keyboard shortcuts preference panel, find the action, and then assign a new keyboard shortcut. Resolve will notify you if the key already has a default action assigned to it.
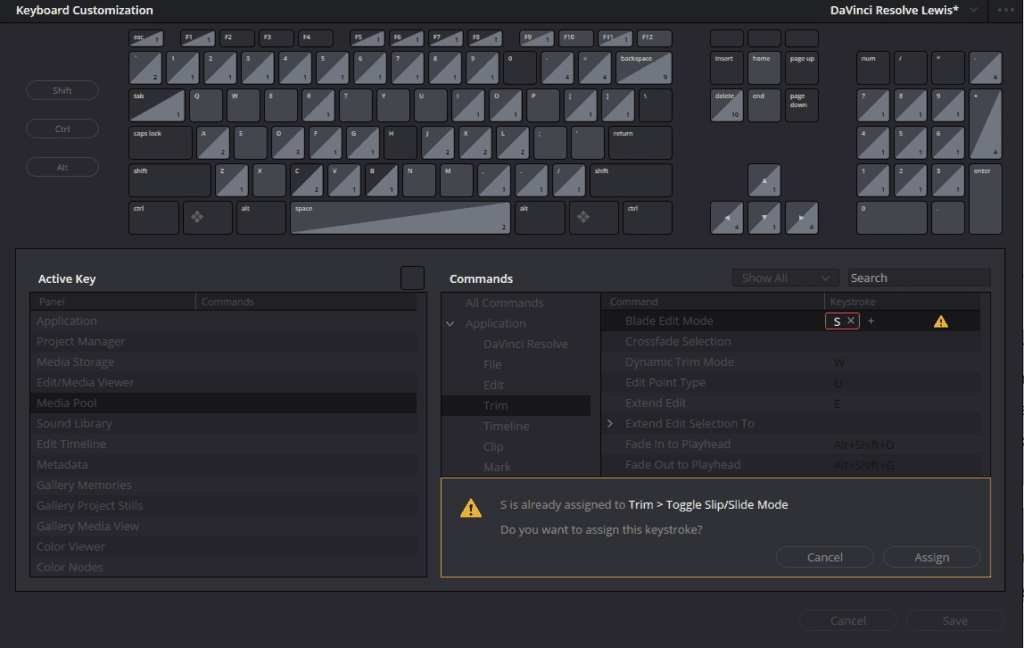
But if you want to stick with the keyboard shortcuts from previous applications, Resolve allows you to keep the keyboard shortcuts from Premiere Pro and many other programs. You can do this by going into the keyboard shortcuts preference panel and then selecting from the following options:
- Adobe Premiere Pro
- Apple Final Cut Pro X
- Avid Media Composer
- Pro Tools
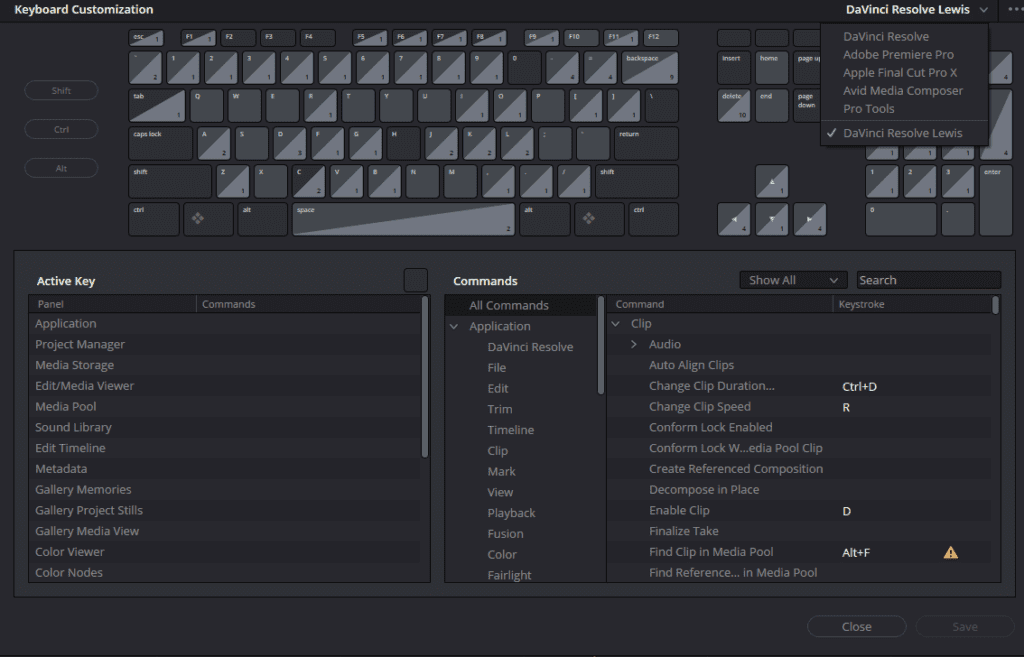
This will allow you to use the same set of keyboard shortcuts that you’re already familiar with. However, if you intend to stick with DaVinci Resolve, I don’t recommend doing this. Since you’re learning a brand new program anyway, it’ll be more useful in the long run to learn Resolve’s default keyboard shortcuts.
If you’re coming over to use DaVinci Resolve on a one-off basis, maybe to utilize its color grading platform, then stick with the Premiere Pro keyboard shortcuts. Otherwise, stay with learning DaVinci Resolve’s native keyboard shortcuts. It will help when following online tutorials, as well as the all-important DaVinci Resolve manual.
Learn how to do even more in DaVinci Resolve
As a beginner, these are the primary keyboard shortcuts that are worth remembering. Of course, these are just a handful within the edit page, and we haven’t touched the likes of the Fairlight or Fusion page. But as you proceed with your editing journey, you’ll start to pick up more advanced shortcuts along the way. And before you know it, you’ll be using keyboard shortcuts instinctively without even thinking about it.
If you’re new to DaVinci Resolve, check out our post on the basics of how to use it, along with ways to make Resolve run faster if you’re experiencing lag. And if you’re looking for ways to enhance your editing experience, we’ve got a post covering the best DaVinci Resolve plugins.
One way to save yourself time in DaVinci Resolve is to use pre-made, customizable templates. With a Storyblocks subscription, you’ll get unlimited downloads of thousands of templates for DaVinci Resolve, along with over 2 million high-quality, royalty free stock footage, music, sound effects, and more. Explore our affordable plan options and sign up today to start downloading instantly.


