The Polar Coordinates effect in After Effects is a useful tool you can use to create a distorted effect on an image or animation. It switches the position of a pixel along the X and Y axes within the polar coordinate system.
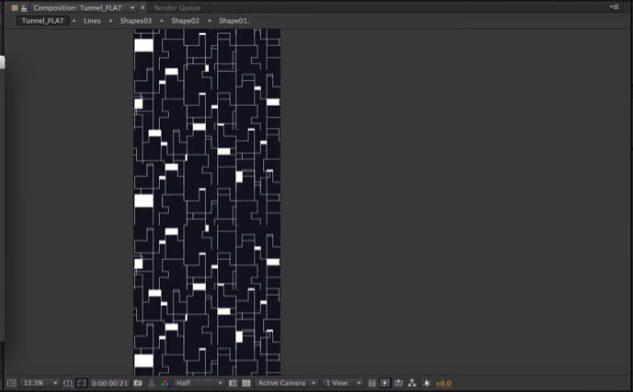
For example, if you start with a long, thin rectangle, and increase the interpolation to 100%, it will warp the rectangle into a circle. On the other hand, if you start with a circular image, it will unfold it into a line. Adding movement and other effects can create psychedelic effects that look professional.
In this tutorial, you will learn how to use the Polar Coordinates effect in After Effects.
How to Use the Polar Coordinates Effect in After Effects
To use the Polar Coordinates effect in After Effects, follow these steps:
Import Your Footage
To use the Polar Coordinates effect, you can either import an existing image, enter text using the Text tool, or use a basic shape like a star or rectangle.
Add the Polar Coordinates Effect
With your image, text, or shape layer selected, navigate to Effect > Distort > Polar Coordinates.
You will then see the Polar Coordinates settings appear within the Effect Controls panel.
Adjust the Settings
There are two settings for Polar Coordinates:
- Interpolation: This setting determines how distorted the image is. At 0%, there is no distortion. You can change the setting up to 100%, which will completely reverse the coordinates from rectangular to polar and vice versa.
- Type of Conversion: You can select between Polar to Rect (rectangular) and Rect to Polar. This will change the coordinates of each pixel from either a rectangular coordinate along the X and Y axes to polar coordinates with a radius and degree. For example, if you have a rectangular coordinate of (5, 7), it will change into a polar coordinate with a radius of 5 and a degree of 7. Horizontal lines become circles and vertical lines become radial lines.
What Does the Polar Coordinates Effect Look Like in Use?
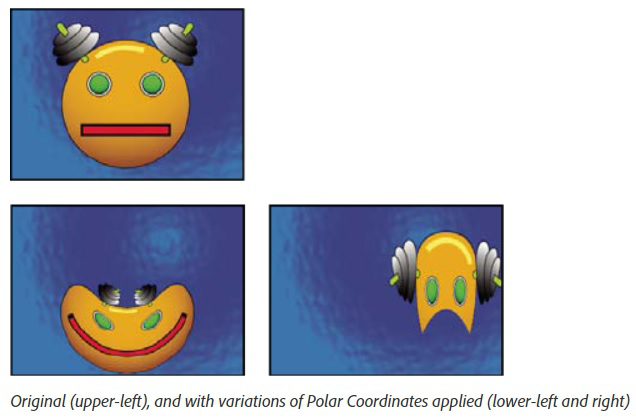
The Polar Coordinates effect can make objects look like they are being turned inside out. The top of your image becomes the center of the circle if you change the interpolation setting to 100%.
Here is an example from the After Effects User Guide.
Another example, taken from a School of Motion tutorial shows how you can turn a rectangular graphic design into a swirling gear-like circle.
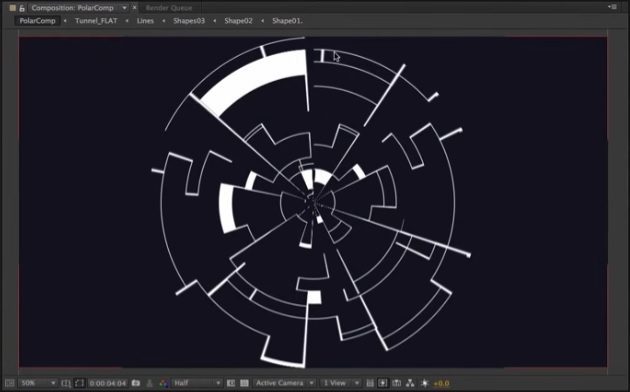
When set into motion, the Polar Coordinates effect can produce swirling, distorted images that can make you feel like you are falling into a tunnel.
What Other Ways Can the Polar Coordinates Effect Be Used?
To create even more stunning graphics, the Polar Coordinates effect can be combined with other effects.
Polar Coordinates and Venetian Blinds
One popular choice is the Venetian Blinds effect. This adds evenly spaced cuts across the image. When combined with Polar Coordinates, it creates a swirling, starburst look for the lines instead of simple vertical cuts.
Another interesting effect is to combine Polar Coordinates with the Checkboard effect. This creates a warped, radial look to the checkboard instead of horizontal and vertical lines.
You can see both combinations in this YouTube video from Jake in Motion.
Warp Effect in Photoshop
Polar Coordinates are similar to other types of warping or distortion effects you can find in other video and photo editing programs like Photoshop. For example, the Warp effect in Photoshop allows you to wrap one image around another.
Polar Coordinates with Text
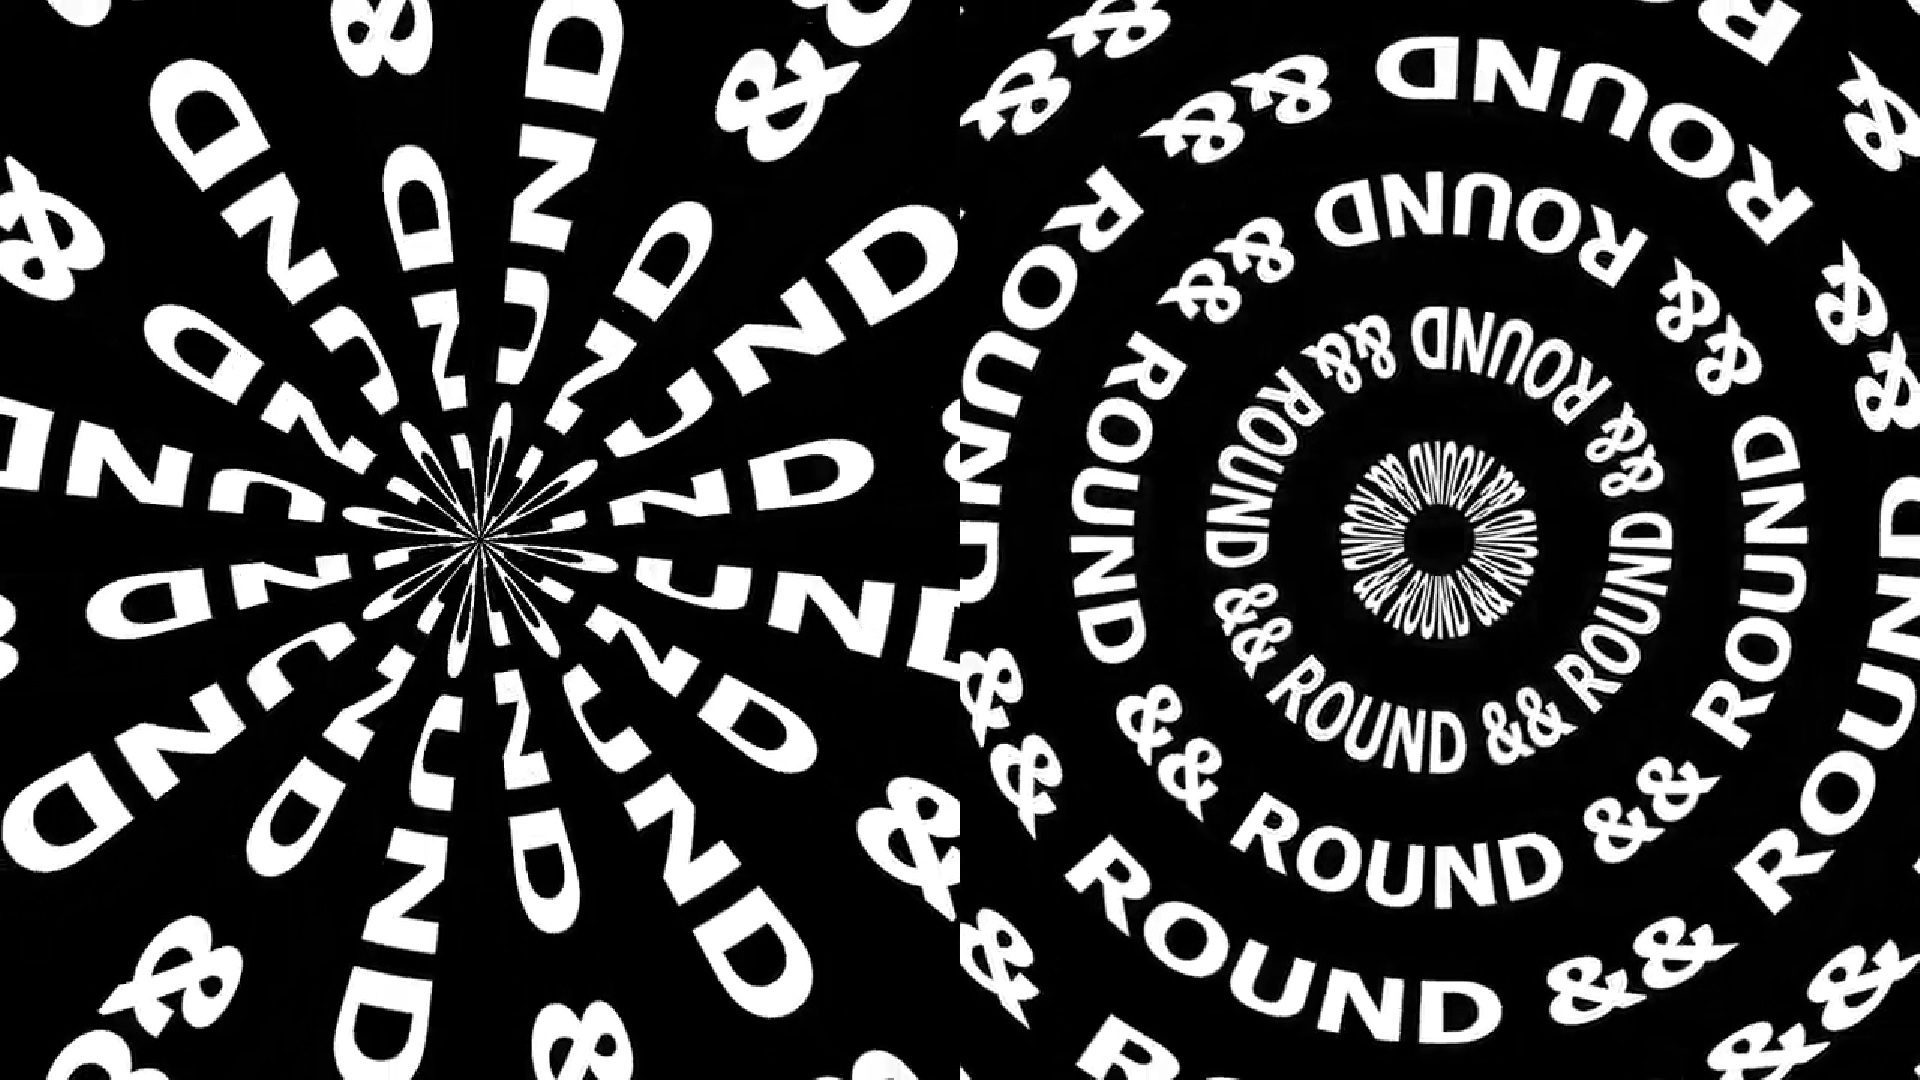
You can also use Polar Coordinates with text. With your text placed horizontally, the Polar Coordinates effect will make it loop in a circular motion. If you orient your text vertically, Polar Coordinates will make it spiral in a star-like pattern.
Polar Coordinates with Optics Compensation
If you like the look of your Polar Coordinates animation, but you want it to fill the screen, you can combine it with Optics Compensation. When this is applied, it warps the image like it was filmed with a wide-angle lens. It can also help create a tunnel effect if you are using the Rect to Polar setting. If you want the center of your Polar Coordinates circle to be empty, you can create a Matte layer and mask out the top portion of your image. You can feather the edge to create a smooth transition.
Vectorize an Image
If you have an image that you want to add a Polar Coordinates effect to, it might be helpful to vectorize the image first. A vector graphic has numerous benefits over other types of images.
They are:
- Easily manipulated
- Scalable
- Reusable
- Easily animated
- Interactive
- Multipurpose
- Editable with code
- Resolution independent
With a Vector image, you can get better results when using Polar Coordinates.
Polar Coordinates with Panoramic Pictures
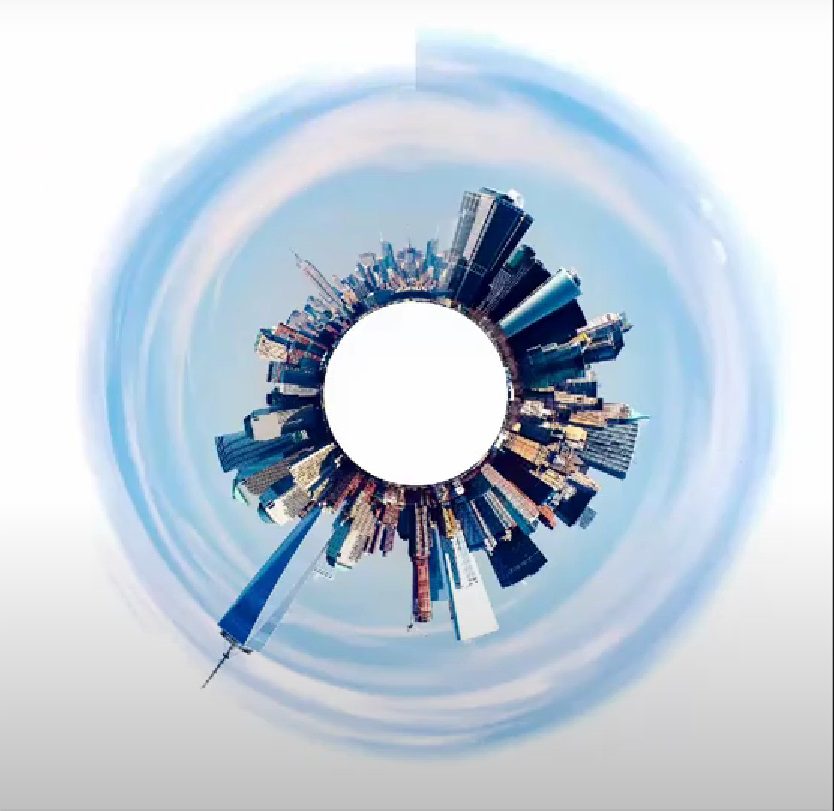
A popular use for Polar Coordinates is to take panoramic pictures, like those of cityscapes, and turn them into circular images. To do this, you need to add a small duplicate section of the left edge of the picture and move it to the right edge. This makes sure the edges line up smoothly when they are connected. You also need to flip the image upside down so that the sky becomes the center of the image. When you turn on Polar Coordinates, you should get a circular cityscape.
Utilize Storyblocks Templates for Easy Video Content Creation
To help you improve your video content creation workflow, you can try some ready-made templates. A template saves you from having to create the effect yourself. Storyblocks offers a wide range of templates including Adobe After Effects templates and Adobe Premiere Pro templates.
You could try adding a Polar Coordinates effect to some of these templates to see what kind of results you get. To try the templates for yourself, sign up for unlimited monthly downloads from Storyblocks. With a subscription, you get access to royalty-free stock video, still images, audio files, and more. Imagine how productive you could be with access to all of this.
Ready to fast-track your creativity? Sign up for Storyblocks today.
