If you’re on TikTok, you’ve likely heard of CapCut. Or maybe you’ve seen the small rectangular box that shows up on some videos with its logo, encouraging you to try the template used. But if you’re not one of the 1 billion active users on TikTok every month, you may be wondering what CapCut even is.
In this post, we cover exactly what CapCut is, how to use it, and go over some editing basics that you can do in the app. Let’s jump in.
Table of contents
What is CapCut?
CapCut is a short-form video editing app that’s owned by the same company as TikTok, Bytedance. It also has image design capabilities. But it’s more widely known for the wide array of pre-made video templates and advanced effects that users can easily use to hop on social media video trends.
Using CapCut for editing vs TikTok
If you create content for TikTok, you know that you can find a selection of video and photo templates, along with effects, within the app. Not to mention that TikTok’s video editor is fairly robust. So why use CapCut instead of what’s in the TikTok app already?
The best way to put it is that what TikTok makes available to you through the app is fairly simplistic compared to what you can do within CapCut. Some of CapCut’s notable features include one-click background removal from videos, a dizzying amount of video templates, and AI enhanced features. It’s a good free beginner video editing tool, especially for those who prefer to edit on their phone.
One other reason to use CapCut vs TikTok’s native options is the fact that TikTok’s editor is notorious for glitching or crashing. I’ve experienced it myself, and the feeling of seeing all your hard work disappear instantly is the worst. So using CapCut gives you some more stability comparatively.
How to use CapCut
CapCut is available in all mobile app stores, but it also has an online editor and an application on Windows or Mac as well. CapCut is free to download or access across all platforms. For this tutorial, we’ll be using the free mobile application.
It does also have an advanced version available, called CapCut Pro, which gives you more features, storage space, and more. CapCut Pro is typically priced at $13.99/month for monthly access, or $129.99 for a yearly subscription. But it seems as though it’s usually discounted, so if you’re seeing those full prices, wait for them to go on sale.
They also offer additional cloud space you can purchase to store your video or image projects.
How to edit in CapCut
Getting started
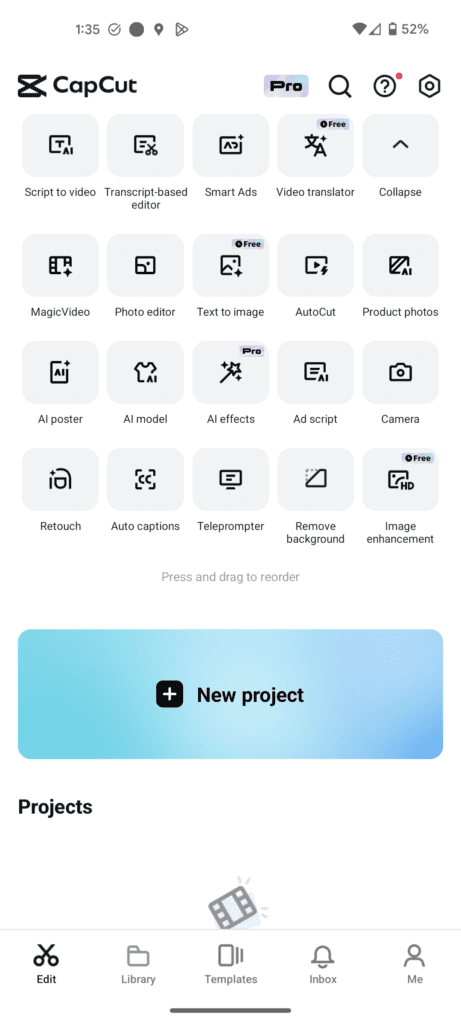
Once you download the CapCut app, you’ll see a series of questions asking you about what you’re using the app for. Once you get through those, you’ll be brought to the main editing page. You can find a row of collapsible features up top, a large blue New Project button below that, and then your project list beneath that.
Creating a new project and adding content
To dive into the editor, click the New Project button. Once you click that, a prompt to let CapCut access your photos and videos on your device pops up. Click Allow, and you’ll see your phone’s videos and videos have populated underneath the Albums tab. You’ll also see two other tabs, one that says (your username)’s space, where you can upload specific projects and materials, and another that says Library.
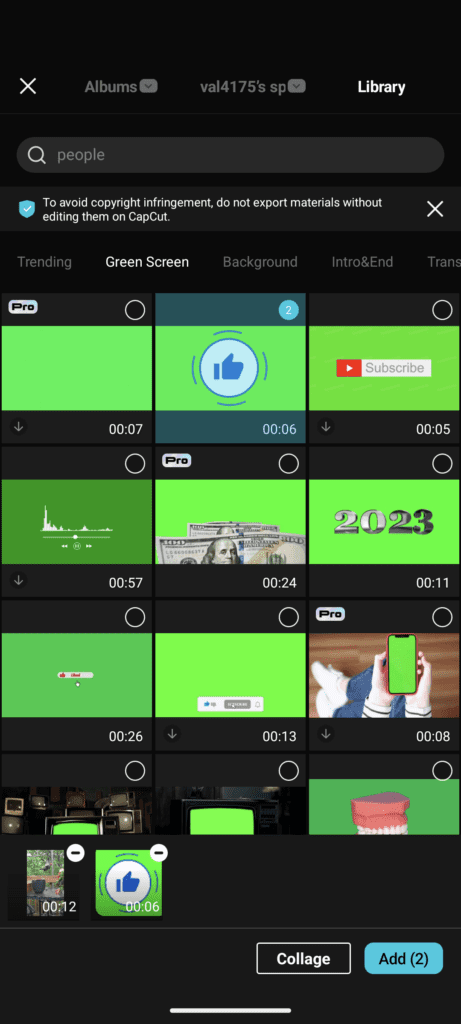
Under the library tab, you can search and browse through a wide variety of video clips, transitions, green screen animations, and more. Most of these are free to use, though some are marked with the Pro logo, which means you’ll need to upgrade to access them. To preview any of these, just tap on the clip.
To add them to your video, click on the circle displayed in the upper right hand corner. Once you do, that circle should turn blue and the content will appear next to any other clips or photos you’ve added in the row along the bottom of your app. When you’re done adding clips for your video, click the blue Add button in the bottom right corner.
Navigating the editor
Once you’re in the editor, you should see any clips you chose on the timeline. To add new content to your project, you can click the grey plus sign button located to the right of your timeline. Touch the black portion of your phone screen beneath the timeline and drag your finger to the left to scroll through your video. If you need to undo or redo any action, tap the curved arrows located on top of your timeline on the right hand side.
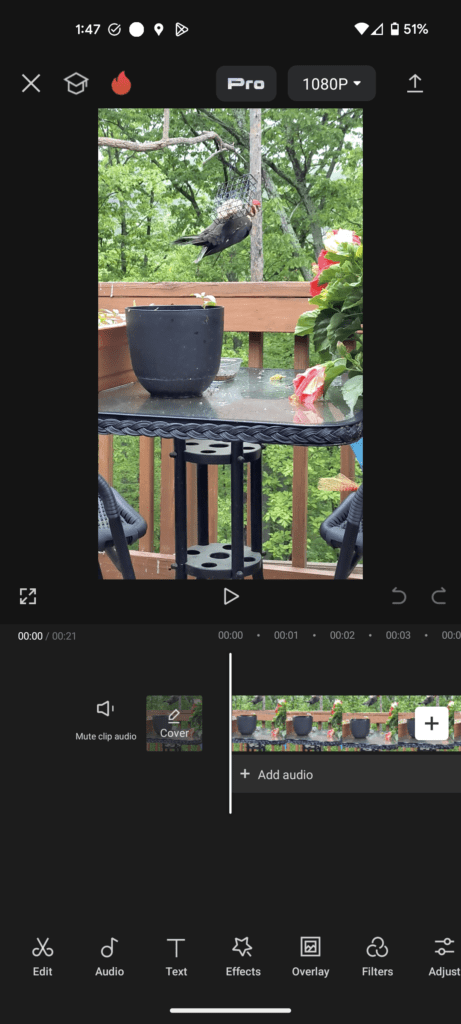
Along the bottom of the editor is where you’ll see all the tools you can use for creating your masterpiece. Tapping each of them brings up a number of options you can take, but we’ll start with adding text.
How to add text
1. Tap the add text button
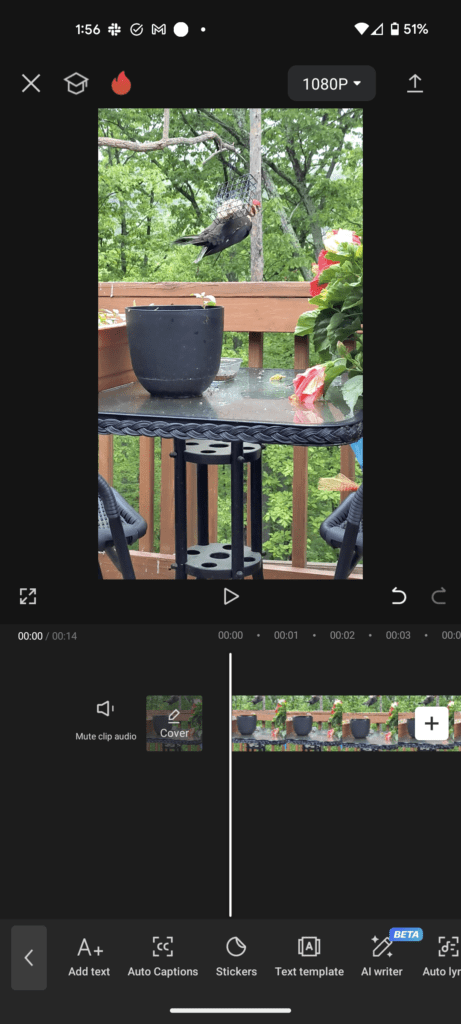
Tap on the Text button located in the tools along the bottom of your editor and you’ll see a few options shown, including Add text, Auto Captions, Stickers, Text template, and more. To just add basic text to your video, tap the Add text button.
2. Type in your text
Text will appear in the middle of your video and a text box will show where you can type in whatever text you want to add. To move your text to a different area in your video, just drag and let go of the text.
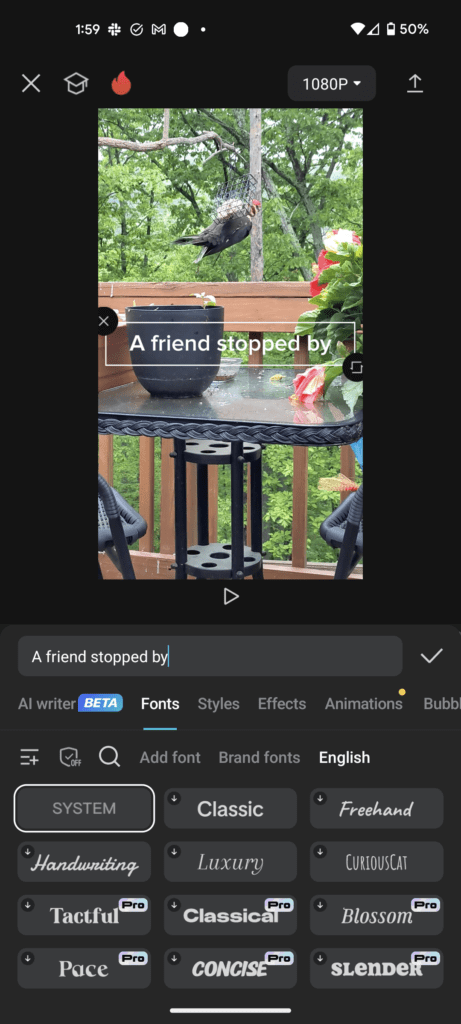
3. Customize your text
Beneath the text box, there are options for changing your text’s font or style, adding effects or animations, and more. Since the current version of my text is hard to read on my video, I’m going to navigate to the Styles > Background. I’ll add a black background to it and reduce the opacity so it’s not as harsh by moving the Opacity slider to the left.
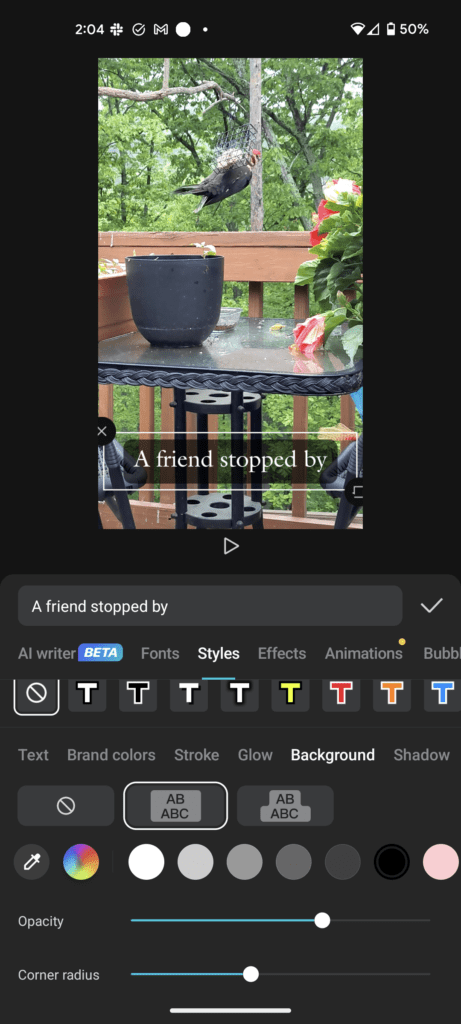
There’s tons of ways you can customize your text, so play around with the settings until it looks exactly the way you want.
4. Finalize your text and adjust the duration
Once you’re done, click the grey check mark next to the right of your text box. You’ll see a new orange bar for your text appear underneath your video in the timeline. To change how long your text shows in your video, just tap the bar and drag the grey box at either end to shorten or lengthen it.
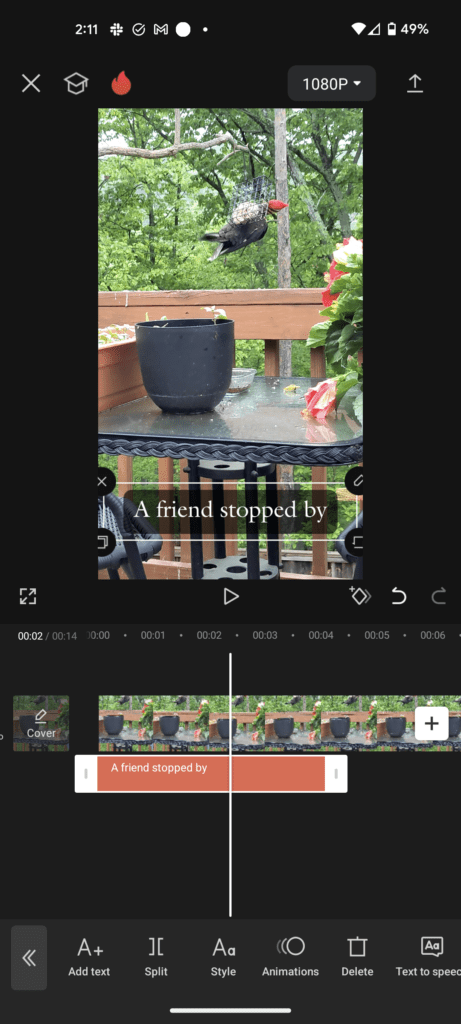
Once you click out of the text settings, the text bar will show as a thin orange line above your video in the timeline. But if you want to edit your text again, you can click back into the Text settings to make changes and the orange bar will appear again.
How to add music
1. Tap the audio button
To add music to your project, tap the Audio button located in the tools along the bottom of your editor, then tap Sounds.
2. Browse and add music
From here, you can browse top TikTok sounds, search by different categories, or use the search bar to look for specific songs or artists.
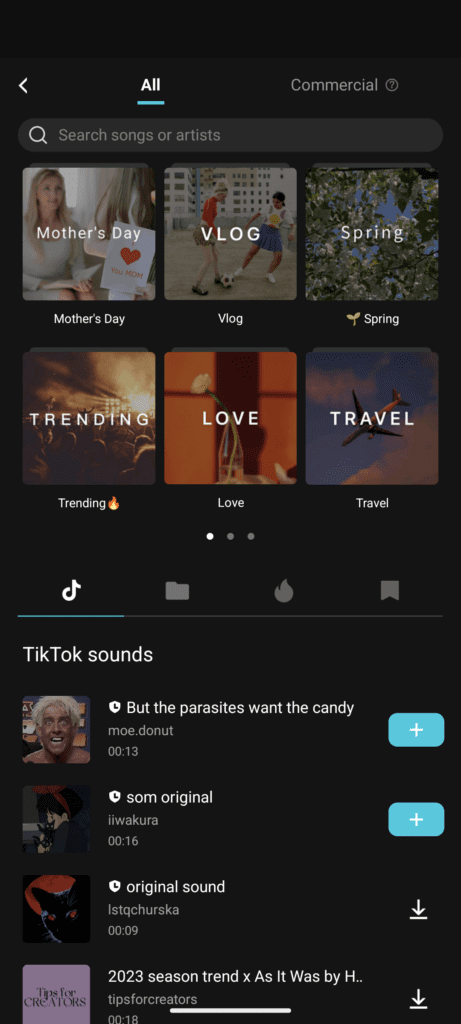
To preview a song or sound, just tap on it. And to add it to your project, tap the blue plus sign to the right of the track.
Note: CapCut doesn’t have the same licensing as TikTok does, so you may not see a wide variety of music in their library. If you want to use the latest Taylor Swift song or anything from a popular artist, you’ll need to edit your video in CapCut without the music, then add your track once you port it over to TikTok or Instagram.
3. Finalize your audio
Once you’ve added your audio to your video, you’ll see it appear beneath your video in your editing timeline. To adjust the duration of it, tap on the audio bar and drag the grey boxes at the ends to lengthen or shorten it. You can also split your audio, adjust the volume, add a fade, delete it, and more by using the audio tools that appear at the bottom of your screen.
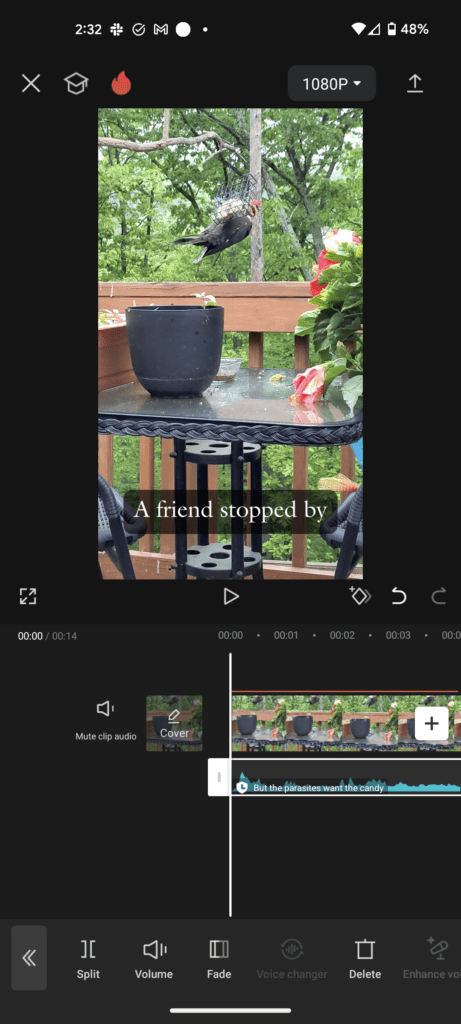
How to zoom in
1. Navigate to Effects > Video effects
To add a zoom effect to your video, tap Effects in the bottom toolbar, then Video effects.
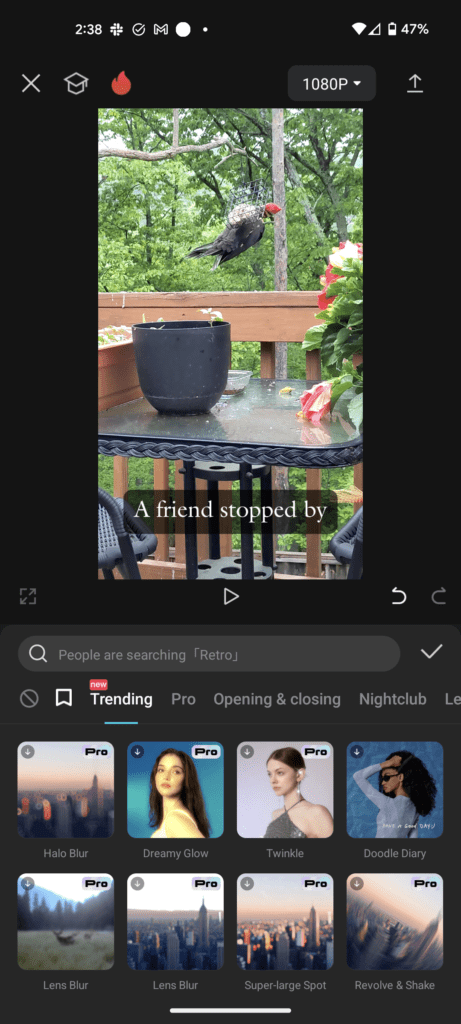
2. Search for zoom
Once you’re on the Video effects page, you’ll see trending effects shown. Type in zoom to the search bar, and you’ll see a number of different types of zoom effects you can choose from. Tap each one to add it to your video and see what it looks like. Remove any effect by tapping it again. With some effects, you’ll have the option to adjust the settings of the effect by tapping on it a second time.
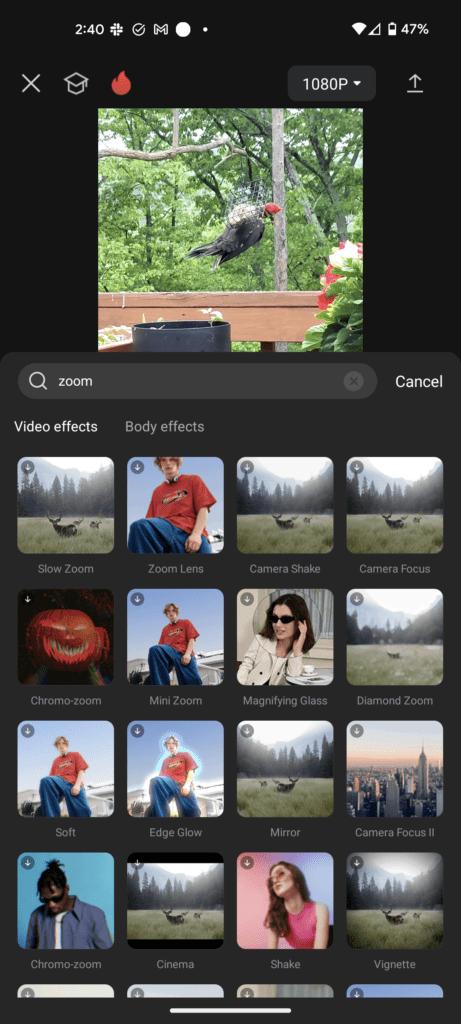
3. Add your effect to your video
Once you’ve chosen an effect and adjusted the settings so you’re happy with it, tap Cancel next to the search bar to exit the search results. Then tap the check mark next to the search bar on the Video effects screen to return to your editing timeline.
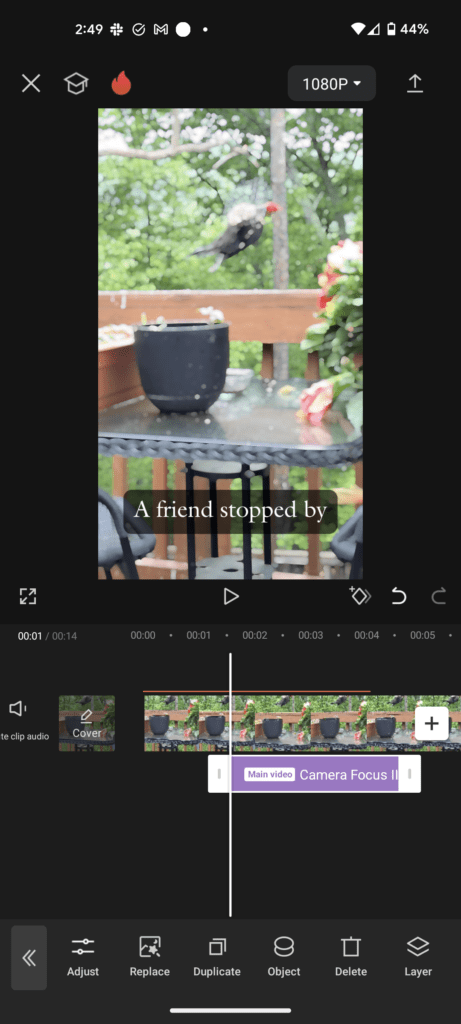
To adjust the duration of your effect, you can tap on the effect bar shown underneath your video in the timeline and drag the grey boxes at either end. You’ll also see additional options for adjusting your effect, replacing it, duplicating it, and more shown on the tool bar at the bottom of your screen.
How to blur
Adding a blur to your video follows the same process as above to add a zoom effect to your video.
1. Navigate to Effects > Video effects
To add a blur effect to your video, tap Effects in the bottom toolbar, then Video effects.
2. Search for blur
Once you’re on the Video effects page, you’ll see trending effects shown. Type in blur to the search bar, and you’ll see a number of different types of blur effects you can choose from. Tap each one to add it to your video and see what it looks like. Remove any effect by tapping it again. With some effects, you’ll have the option to adjust the settings of the effect by tapping on it a second time.
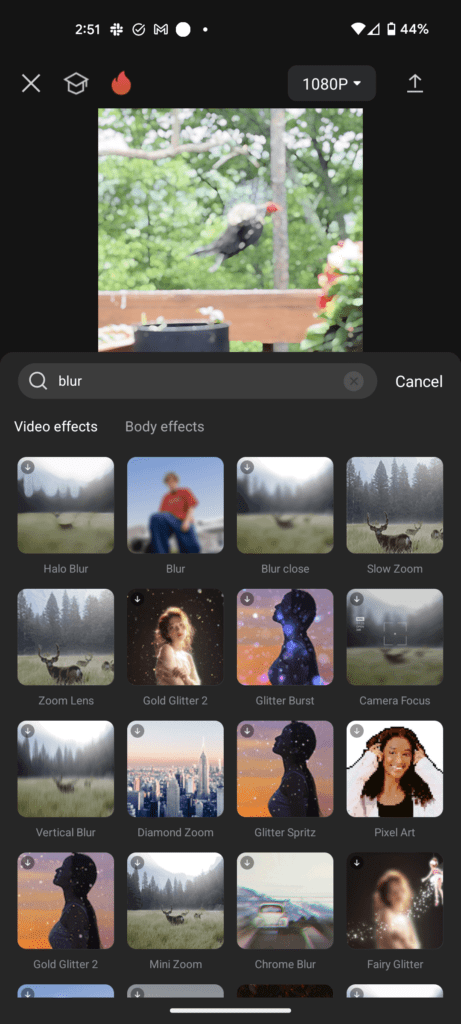
3. Add your effect to your video
Once you’ve chosen an effect and adjusted the settings so you’re happy with it, tap Cancel next to the search bar to exit the search results. Then tap the check mark next to the search bar on the Video effects screen to return to your editing timeline.
To adjust the duration of your effect, you can tap on the effect bar shown underneath your video in the timeline and drag the grey boxes at either end. You’ll also see additional options for adjusting your effect, replacing it, duplicating it, and more shown on the tool bar at the bottom of your screen.
How to reverse a video
1. Tap on your video on your timeline
Reversing a video on CapCut is easy. Just tap your video on your timeline, then swipe to the left on the toolbar at the bottom of your screen until you find the Reverse button.
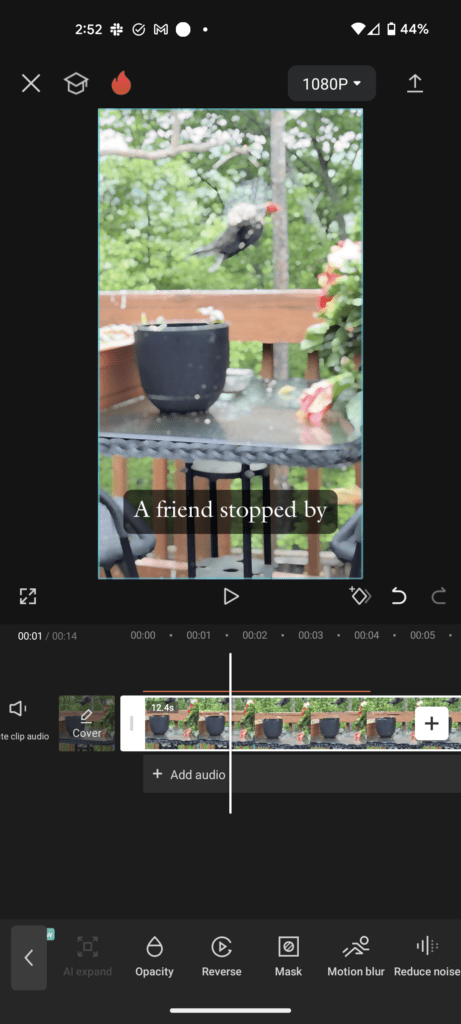
2. Add Reverse to your video
Tap on the Reverse button in your toolbar to start the reversal process. You’ll see a small window pop up that will tell you the percentage progress of reversing your video. It should take less than a minute, but how long it takes will vary based on how long your video is. Once it’s done, that’s it! You’ve successfully put your video in reverse.
How to use CapCut templates
CapCut templates are a great way to easily add cool effects, transitions, and more to your videos without having to put in a ton of time.
If you’re planning on using a template for your video in CapCut, it’s best to add it from the very start. Then add any other edits like text or effects in later. If you choose to add a template to a project that you’ve already started working on, adding a template will completely erase your work. I thankfully learned this working on a test project, but I’d hate for it to happen to someone who spent a lot of time on a video. You’ve been warned!
1. Navigate to Templates
To use a template for your video, it’s best to navigate to the Templates section of CapCut outside of the main editor. You can also access templates from inside the editor. But since it asks you to select what footage or images you want to use once you do select a template, it doesn’t make much sense to start a project before adding a template.
2. Search or Browse templates
Once you’re on the templates page, you can browse through specific categories like TikTok, Memes, Effects, and more. Or you can search for a specific template using the search bar. Once you’ve found a template you like, click on it and then click the blue Use template button.
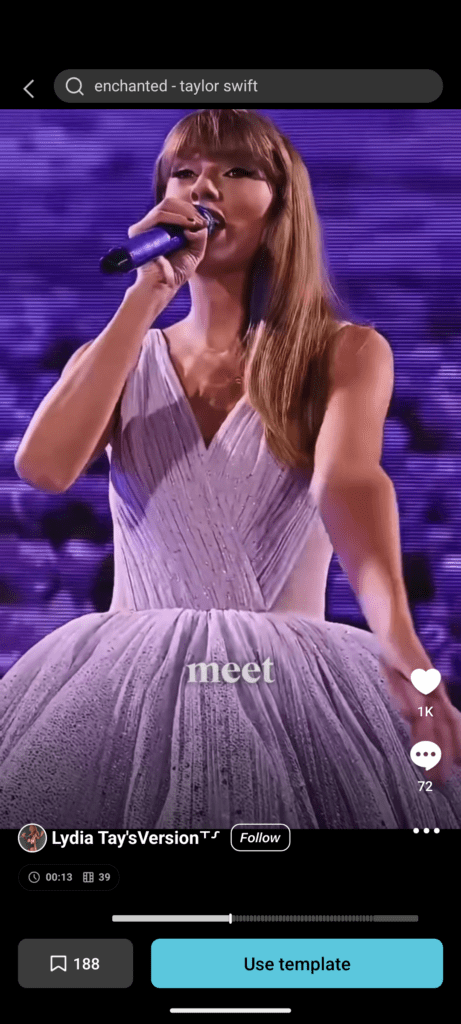
3. Add your photos or videos
Some templates work with photos or videos, while some work best with one or the other. Choose depending on what works your specific template.
On your media selection screen, you’ll see how many photos or videos you need to select shown at the bottom. You should also see a preview of how long each one will be shown for. The template I’m using is asking me to select 39 items that will each be shown for 0.1 seconds (with 2 seconds for the last one), so I’m using photos for mine.
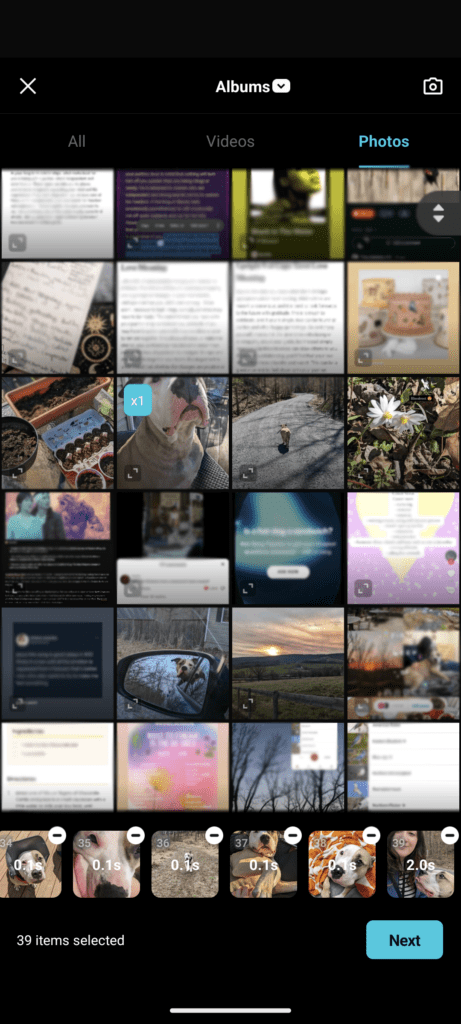
Once you select your video(s) and/or photo(s), click the blue Next button to add them to the template.
4. Preview your template and make any edits
On the next screen, you’ll be able to watch a preview of your template with all the media you just added. If you want to switch any photos or videos, you can tap on the specific photo or video and select Replace. Here, you’ll also see options to crop the photo and make other edits or adjustments.
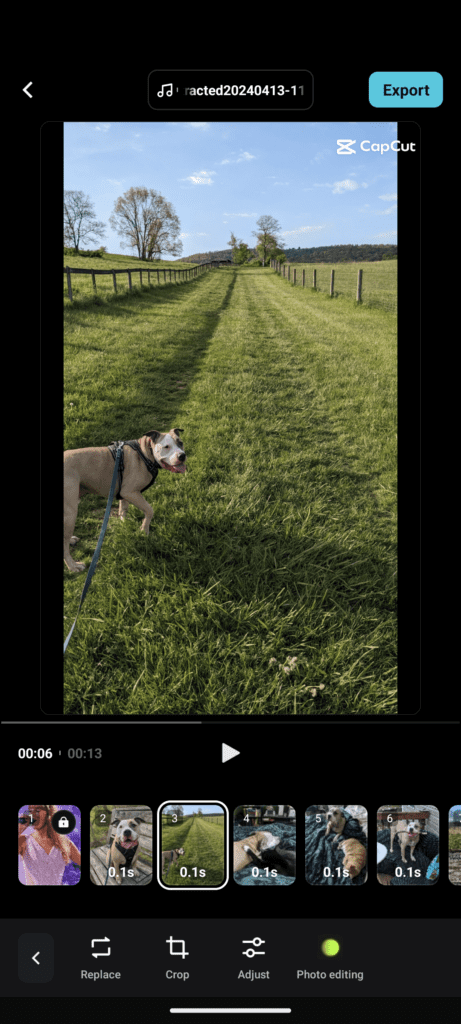
You can also change out the audio or add/change the text in the template by tapping either of those options on the bottom when you have the main part of the template selected. Keep in mind that if you change the audio, some templates may not work as well as they were created to work with the beat of the audio that came with the template.
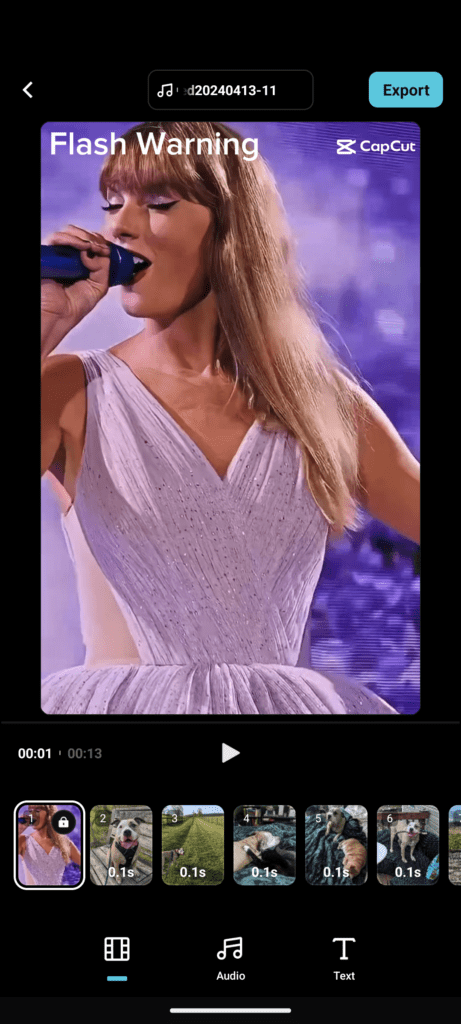
5. Export your video
Once you’re happy with how your final template is looking, click the blue Export button in the upper right hand corner. Here, you can adjust the resolution and choose whether you want to export to TikTok or just export to your phone storage.
How to remove the CapCut watermark
Unless you’re exporting directly to TikTok or you’re using CapCut Pro, a CapCut watermark is added onto the exported version of your video. Unfortunately, there’s no way around it besides those two options.
Final thoughts
As someone who typically edits anything they post to TikTok inside the native editor, I can see the benefits of using CapCut. The editing workflow seems way more streamlined and stable compared to TikTok’s editor. Not having access to most artists and songs is definitely one of the downsides to using CapCut, though you can always add them in once you bring it over to TikTok or another platform.
Overall, it’s a pretty robust editing tool for beginners or mobile-only users that has a lot of template options to choose from, including viral ones. If you’re editing on the go, it’s not a bad option at all. But if you’re using the desktop version of CapCut, there’s lots of better editors to choose from, including Premiere Pro, DaVinci Resolve, Final Cut Pro, and more. Though those have a steeper learning curve, you can do far more with these professional-quality editors compared to CapCut.


