
The stabilization technology in both lenses and cameras has advanced significantly over the last decade. In 2010, capturing stabilized footage from your DSLR without a tripod meant standing as still as a statue, elbows pinned against your ribs, and controlling your breathing like a deep-sea diver. However, the landscape in 2024 is vastly different.
Thanks to multi-axis gyroscopic in-body stabilization (IBIS) found in most cameras in 2024, creators can effortlessly hold their cameras and even pan with gentle steps forward with minimal shake affecting their footage. But while IBIS does smooth out these slight jitters, more pronounced movements like walking can still introduce noticeable motion into your videos. This is where software solutions such as Warp Stabilizer in Premiere Pro come into play. In this post, we’ll cover exactly what Warp Stabilizer is, how to stabilize video in Premiere with it, and ways to prevent shaky footage while you’re filming.
What is Warp Stabilizer?
Warp Stabilizer is a tool in Adobe Premiere Pro (and Adobe After Effects) that analyzes your video clip. It automatically adjusts various parameters—position, scale, rotation, and perspective—across each frame to reduce or eliminate camera shake. While the tool is relatively easy to use, we’ll walk you through how to stabilize shaky video in Premiere Pro.
How to stabilize video in Premiere Pro
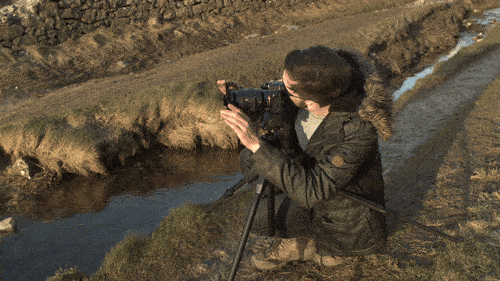
This clip was shot using the Blackmagic Pocket Cinema Camera 4k. While it’s an excellent camera, unfortunately it lacks built-in stabilization, resulting in a considerable shake in the footage displayed in Premiere. So I’ll be using Warp Stabilizer to remove that shakiness.
Mastering Warp Stabilizer
To stabilize a clip in Premiere Pro using Warp Stabilizer, follow the steps below or watch our full video tutorial.
1. Navigate to Video Effects > Distort > Warp Stabilizer
Select the clip you wish to stabilize.
Then in the Effects panel, navigate to the Video Effects section. Scroll to the Distort category and double-click Warp Stabilizer, or drag and drop the effect onto your clip.
Once the effect is applied, you’ll see an orange bar appear as the clip automatically begins running the Warp Stabilizer analysis in the background.
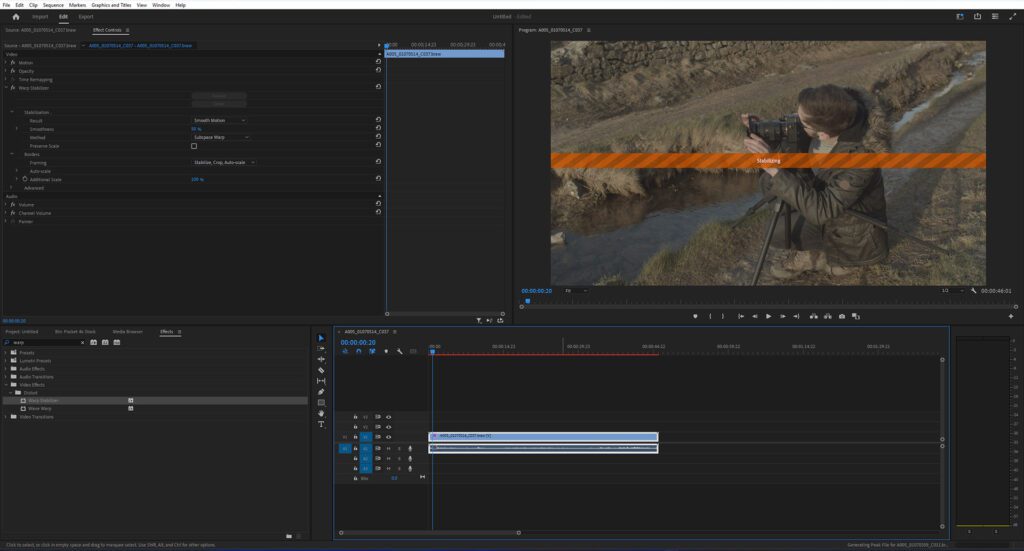
2. Let the Warp Stabilizer analysis run
During this time, you’ll see a notification in the Project panel indicating that the analysis is in progress. Once the analysis is complete, another notification will inform you that stabilization is underway.
That’s it! Easy. Your footage should now be stabilized.
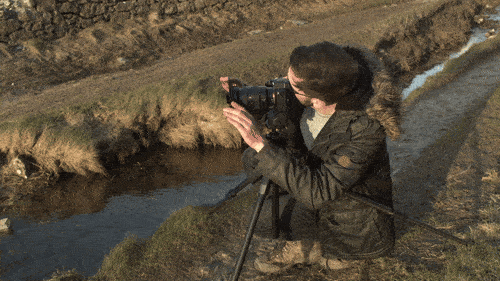
This is the final result of my clip.
Depending on the characteristics of your footage, the results may vary. If they aren’t perfect, don’t worry—there are several parameters you can adjust within the Effects Control panel.
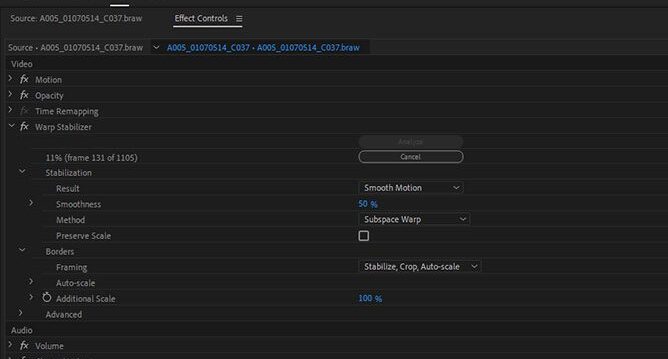
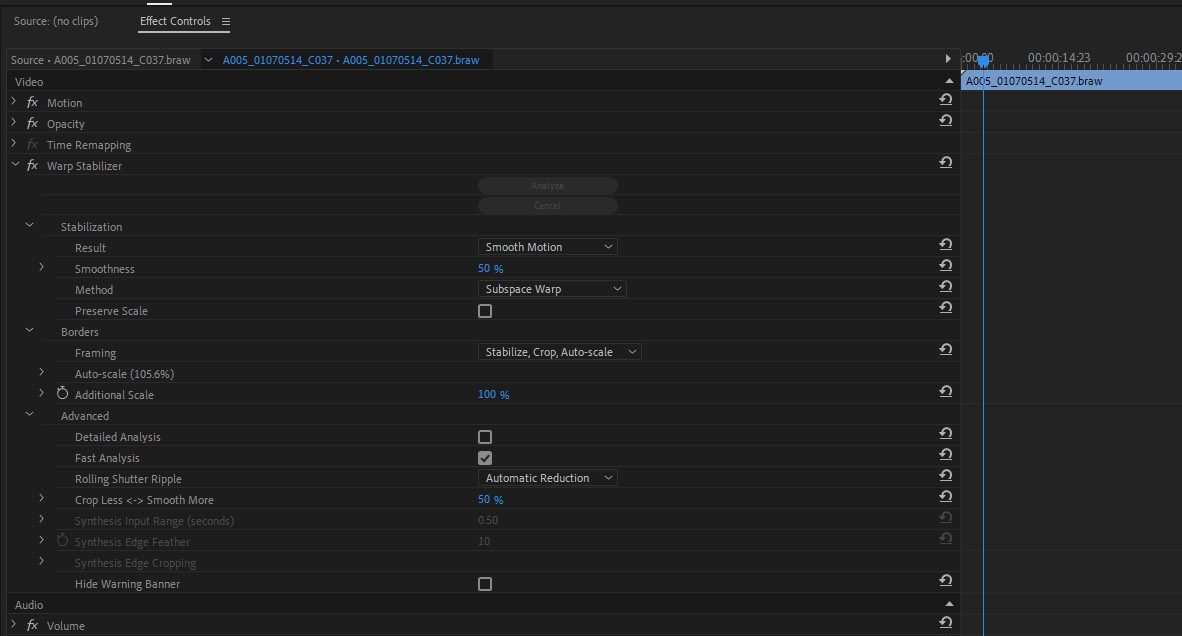
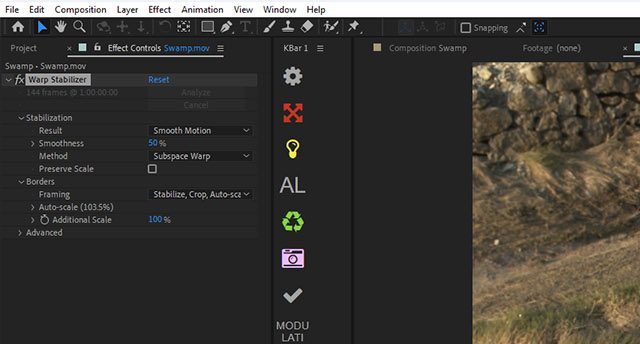
Optimizing Stabilization Settings
Under Result, you will find two options that control the intended outcome for the footage:
- Smooth Motion (default): Retains the original camera movement but smooths it out. Think of gimbal or in-body stabilization type smoothness (without walking). When selected, Smoothness is enabled to control how smooth the camera movement becomes.
- No Motion: Attempts to remove all camera motion from the shot. When selected, the “Crop Less <-> Smooth More” function is disabled in the Advanced section.
Switching between these settings will require Premiere to restabilize the footage briefly. If your original shot has motion, such as moving the camera left to right or holding the camera handheld while pointing toward different subjects, and there’s implied motion, you’ll want to use Smooth Motion to retain that. However, if you want your shot to look as if it was locked off on a tripod, No Motion would be the better option.
Additional settings with Smooth Motion
If Smooth Motion is selected, you can adjust additional parameters to enhance stabilization:
- Smoothness: Determines how much the camera’s original motion is stabilized. Lower values maintain more of the original motion, while higher values result in smoother footage.
- Method: Dictates the complexity of operations Warp Stabilizer performs to stabilize the footage:
- Position: Basic stabilization based only on position data.
- Position, Scale, and Rotation: Stabilizes based on position, scale, and rotation data.
- Perspective: Uses corner-pinning for stabilization.
- Subspace Warp (default): Warps different parts of the frame independently to stabilize the entire frame. The method may vary across the clip depending on tracking accuracy.
- Preserve Scale: Prevents the scale of the clip from changing. Note that this may result in visible blank areas around the video.
In most cases, Warp Stabilizer is a straightforward tool; you most likely won’t need to tweak these settings extensively. Adjusting the smoothness slider is often good enough to reduce any jello effects introduced by the Warp Stabilizer.
Advanced stabilization settings
For more advanced stabilization, you can also use these features under the Advanced settings section:
- Detailed Analysis: Conducts a thorough analysis to identify trackable elements, resulting in more data and potentially slower processing but improved stabilization.
- Rolling Shutter Ripple: Automatically corrects the rippling effect associated with stabilized rolling shutter footage. Rolling shutter is a sensor defect where straight vertical lines appear slanted when moving the camera back and forth. This is down to how the sensor scans the scene. Automatic Reduction is the default, but use Enhanced Reduction for footage with significant ripples.
- Crop Less <-> Smooth More: Adjusts the trade-off between smoothness and the scaling of the cropping rectangle as it stabilizes the image. Lower values increase smoothness while showing more of the image; at 100%, the effect is similar to manual cropping with Stabilize Only.
If you found this article but were looking for Adobe After Effects information, don’t worry, as the same tool can be found within After Effects. You can find Warp Stabilizer either in the distortion effects found within Premiere or in the tracking window.
Why should you stabilize your footage?
Influential films like The Bourne Identity popularized the shaky cam technique throughout the 2000s, though it was not without its critics. These films used shaky cam intentionally to evoke specific emotions from the audience and amplify the tension.
However, unintentional shaky footage in a corporate video or small business commercial can detract from the professionalism of the presentation and distract viewers from the intended message. Stabilizing your footage ensures a polished, high-quality appearance that enhances viewer engagement and communicates your content clearly and effectively.
Tips for Preventing Shaky Footage
While the Warp Stabilizer is an excellent tool for salvaging many shaky shots, it has limitations. It isn’t a miraculous fix for footage shot while running handheld with a lightweight camera. The limits of what it can correct are quickly reached. That’s why professional stabilization equipment, such as the Arri Trinity, can cost upwards of $60,000.
With excessive shake or rapid movement, the Warp Stabilizer may introduce jello-like artifacts as it attempts to counter the significant motion, rendering the footage as unusable as if it were shaky. Ideally, if you anticipate unstable footage due to a lack of stabilization equipment, preparing for the shot while still in production is the best approach. Here’s how you can minimize shaky footage when shooting with a mirrorless or DSLR camera:
Create a point of tension using your camera strap
First, make sure your camera strap is securely attached. Then, extend the camera away from your body so the strap is tight against your neck, creating a point of tension that stabilizes the camera. Although I mentioned locking your elbows against your ribs at the start of this article as a joke, this technique does provide stability by creating two additional contact points along with the camera strap.
Control your breathing
Likewise, while I may have also joked about holding your breath like a deep-sea diver, controlling your breath can also help stabilize your camera when holding it.
Learn to walk with minimal bounce
Finally, if you plan to move with your camera, I recommend adopting a specific walking style to minimize bounce in your steps. This tutorial from Rich Photography features an excellent demonstration on how you can master these techniques.
Final thoughts
With these tips, you should be well-equipped to capture non-stabilized footage, import it into Premiere Pro, and use the Warp Stabilizer to transform your footage into shots that look as if they were taken with either a tripod or a gimbal. But remember, this tool has its limitations; it won’t fix extremely shaky footage. But it can certainly save you from less severe cases and often turn what seems like unusable takes into polished, professional shots.
If you’re still learning the ins and outs of Premiere Pro, check out our post on the basics of color correction in Premiere. We also have a list of our top 15 recommended plugins for Premiere to help you work faster and more efficiently. Using Premiere Pro templates are also a great time-saving tool – with a Storyblocks plan, you can get unlimited downloads of them, plus 4K and HD footage, royalty-free music, sound effects, and much more.
Explore our selection of over 8,000 Premiere Pro templates today and sign up for a Storyblocks subscription to start downloading instantly.
Editor’s Note: This post has been updated to include additional information. It was originally published on May 16, 2019.

