To excel as a motion graphics designer, you need advanced composition skills, and masks are the most important tool in this field. Learning how to mask and use the masking effect is a fundamental After Effects skill that will help you create dynamic animations and interesting compositions.
An otherwise uninteresting scene can gain extra appeal by adding an engaging animation behind an object. All you have to do to get this stunning effect is mask the object from your composition and add graphics or text behind it.
Of course, you must first master the fundamentals before getting your sea wheels on. This article provides a comprehensive After Effects tutorial on the masking effect, teaching you how to mask in After Effects with step-by-step directions and advice for how to tweak them to perfectly fit your footage.
What is an After Effects Masking Effect?
Masks can be a path or outline used to modify layer effects and attributes. In After Effect, a mask is often a shape that reveals or conceals a particular region of a layer in your composition. Think of it like cutting a hole out of the image, only to reveal the clip you’ve placed underneath on your timeline.
You can use masking to hide or reveal a portion of a layer or an object. An item, such as text, may first be covered by a mask in an animation before the mask slides out to reveal the object. Alternatively, you can have them stay still in the picture and crop out unwanted features.
Additionally, masking is essential in the motion picture industry since, occasionally, you may need to take anything out of the video after the shoot. In these situations, masking is perhaps the best solution. Plus, you could clip out objects from pictures or videos, draw shapes, or even add a design of your choice to your favorite music videos.
What Are The Different Ways To Mask?
You can deploy the masking effect and create masks in After Effects two ways: the Pen tool and the Shape tool. Let’s discuss what each tool does and why you would need them.
Using the Pen Tool
You may often have to draw something more organic, and that’s where the Pen tool comes in.
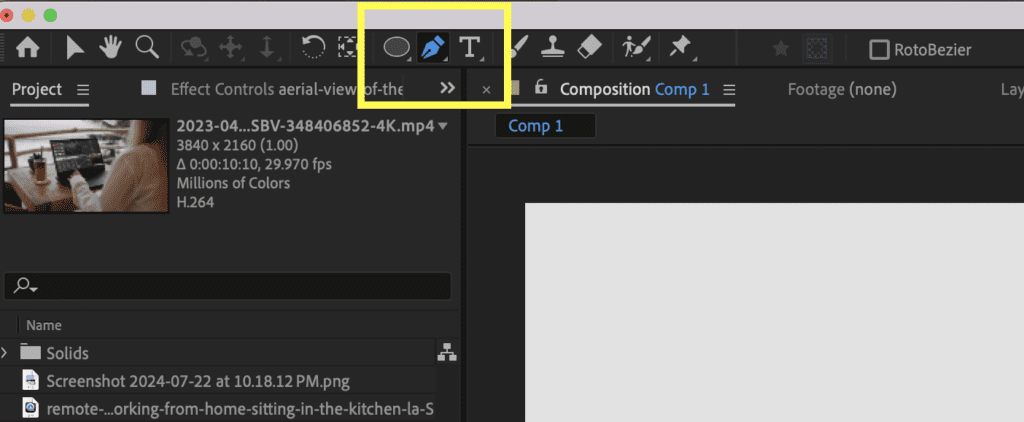
The most accurate method of masking a picture is with the pen tool. It can be used for intricate masking tasks so you can draw something specific and contoured to fit a particular shape within your image or footage. You’ll notice when you select the Pen tool that there’s a small mask icon that will appear next to your pen cursor.
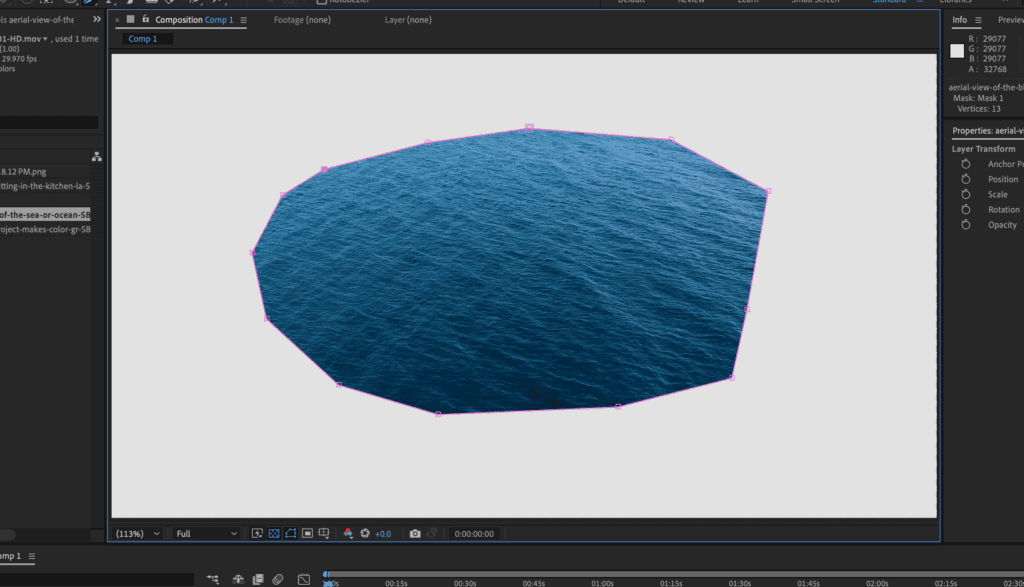
Make sure to construct a closed route, also known as a mask, while using the pen tool to build the masks. The pen tool is used to create a complete “shape” of a closed bath. It won’t be possible for you to make a mask if you leave an open path.
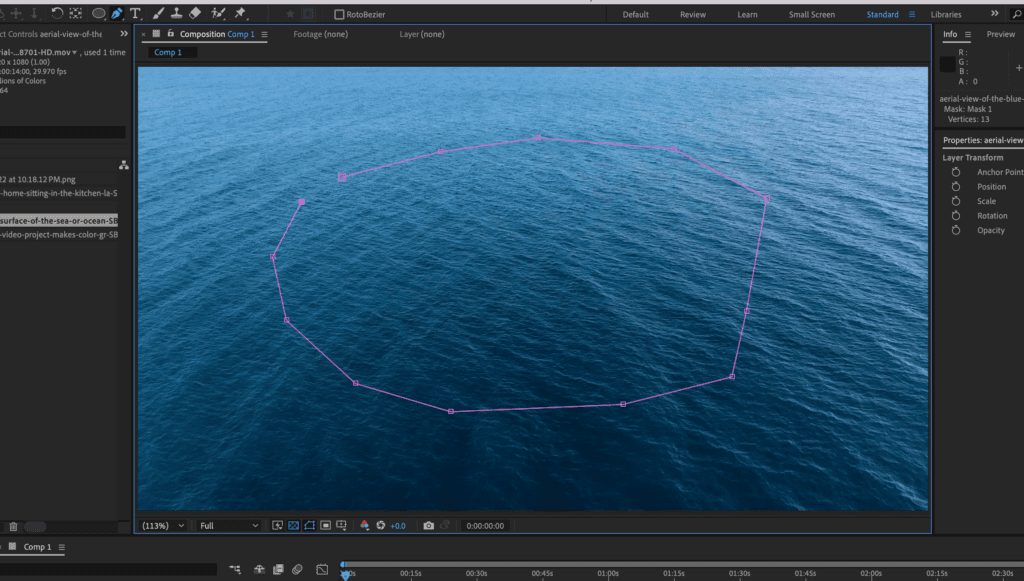
You can easily design your mask by selecting the pen tool or using the G key on your keyboard. To create shapes with rounded corners, click and drag your selected points. From here, there are several variant Pen tools are on the menu that let you add, remove, and change these path points. You can cycle through these variant settings by repeatedly pressing G.
Using the Shape Tool
You can create masks using the shape tool in simple shapes like circles, triangles, and squares. To mask off a portion of the frame, first make sure your layer is selected, then choose the mask tool. Next, click on any shape or navigate between the shapes using the Q key on your keyboard.
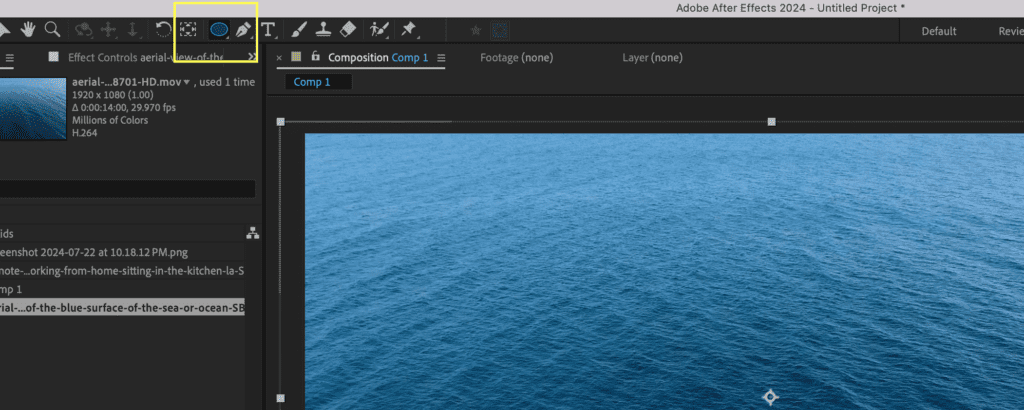
After you’ve chosen a shape, click and drag your mouse on the image. It will automatically create the shape for you in the direction you’re dragging it from and the mask will be applied to the layer.
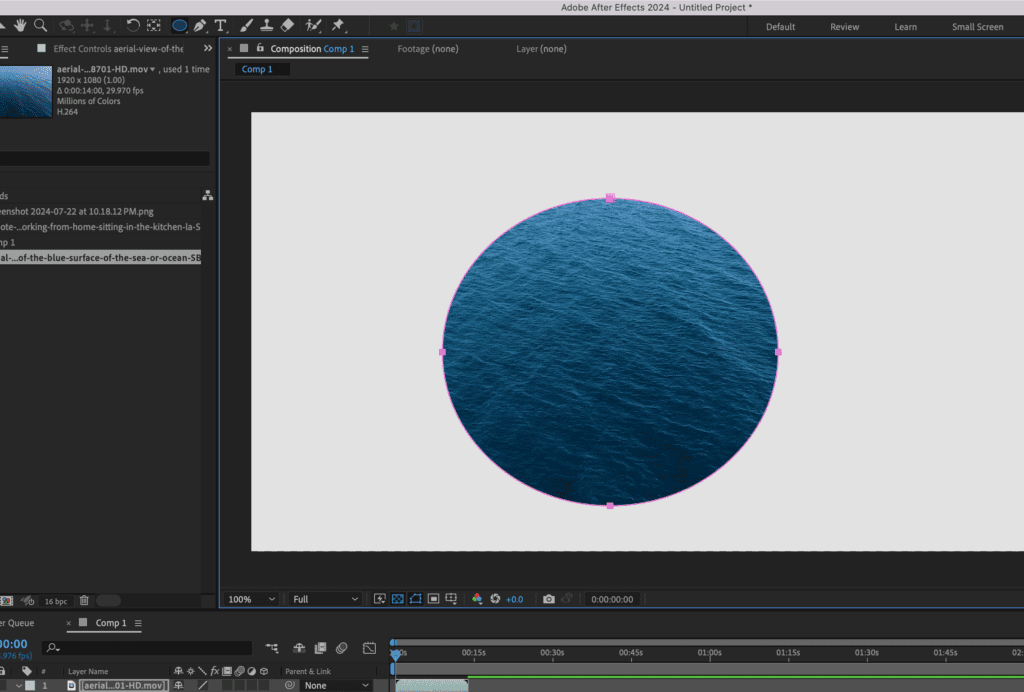
On a Mac, you can create the shape by pressing control or command, and the shape will be created from the center rather than from the sides.
By default, After Effects allows you to control the overall shape of the circle or square, which makes it difficult to create a perfect circle or square with equal dimensions. A workaround for this is to hold down Shift while you drag the shape over your image. This will lock the dimensions to remain equal regardless of its size.
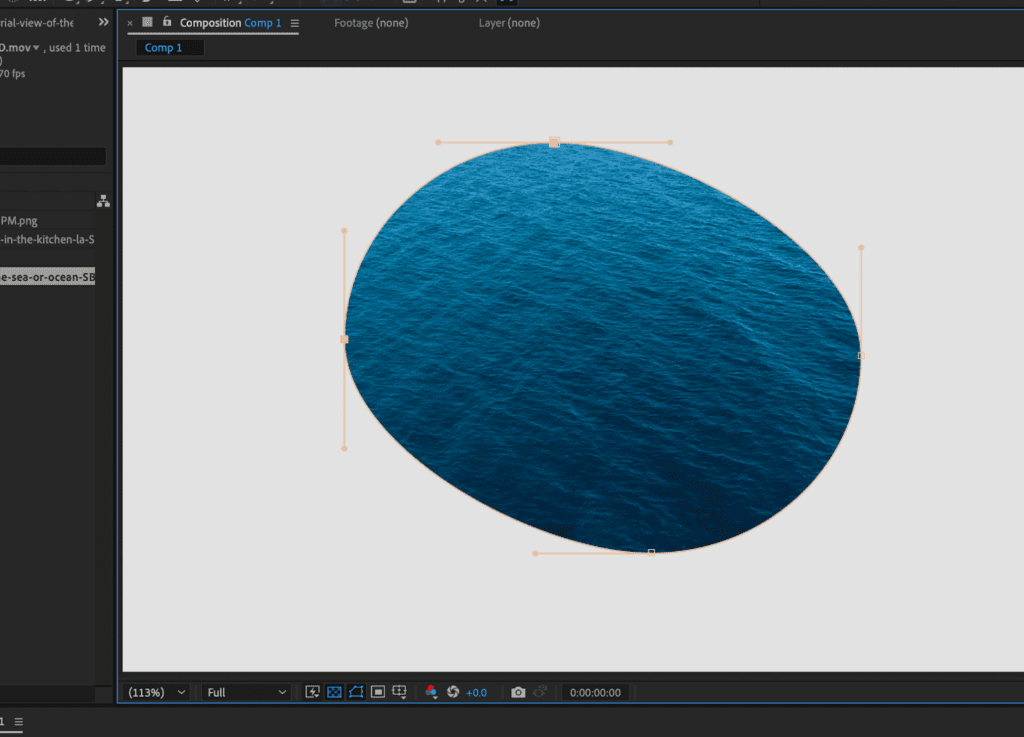
If you want to adjust the shape of your mask after you’ve adjusted its size, just make sure the mask layer is selected and click on the outline of the mask. You’ll see markers on four points of the mask that allow you to customize the shape, as seen below.
Choosing which tool to use
How will you know whether to use the Shape tool or the Pen tool? It’s entirely dependent on what you’re masking out. If the shape has many points and curves and unpredictable joints, then you’re better off choosing the Pen tool. However, if you need a simple window, door, or any shape that has straight edges, the Shape tool is for you.
Types of Masks
There are two types of masks; regular and shape layer masks. When you select your layer on your timeline you will create a regular mask. A shape layer mask is created when you don’t.
How to Create a Regular Mask
1. Choose your image/video on your timeline. Make sure to click on the layer you want to add your mask to as well.
2. Next, select the shape or pen tool icon on the top toolbar.
3. Finally, draw whatever shape you want on top of your image or video with your selected tool.
How to Create a Shape Layer Mask
You can create a shape layer mask through this process:
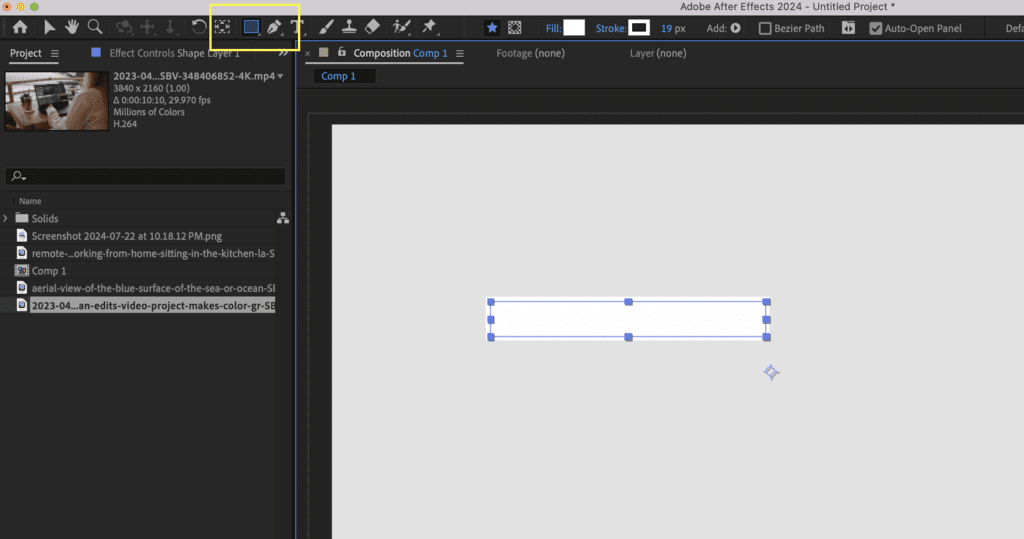
1. First, make sure no layer is selected on your timeline. Click the Shape Tool icon on the top toolbar. Then draw a rectangle (or whatever shape you want) on top of your footage or image. Ensure your rectangle shape layer is above the image/video layer in your timeline.
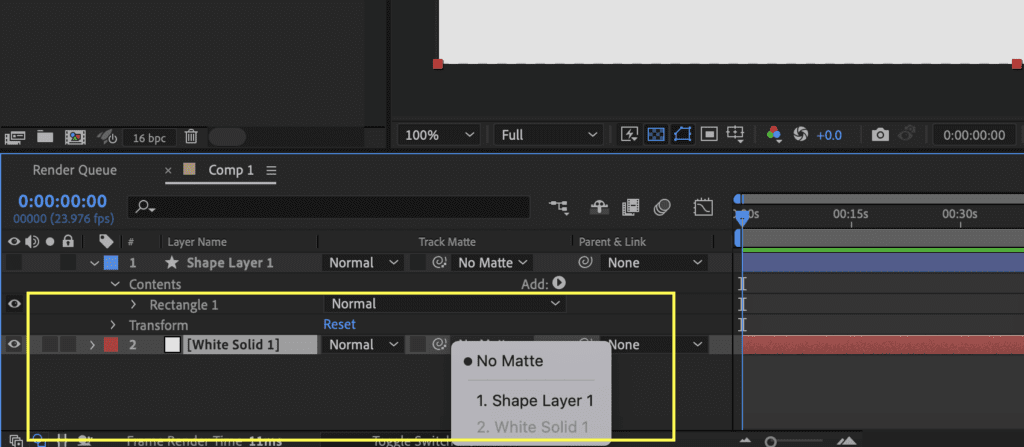
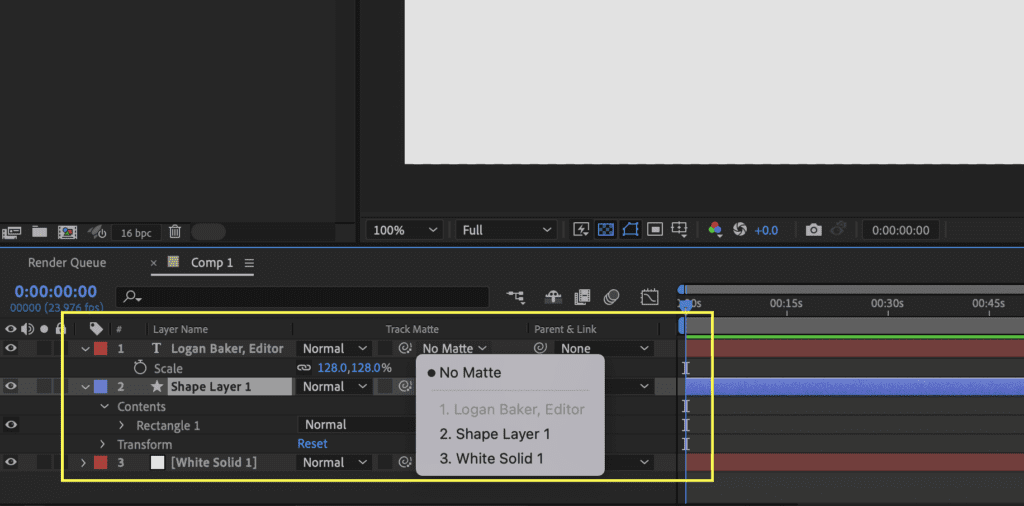
2. Next, select your image or video layer and change track matte to Shape Layer 1. This will flip the mask, adding your footage or image inside the shape rather than having the shape lay on top.
This technique can also be applied to creating lower thirds and title reveals. To do this, add another rectangle Shape Layer to your footage, then add your Text on top of the shape layer.
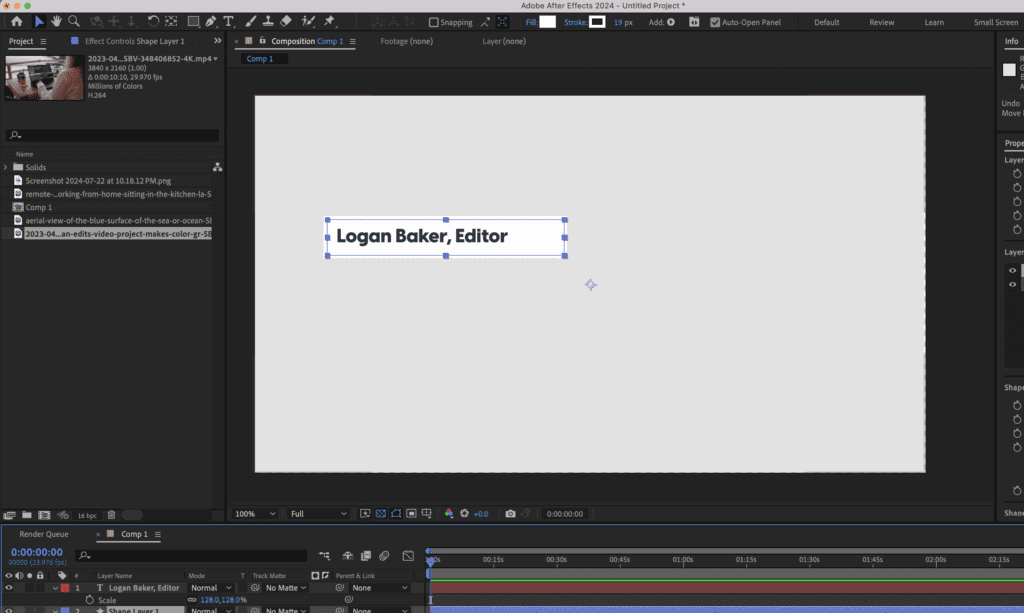
3. Next you’re going to change the Track Matte of your text to Shape Layer 1. This will link the text to your shape layer, allowing you to animate the text in and out of the Shape Layer on top of your footage.
4. From here you can animate the text to move from outside the shape layer mask where you will not see the text, to inside the shape layer mask revealing the text.

How to Animate Masks
Masks don’t always have to be static items that hide or reveal certain elements in a frame. They can be animated in After Effects the same way as other elements to provide stylish, smooth transitions and revelations. To animate a mask:
Step 1: Choose the mask you wish to animate in the layer it is sitting in.
Step 2: Collapse the drop-down and select stopwatch next to the Mask Path. This will generate a keyframe and the starting point of the mask.
Step 3: Move the playhead in time.
Step 4: Position the mask in the desired manner. This will be the final position your mask is animated to end in.
Step 5: Press the stopwatch once again. The mask will then transition from its initial position to its final position in the time you specified for the playhead to move.
You can keep adding keyframes to the mask path to slow down, speed up, smooth out the animation, and generally move the mask in various ways. To create a keyframe, drag the playhead to the time you want the current animation stage to end, adjust the mask’s size or position, and then click the stopwatch again.
Examples of After Effects Masking
Some examples of After Effects masking include:
Curved Masking
When you create masks using the Pen Tool, you create masks using straight lines. However, this type of masking involves creating masks with curved lines using Bezier curves.
Feathered-Edge Masking
Feathered-Edge masking involves softening the edges of a mask and can be done by pressing F on your keyboard, selecting the Mask Feather property, and dragging the yellow values to adjust the edges.
Inverted Masking
Inverted masking involves masking out everything except what is inside the mask and reversing it so that everything shows except what is inside the mask.

Utilize Storyblocks Templates for Easy Video Content Creation
There you go! With this guide, you are well on your way to creating that stunning graphic. Storyblocks is here to make your journey easier. Unlock access to our library of over a million royalty-free footage, music, Adobe Premiere Pro and Adobe After Effects templates, photo assets, as well as an easy-to-use video editor to kickstart your graphics design journey. We offer unlimited downloads so you don’t have to keep hunting for video, sound, and image production assets. Get started today.


