
Want to add a stylized, retro or vintage look to your footage? Classic analog aesthetics will never go out of style and are one of many ways to add production value to your work. To create this effect we’re going to look at a few editing tips and tricks in Premiere Pro. No matter your skill set with editing or if you’re a beginner using Premiere Pro, creating and applying a retro look to your footage is easier than you might think.
Whether a client is asking for specific retro looking visuals to match a brand campaign, or if the story you’re telling requires an older, vintage aesthetic like a film set in the 70’s, these techniques will help get your project to the finish line. Let’s get started! If you’d prefer a video tutorial, you can follow along with our YouTube tutorial.
How to Make Video Look Vintage in Premiere Pro
1. Add an Adjustment Layer
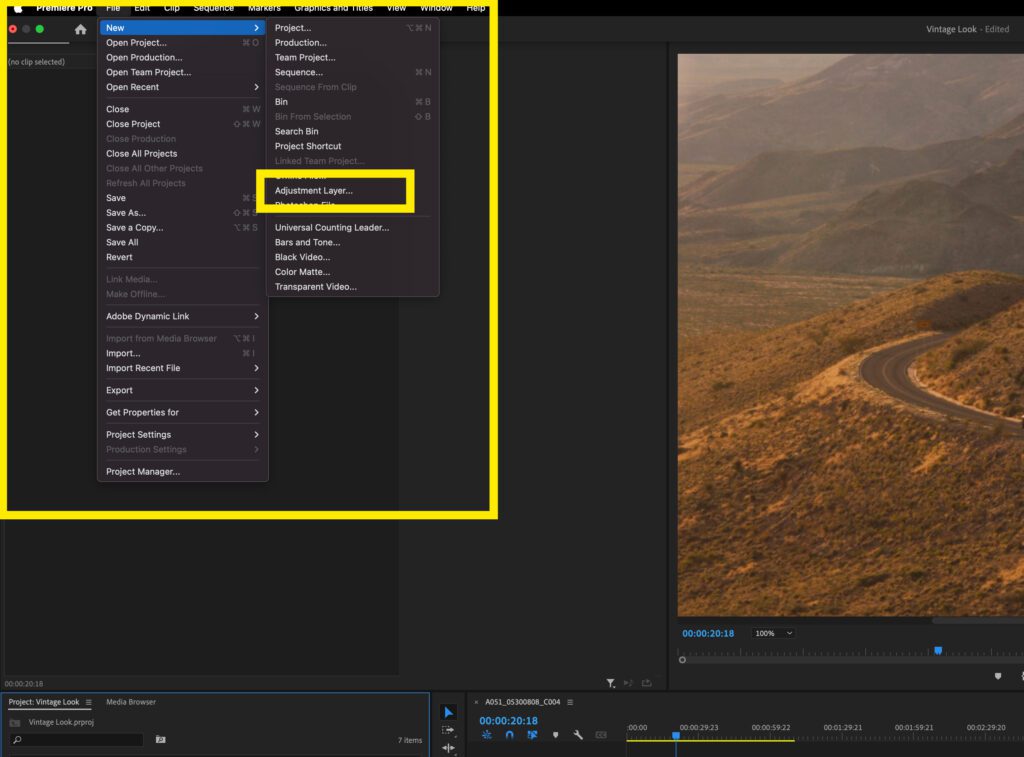
To kick things off we’re going to add an Adjustment Layer to your timeline. With Premiere Pro open and footage added to your timeline, go to the Project panel, click on the New Item icon and then select Adjustment Layer. You can also go to File > New and then click Adjustment Layer.
Next, drag the Adjustment Layer from your Project panel over the top of your clip. If you want a quick refresher on adding adjustment layers to your timeline, check out our tutorial.
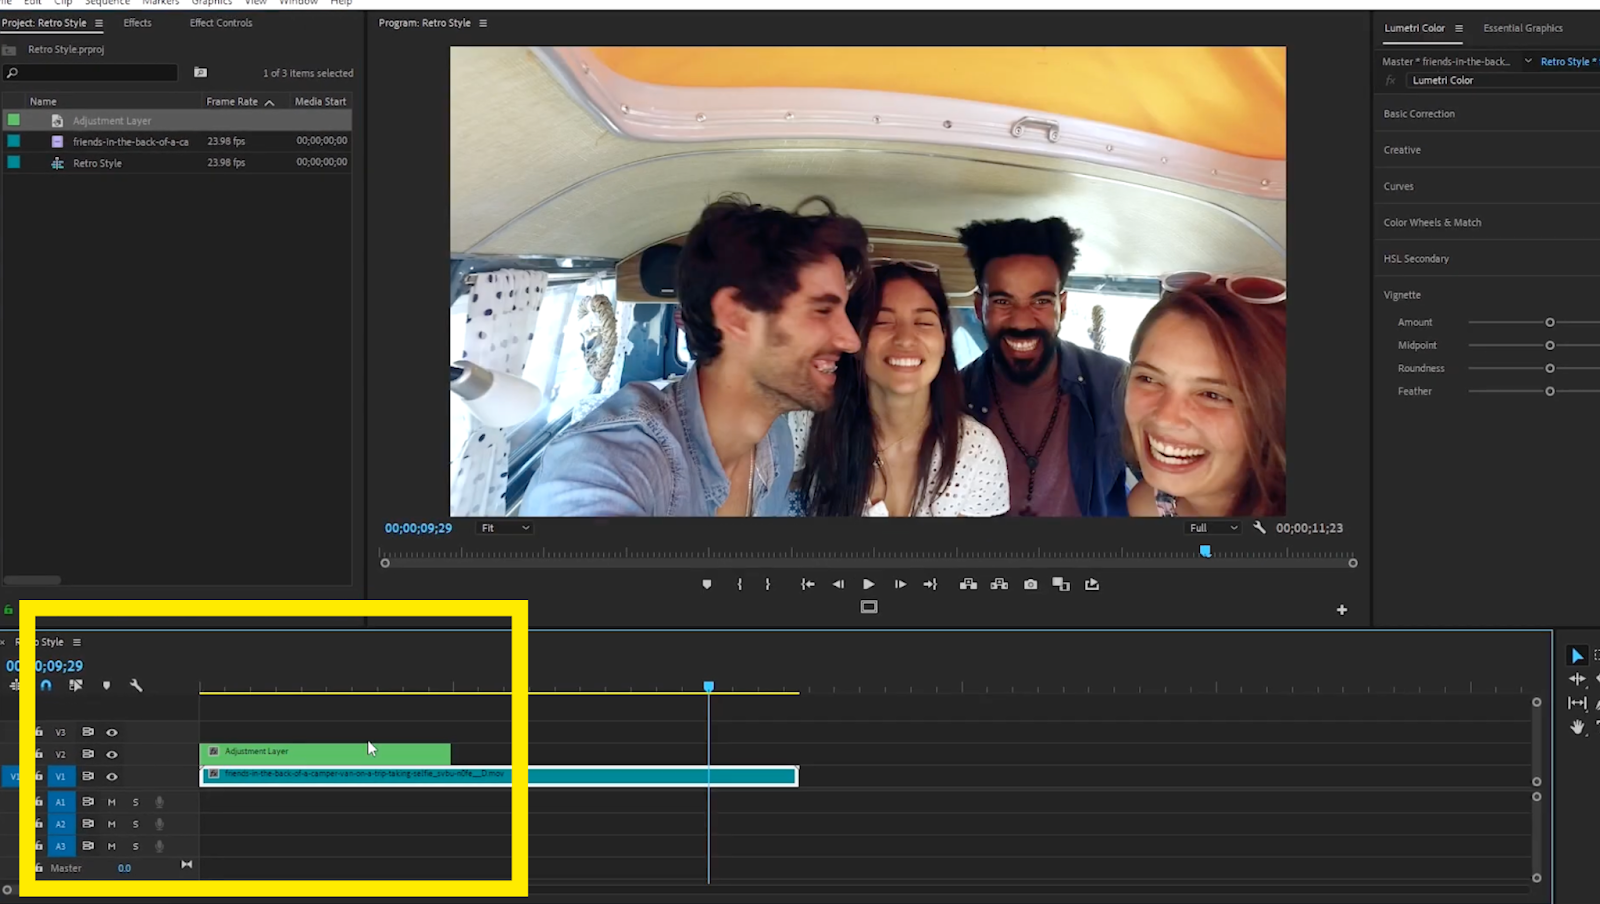
As we go through the steps of stylizing your video in a vintage way, we’ll be applying all of the effects to the Adjustment Layer rather than directly onto your clip. You can quickly turn the Adjustment Layer on and off to compare the look of the original footage by clicking the “eye” icon on the left side of the clip, to the added effects.
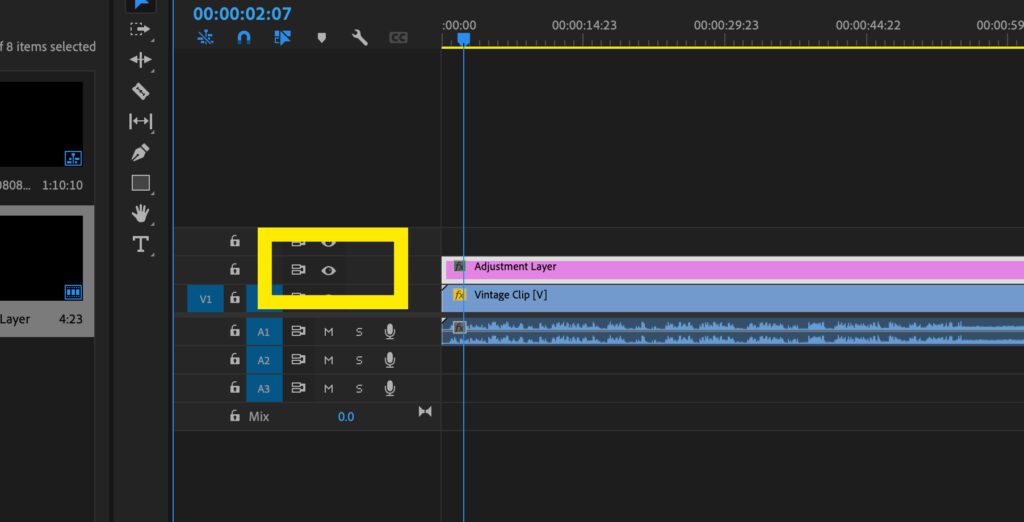
This is useful for giving you context for how much the clip has changed from its original state as well as giving you the ability to show clients the before and after version.
2. Adjust the Contrast and boost the Highlights
With the adjustment layer selected on your timeline, click the Window tab at the top of your screen and choose Lumetri Color. This will allow you to tweak the exposure and overall saturation of the clip, giving you a more washed out, warmer, vintage feeling.
Since older camcorder cameras didn’t have the dynamic range that we’re used to seeing today, blow out the exposure of your footage just a little bit. You can do this by raising the Exposure as much as you see fit. We recommend 1.5 – 2. You can also raise the Highlights a bit to really create that sense of overexposure.
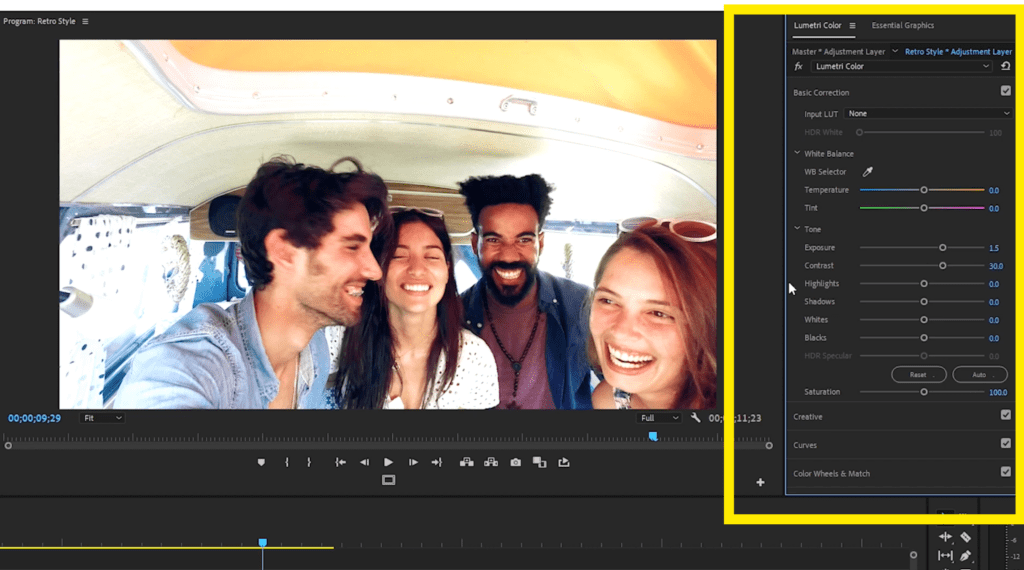
Older footage tends to have punchier contrast so increase the Contrast by however much you see fit. If you’re working with a flat or log footage, you’ll probably need to increase the contrast much more. If you want an all-encompassing tutorial on the basics of using the Lumetri Color panel, be sure to check out this tutorial.
3. Increase Faded Film slider
In the Lumetri Color panel under the Creative tab, bring Faded Film to around 70 to give your footage a flat, washed-out look. Even though you just increased the contrast, this serves as more of an overlay effect that is on top of your footage.

4. Decrease the Sharpness
Next, let’s soften that clip. Older footage compared to HD footage, isn’t as sharp, or as vibrant, these cameras usually were shooting at about 480i quality or worse. So we’re talking low quality, standard definition footage.
To get this softer look, decrease Sharpen to -50 and decrease the Vibrance to -40 in the Lumetri Color panel.
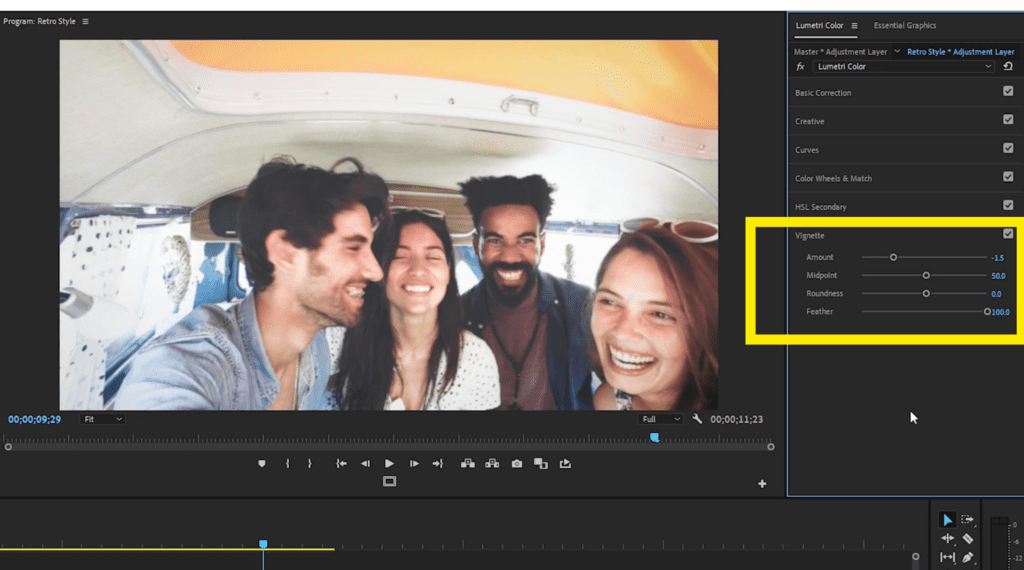
5. Add a Vignette
Adding a slight vignette will give you the effect of an older lens that naturally adds a vignette from its casing around the glass. Adjust the Vignette Amount to -1.5 and Feather to 100, which will subtly darken the edges of our footage.
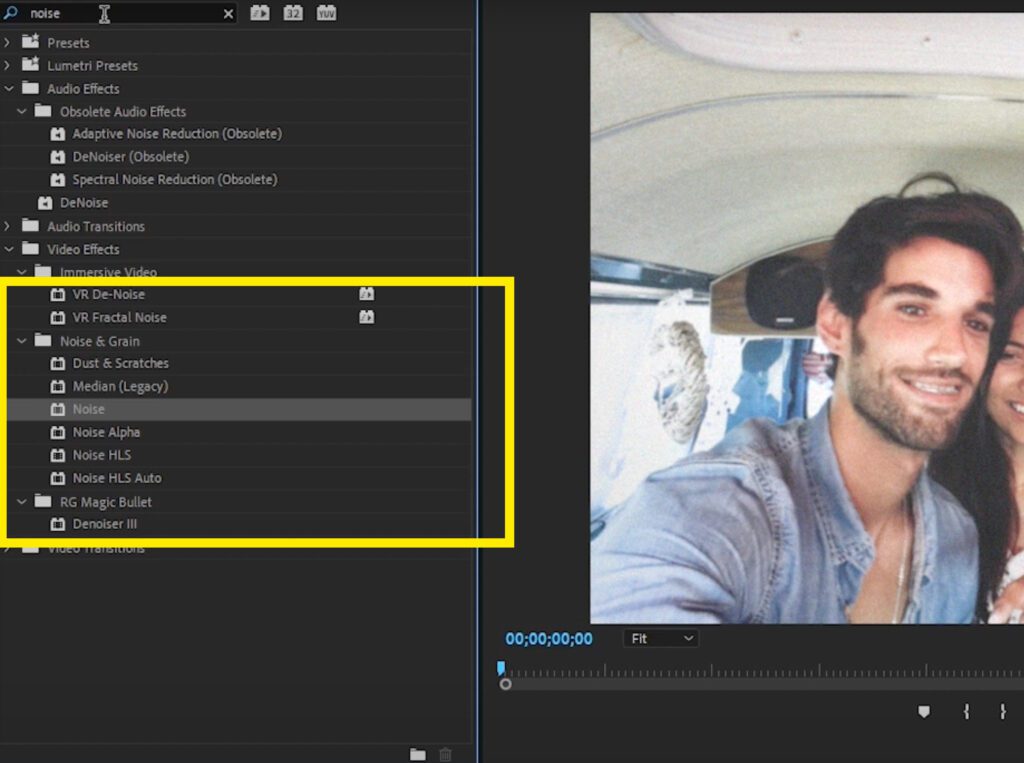
6. Adding Grain and increasing Noise
Next we’re going to add some noise to our footage. In the Effects panel, search for the Noise effect and select Noise under the Noise & Grain folder. Then drag the Noise effect onto the adjustment layer.
Now, go to the Effect Controls panel and set the noise to 20% or to taste, based on how much grain you’d like to add into the footage. If you’re creating more of a film look, or if your shot was underexposed or in the dark, you’d want to increase this much more to emulate an underexposed film stock.
Another way to add grain to your footage in Premiere Pro is by throwing on a film grain overlay. Storyblocks has several types of film grain overlays to choose from offering different details like scratches, film burns and light leaks.
7. Create a Warping Effect
Next, let’s re-create the warping effect that sometimes appears on VHS tapes. Think of this effect as one part of the image swiping across or side-to-side as if a new image is loading continuously.
To find the effect, search for the Wave Warp effect in the Effects panel. Then drag this effect onto your Adjustment Layer. Next, go over to the Effect Controls panel to adjust the Wave Warp effect. Change the Wave Type to Square by clicking on the dropdown menu. Then set Wave Width to 1000 and change the direction to 0 so that the line shows horizontally. (Or you can set it vertically, whatever your personal preference is.)
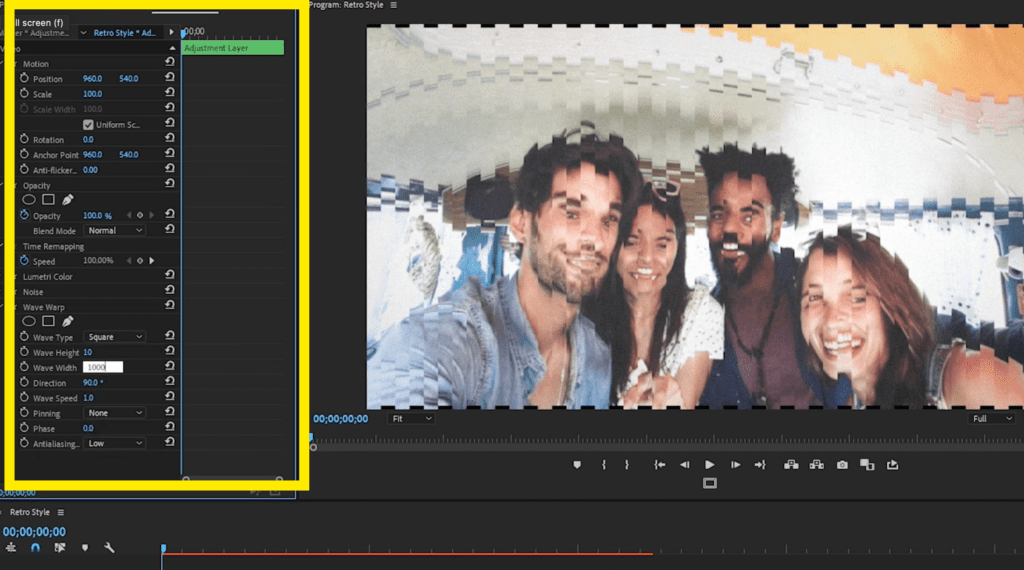
Finally, adjust the Wave Speed to -0.1, click on the Pinning dropdown menu and choose All Edges, so that you don’t see any of the black edges on the sides of your clip.
8. Add a colored gradients for a nostalgic look
Next we’re going to add a gradient on top of the clip. This gives the image a “worn out” feel, as if the bottom half of the shot is fading a bit. Search for the Ramp effect inside the Effects panel and drag it onto your adjustment layer. This effect allows us to create a gradient. We’re going to add a warm orange overlay to this clip to give it a 70’s vibe. You could also choose a blue-ish hue and the vintage effect would work just as well.
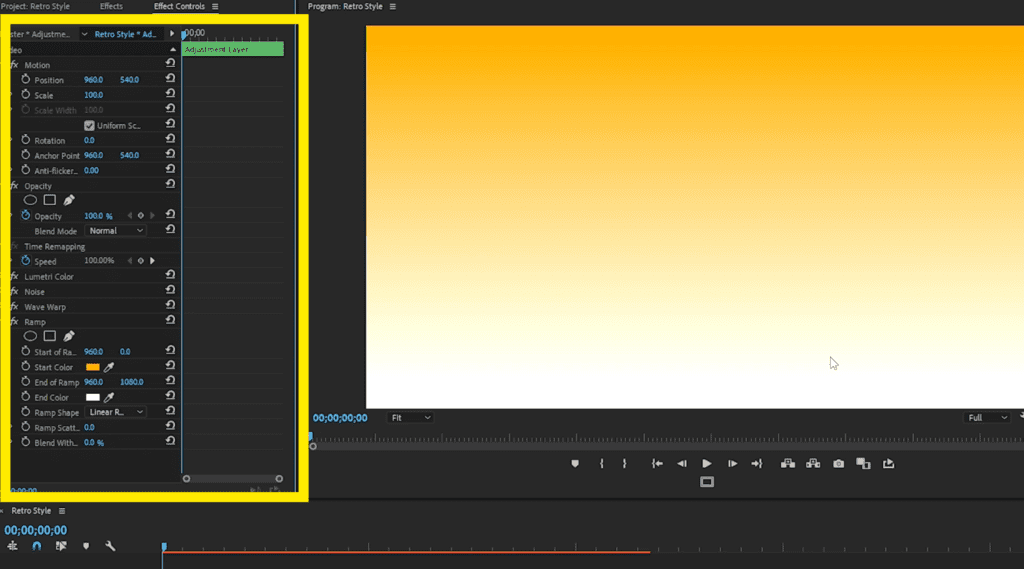
Click on the Start Color box that shows the color on the top half of the gradient and pick an orange hue. Be sure to keep End Color white, as this will blend in with the original clip much easier. Now, adjust the Blend With Original setting to around 80% so we can see the clip through the gradient.
9. Add VHS-inspired text onto your footage
A retro inspired video wouldn’t be complete without a date in the corner. To add this, open the Essential Graphics window, choose the Type tool, click on your Program Monitor, and type a date. I recommend you find a retro style, commercial use, free font like VCR OSD Mono, or Kindly Rewind Font to really emphasize that camcorder/VHS feel. You can find this font here.
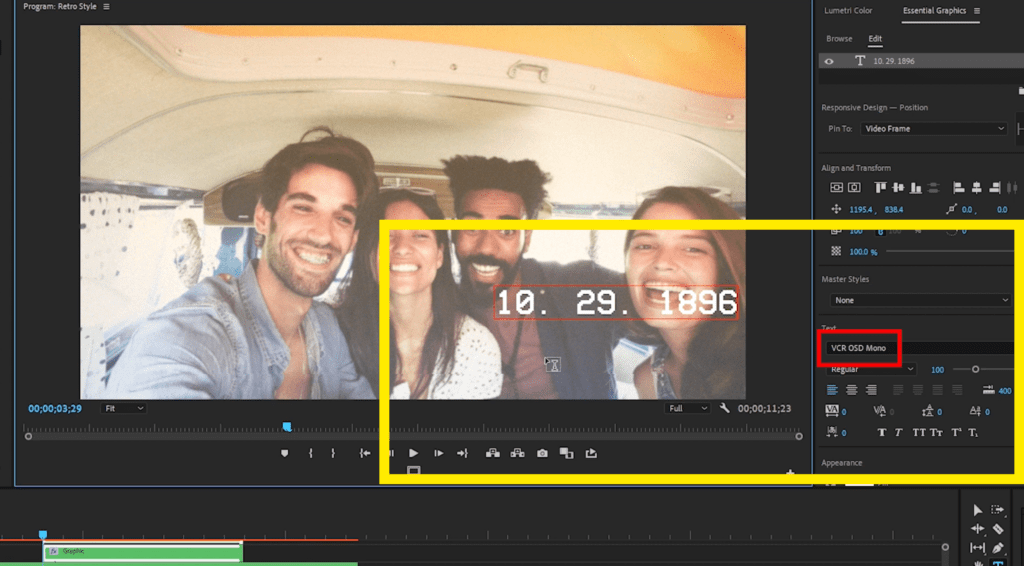
Use your Selection tool to adjust the position of your text to the bottom right of your Program Monitor. Next, bring the text layer that was created on your timeline underneath your adjustment layer so that the effects on the adjustment layer also affect the text layer.
If you want to bypass this entirely, you could use one of our very own VHS-inspired overlay packs that come with text and play button overlays already applied to the clip.
10. Add the Posterize Effect
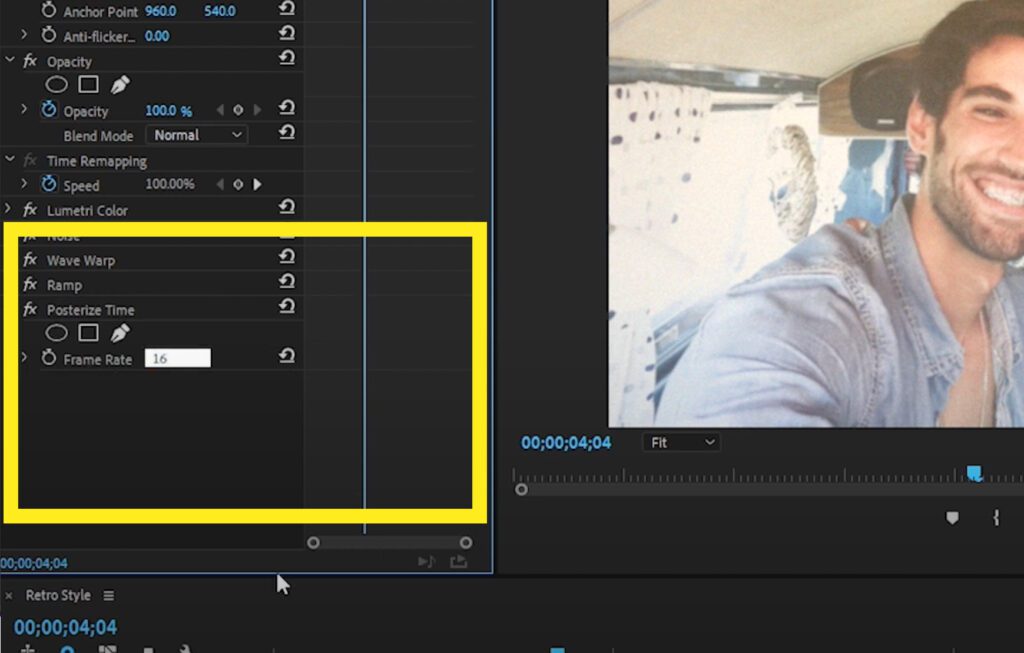
Lastly, to finish off our retro look, let’s remove some of the frames from the clip. Oftentimes with older camcorders and especially film cameras, frames would get dropped due to malfunctioning tech or the film jamming for half a second, causing the frame rate to be every-so-slightly off.
To do this, search for Posterize Time in the Effects panel and add it to the adjustment layer. In the Effect Controls panel, change the frame rate to 16 within the Posterize effect.
11. Add Channel Blur to your footage
For our final step, let’s play with the color channels. First go to the Effects panel, choose Channel Blur and drag it onto your adjustment layer. This effect lets you move the red, green and blue color channel vertical or horizontal. So it gives you that hyper stylized VHS effect.
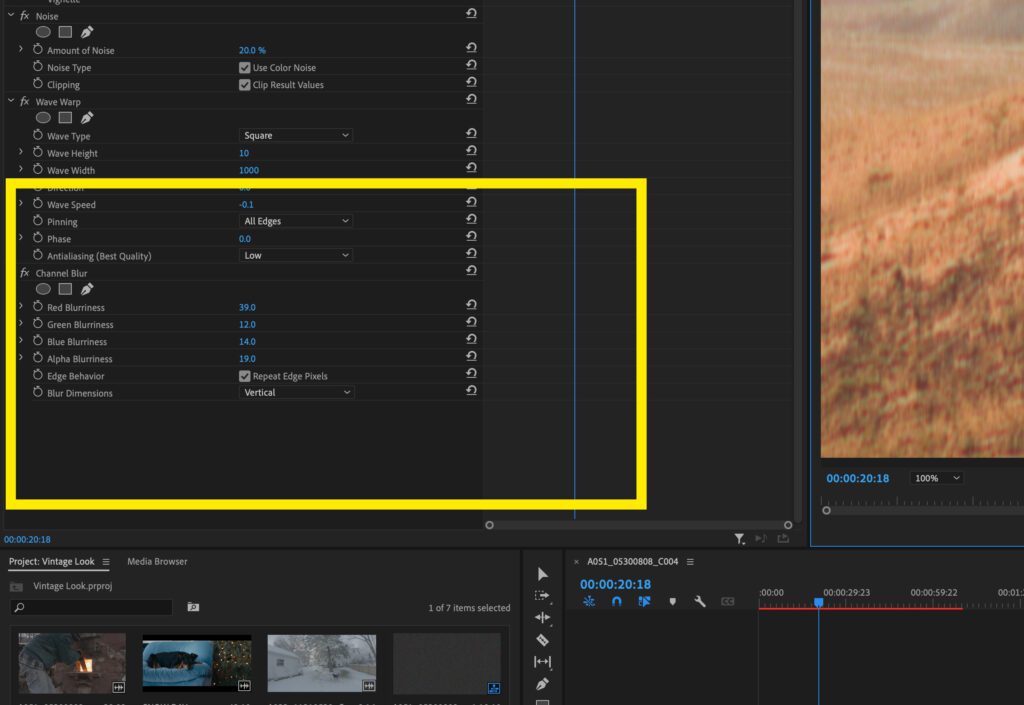
Before you start playing the blur amounts, be sure to click the dropdown next to Blur Dimensions and click Vertical. The results of this effect almost look like halation over your images, kind of a rainbow colored glow being emitted from the subjects in your shot.
With that, your footage should now have a vintage effect applied all the way through it!
Save time with premade vintage Premiere Pro Templates
If you’re short on time or new to Premiere Pro, applying film and retro overlays is a great way to make your footage look vintage. You can also combine them with our tutorial above to create a unique retro look. The best part about these templates is their customizability. Tweak the colors to match your video and you’ll be blown away by how convincingly vintage your footage looks.
Whether it’s a 90’s-era VHS look or old film stocks with scratches, there’s plenty of options for every time period or style available in our library here.
Vintage Style Intro
This fun, colorful 80’s-era intro is a great way to set the tone for your next vintage project. There’s plenty of looks and color schemes to play with here, with bold backgrounds and fun animated text.
Old Film Intro
If you’re wanting to add more of a 90’s-era vibe, this Premiere Pro template is for you. By completely desaturating the image and creating an almost sepia tone, this template gives a vintage aesthetic to your project.
VHS Opener
This Premiere Pro template does two things very well. It recreates a VHS tape look while also including fun, era-appropriate animated titles. What more could you ask for in a template?!
VHS Retro Overlays
Lastly, if you want an all-encompassing solution for creating a nostalgic atmosphere for your project, look no further than this overlay pack. There’s a little bit of everything in here from VHS overlays to film borders with scratches and grain.
Download unlimited Premiere Pro templates with a Storyblocks plan
As you can see, re-creating a vintage look for your footage isn’t too difficult. With just a few tweaks to the exposure, some noise added and a little tweaking of the colors inside Premiere Pro – your video will have that retro feeling straight from the past.
To download vintage or retro Premiere Pro templates, sign up for a Storyblocks subscription and unlock unlimited downloads of 4K and HD footage, sound effects, templates, music, and more.
Editor’s Note: This post has been updated to include additional information. It was originally published on December 12, 2019.

