Finding a design technique that is simple, budget-friendly, and versatile is like discovering the holy trifecta of content marketing. As elusive as that may sound, one of our favorite design hacks meets all of those criteria: cropping. It’s an incredibly easy technique that saves time and money, allowing you to create completely new designs that pack a punch. The best part? You don’t even need Photoshop to get the job done.
We’re going to show you how to do some creative cropping in GIMP—a free Photoshop alternative. With just a few clicks, you’ll have three completely different images that each tell their own story. Then, we’ll show you how each image can shine in your digital marketing campaigns. Now, on to the tutorial.
How to Crop in GIMP
Step 1. Open your file in GIMP
For this tutorial, we started out with a photo of two women having drinks. To open the image in GIMP, simply go to File > Open and select your image.
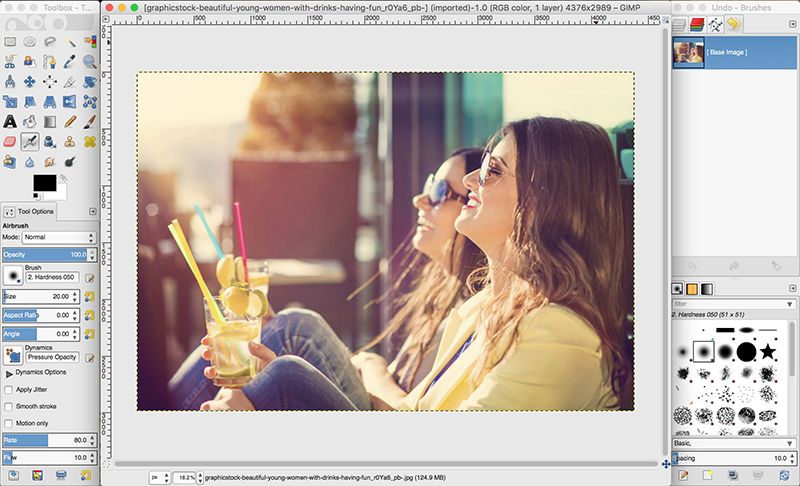
Step 2. Select the crop tool
In the toolbar on the left side of your screen, select the Crop Tool (the icon looks like a utility knife). Then, just click and drag anywhere on the canvas to create a frame. Similar to Photoshop, whatever is outside of the frame will be cropped out.
Once you’ve drawn the cropping box, you can adjust the size by clicking and dragging the edges. If you’re trying to crop your image to specific dimensions, you can go to the “Size” section under “Tool Options” on the left-hand side and type the dimensions directly into the box.
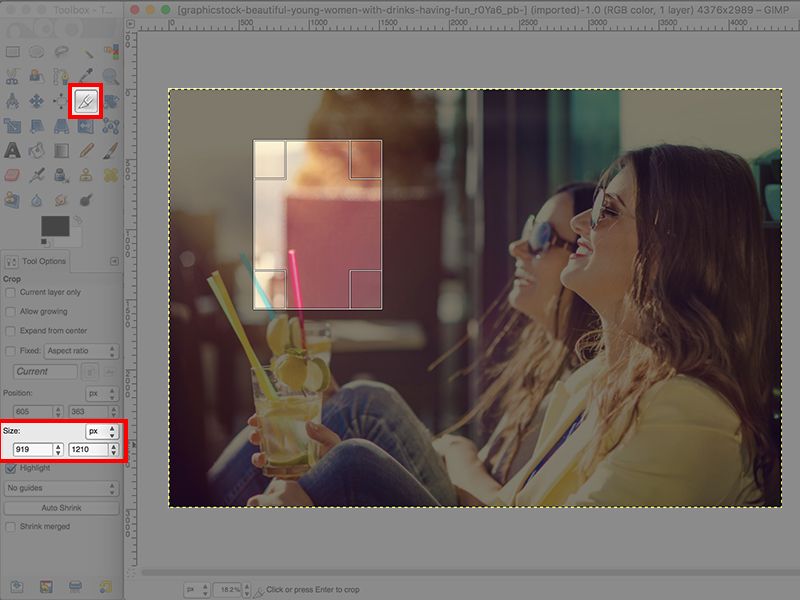
In this example, we used the recommended dimensions for Instagram stories (1080px x 1920px).
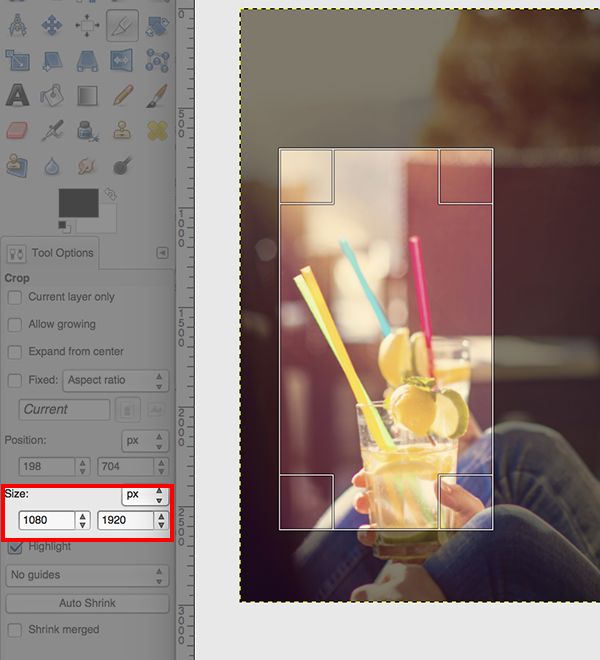
Step 3. Scale the image (if needed)
You may decide that you want to zoom-in on certain elements of the image, all while maintaining the desired dimensions. In this case, all you need to do is scale the image. You can leave your cropping frame as-is and just go to Image > Scale Image and play around with the size of your original photo.
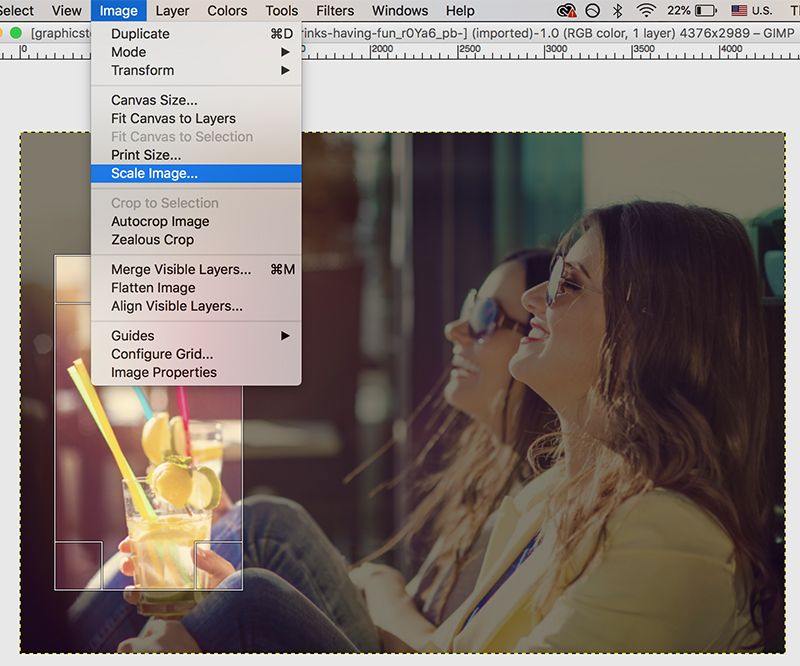
Once you’ve scaled your image, you’ll see that the cropping frame has remained the same size while the size of the original image has changed. To move the cropping frame, just select the middle of the box and drag it to the desired area of the image.
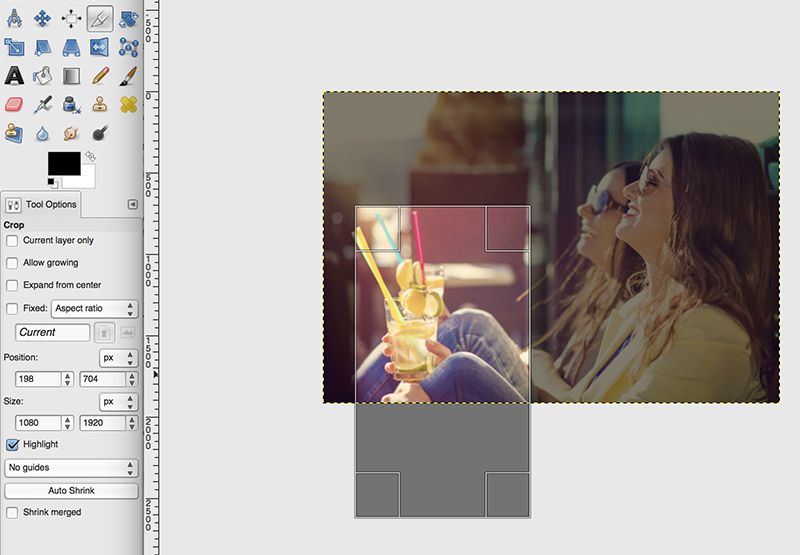

Step 4. Crop away!
Once you’re happy with the layout, hit enter to crop your image. You can then export the image to a different file format by going to File > Export As, then selecting the file format by extension (you’ll find this option at the bottom of the window).
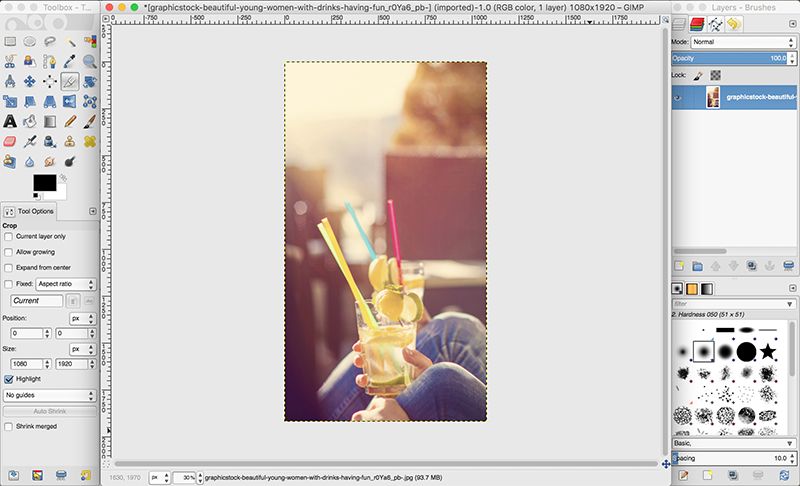
Cropping Images for Different Platforms
Now that you’ve cropped an Image in GIMP, it’s time to put it to use! We used our freshly-cropped image to create a happy hour ad for a local bar. The empty space at the top of the picture was perfect for text, so the image works exceptionally well for an Insta story. If you are new to Instagram, read more about cropping images to the right dimensions for Instagram Stories.

We then went back to the original image of two women having drinks and cropped it in GIMP to create a Facebook ad. Facebook’s recommended dimensions are 1200px x 628px, and we used the same process outlined above to create our new image. This time, we focused exclusively on the women’s faces, creating an entirely different feel from the Insta story we made before. Looking at our two cropped images, you wouldn’t even know that they came from the same photo!

But why not have the best of both worlds? We created a hero image in GIMP that kept both the women and the drinks in the frame, but with dimensions that were better-suited to a website or email header. This way we retained the feel of the original photo while optimizing it for other content marketing uses.

Cropping can have a significant impact with only a little effort, so start taking advantage of this design hack! For more cropping adventures, check out our tutorial on how to creatively crop in Photoshop.


