With emojis, face filters, a 24-hour time limit, and the infinite possibilities of sequential storytelling, Instagram’s Stories feature offers a unique opportunity for users and brands to just have fun. But don’t let the casual nature of the feature fool you—when it comes to Instagram for business, Stories can turn browsers into customers with a swipe. These days creators are pulling out all the stops to generate new and exciting content for Stories. If you’re wondering how to take your Instagram Stories to the next level, look no further than high-quality photography.
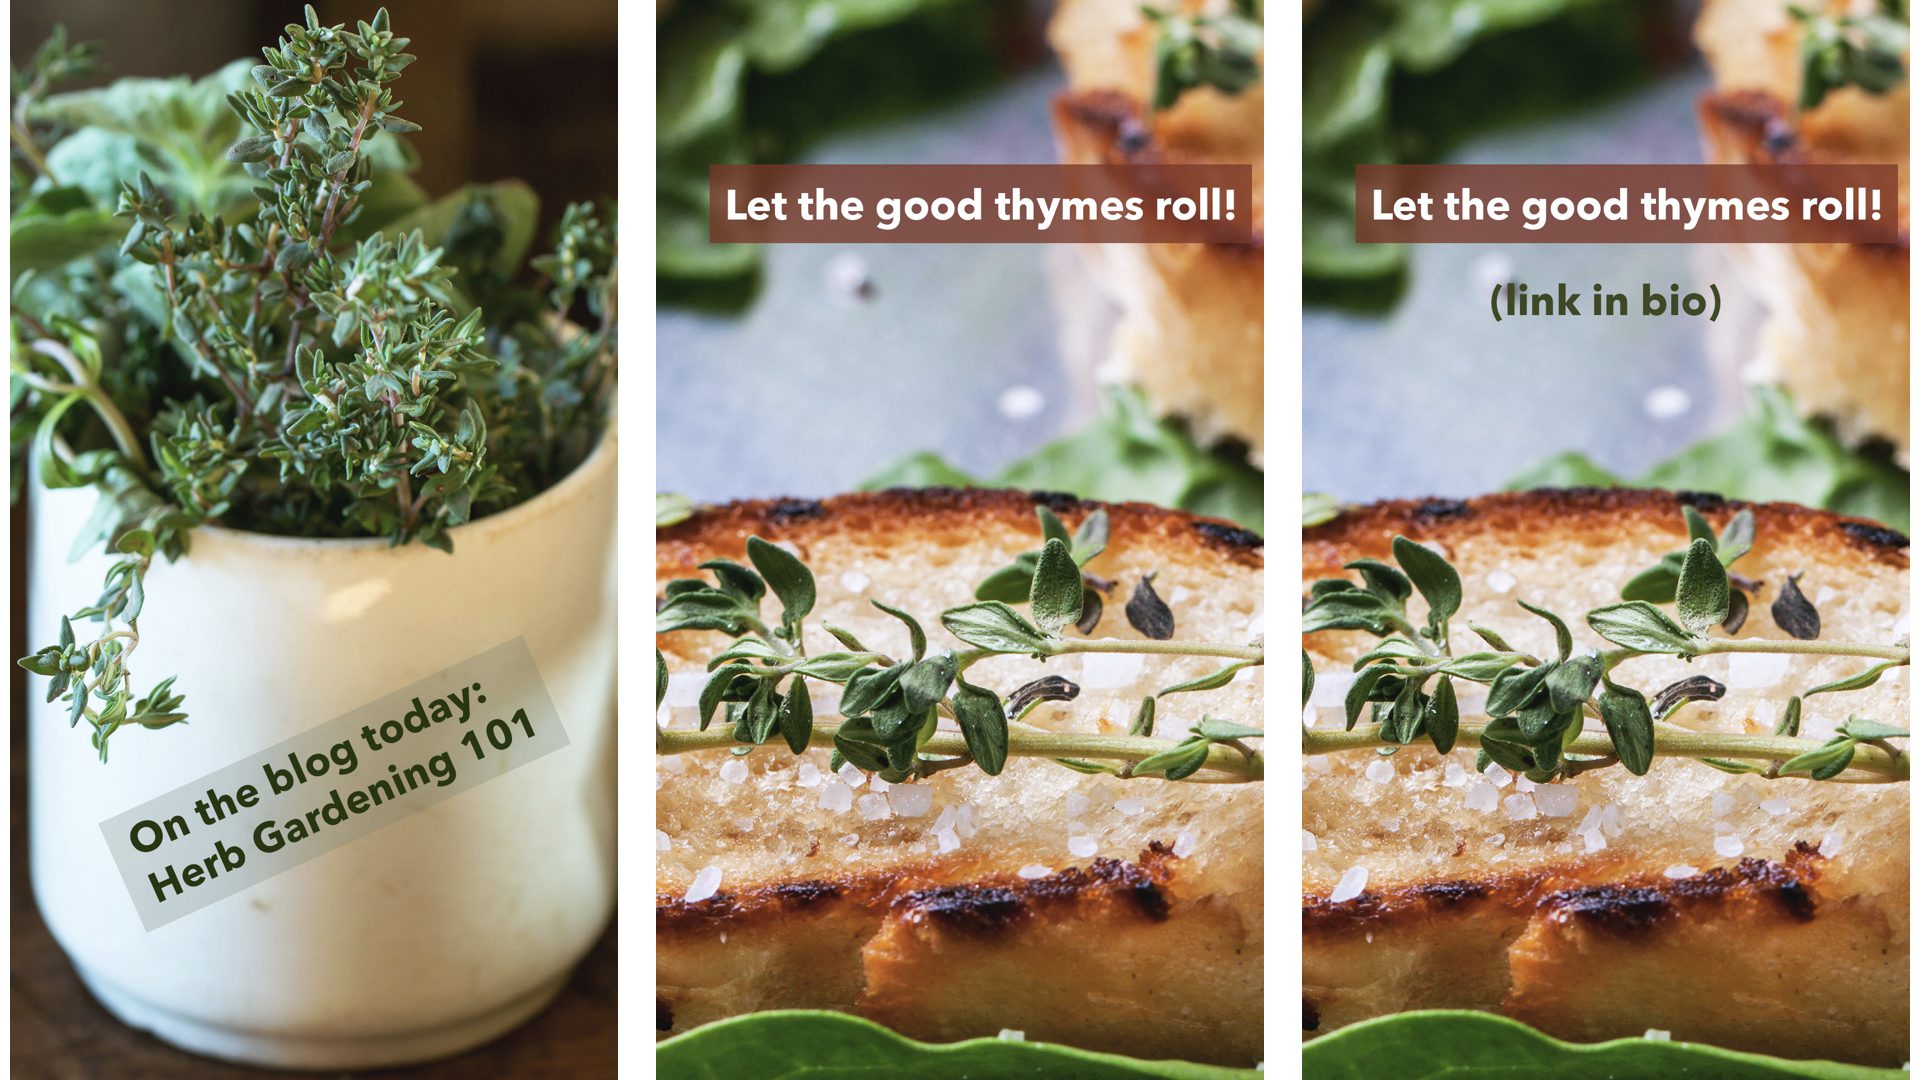
If you’ve ever tried to upload images taken outside of the Instagram app, however, you’ve likely gotten some odd cropping results that aren’t as #instacool as planned. Luckily, this frustration is easily quelled with Photoshop. In a few simple steps, you can crop any image for Stories. In this tutorial, we’ll learn how to create a sequence of Instagram Stories posts using these images of fresh herbs and crispy croutons.
1. Set Up Your Document
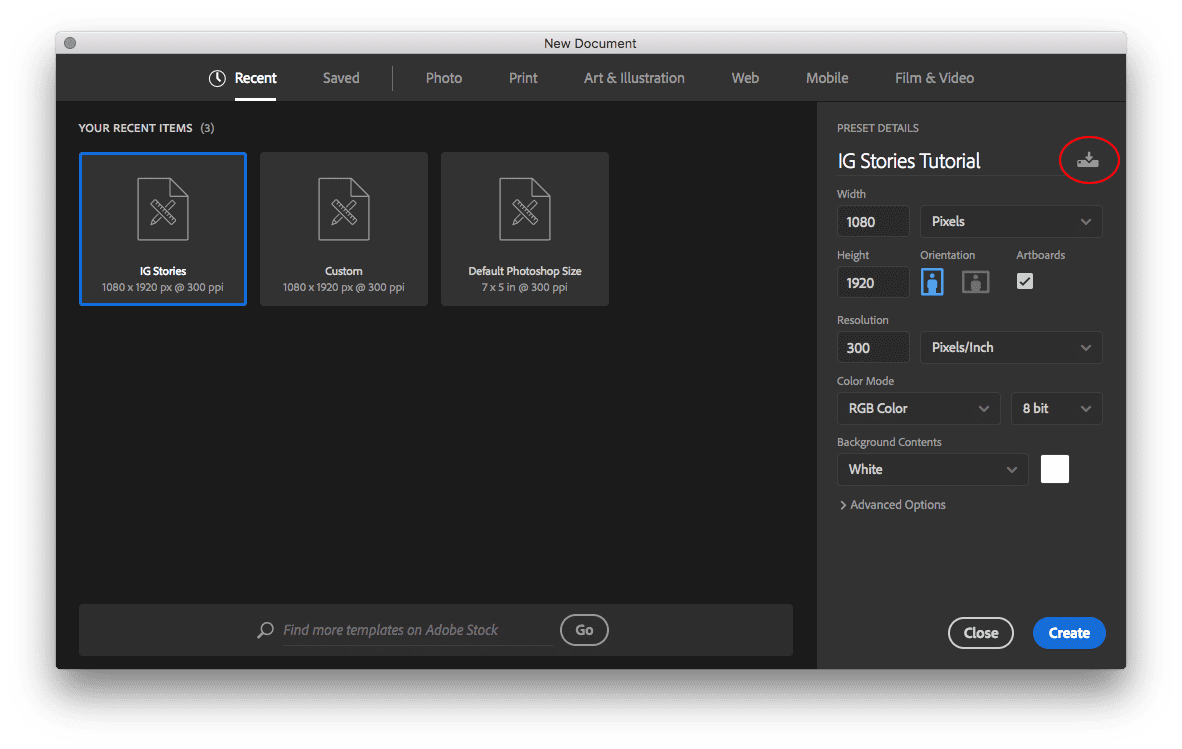
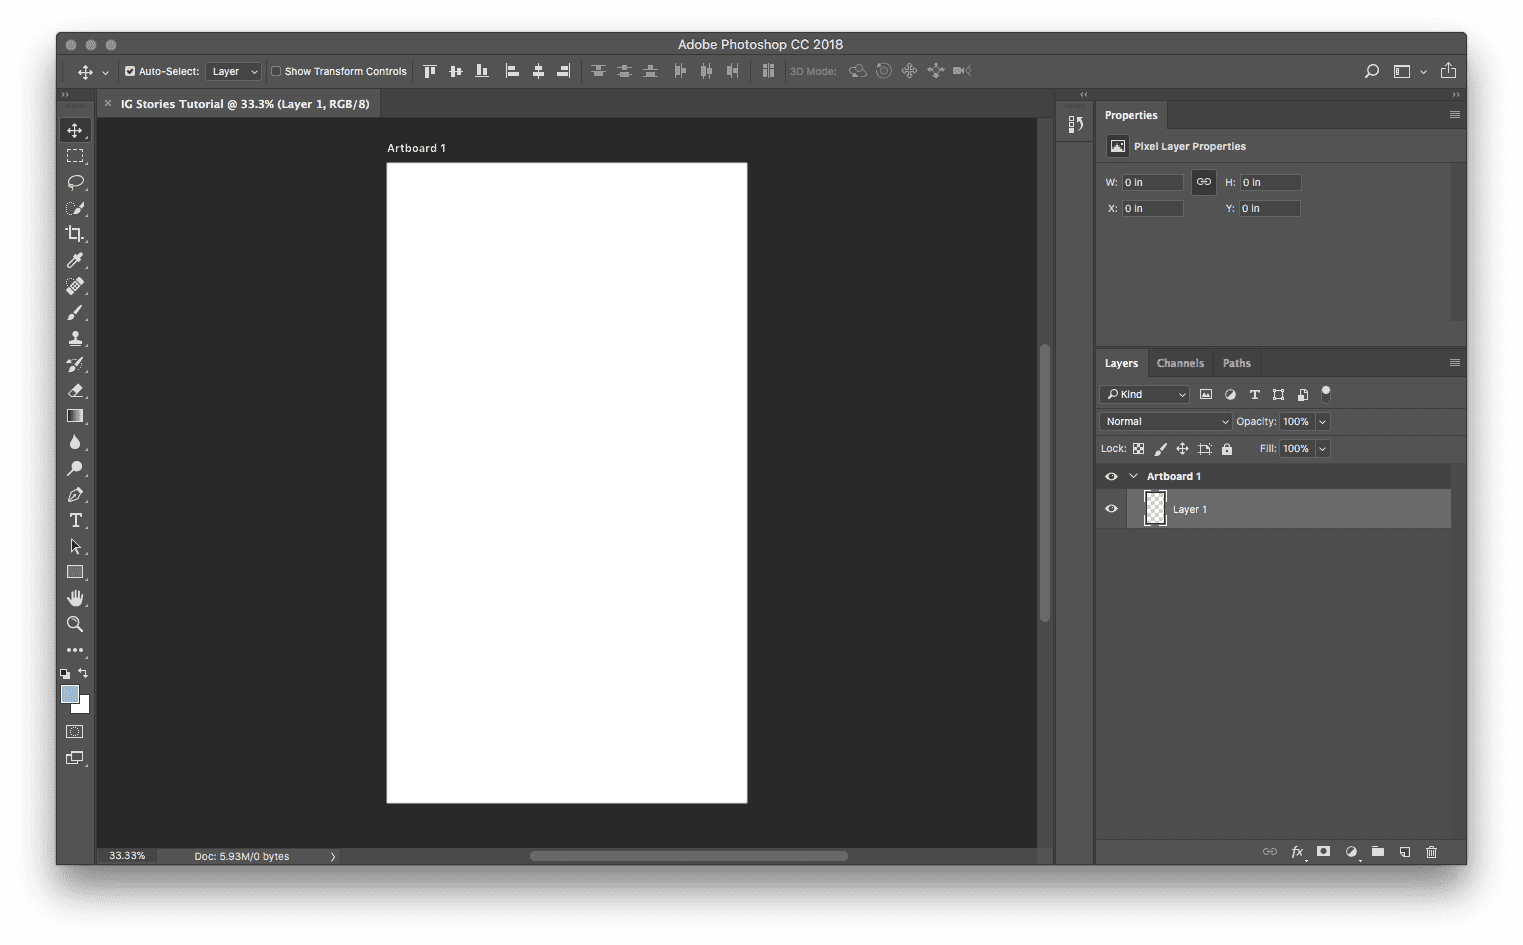
Start by creating a new document in Photoshop. Under Preset Details, change the width to 1080 pixels, and the height to 1920 pixels. Next to the resolution settings, check the Artboards box (Creative Cloud only).
At this point you may want to save these settings as a preset for next time. Just click the save icon for easy future access.
2. Crop and Resize
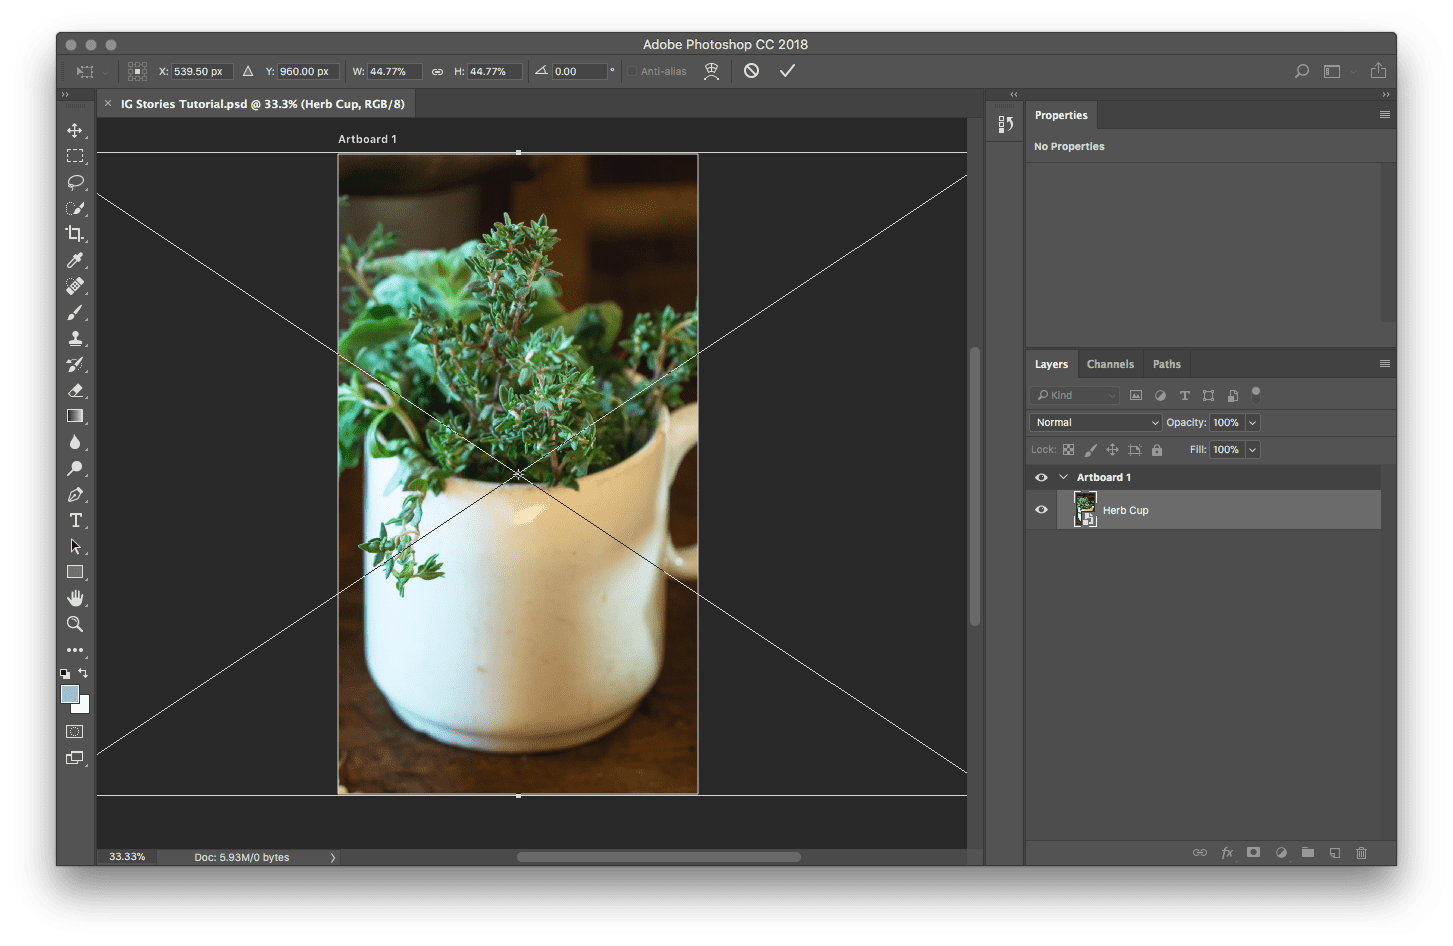
Next, drag and drop your downloaded image onto the Artboard to insert it in the document, and use the corners to resize. Hold Shift while you drag to lock the image proportion. Hold Option at the same time to keep the image centered as you resize. Press Return to place the file. You can always click and drag to tweak the framing. If you need to resize again, just select your image and press Command + T (Control + T for Windows users) to pull up the Transform Tool again.
3. Create Multiple Posts
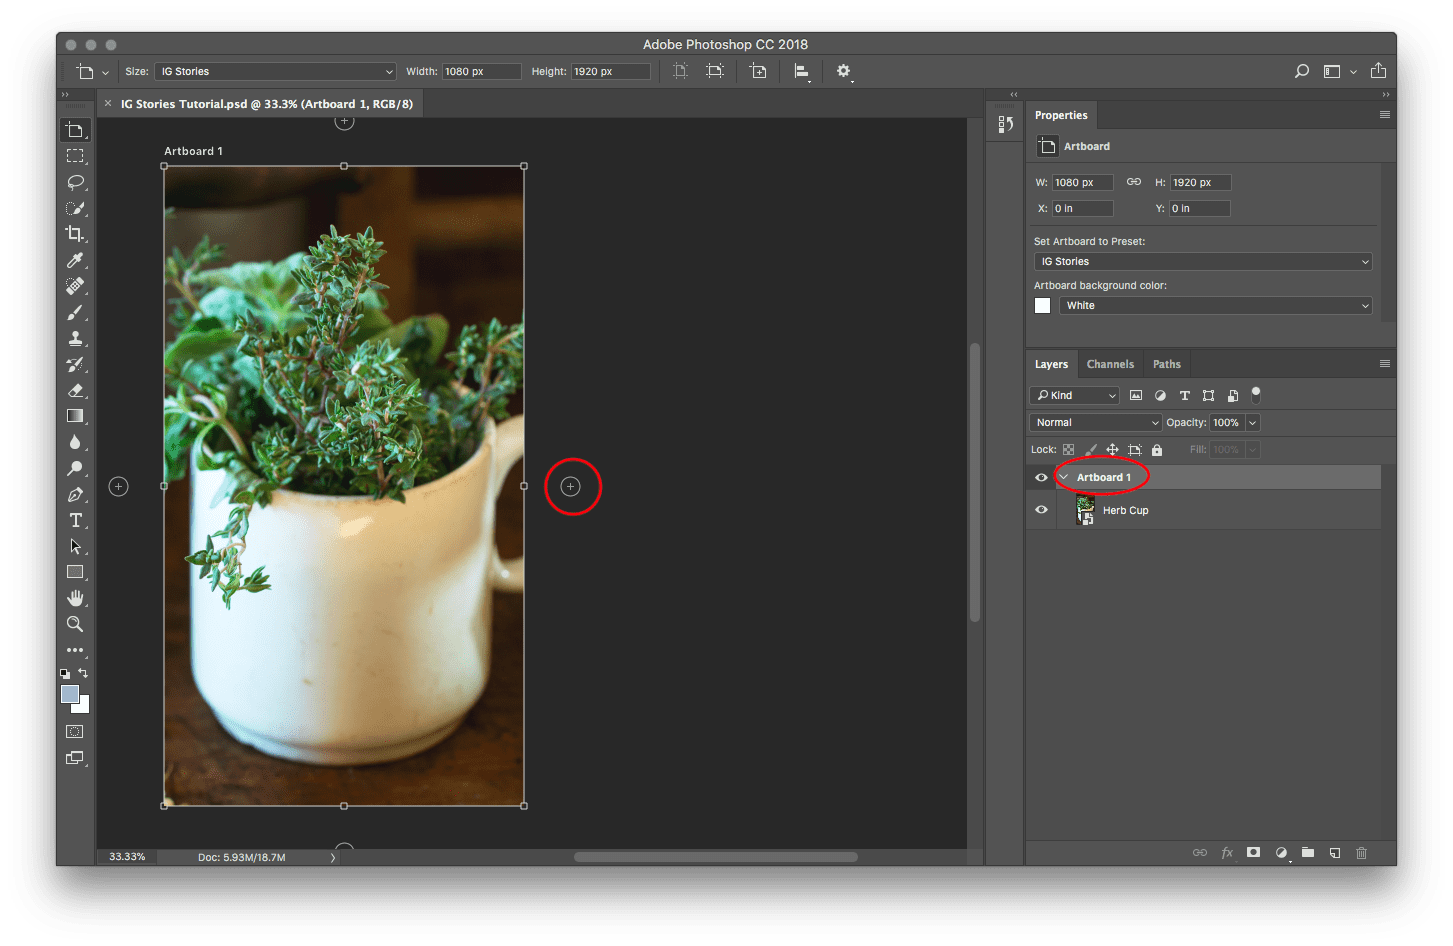
You may want to create a series of images to tell a story in your Story. With Photoshop we can use Artboards to seamlessly create multiple posts in one document. Right-click on your Move Tool to switch to the Artboard Tool. (Tip: the keyboard shortcut “v” activates the Artboard Tool or the Move Tool, depending on which is selected.) Next, select your existing Artboard by clicking it in the Layers panel. You will see a plus sign appear next to the Artboard. Click it to create a blank Artboard, or Option + Click it to duplicate the existing Artboard.
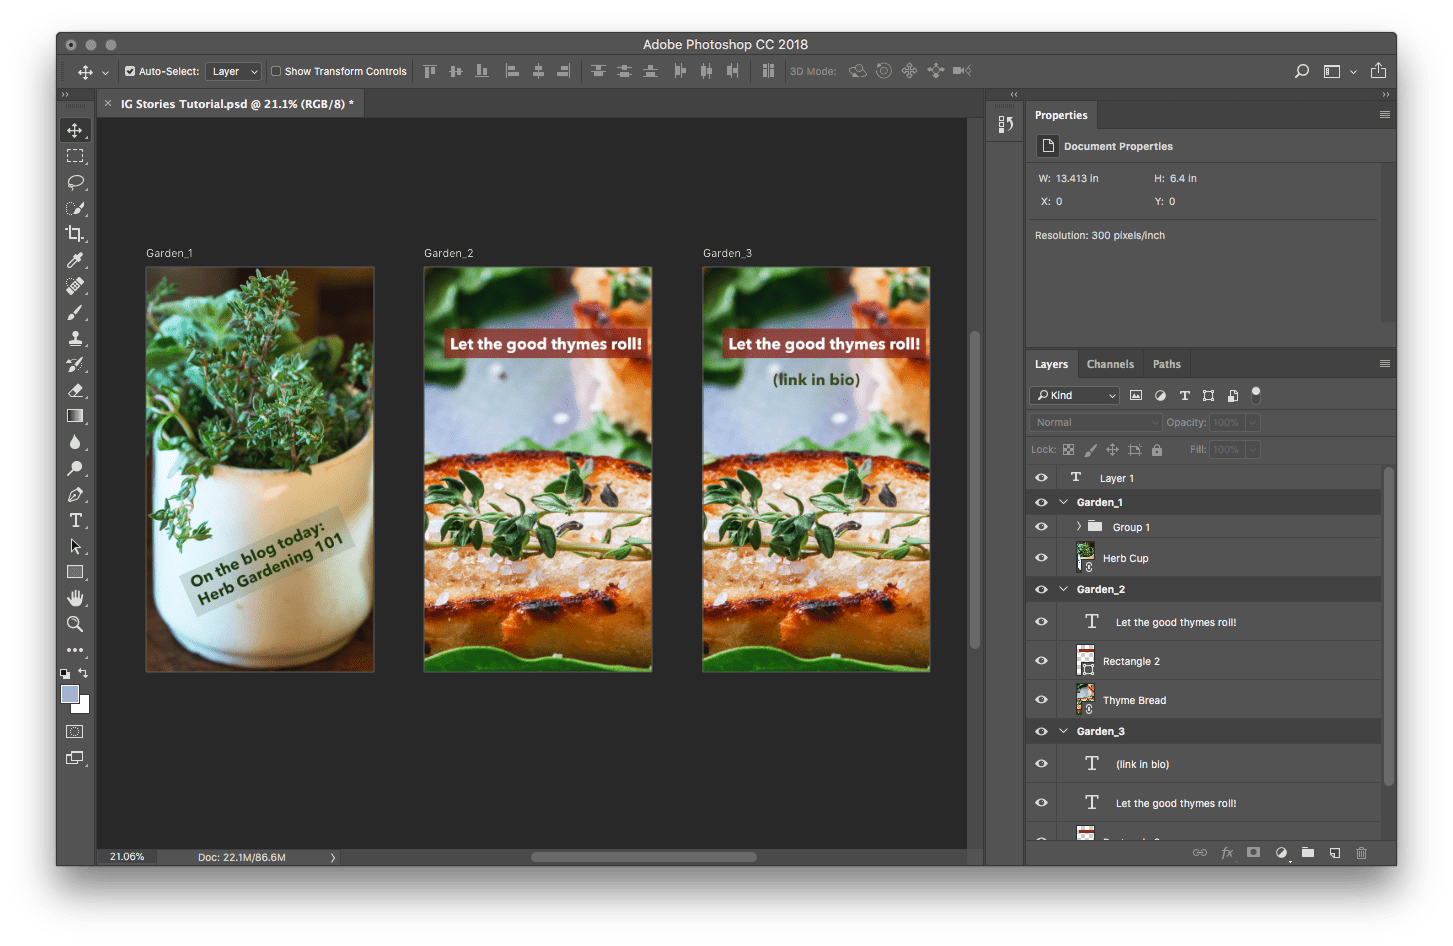
You may choose to add text or decoration right in Photoshop. It can be helpful to view the posts together before brining them into Instagram. You can also do a combination of both, like adding the text in Photoshop and then adding stickers and emojis in Instagram.
4. Export
When you’re ready to export, select all of your Artboards in the Layers Panel and right-click them to choose Export As. Again if you used multiple Artboards, select them all here. Choose JPEG as the format and lower the quality to around 80% to create a smaller file size that still looks great on Instagram. Upon exporting, you may opt to save the images directly to a cloud service like Dropbox or Google Drive for easy access from your phone.
And there you have it! Stock photography can open up a whole new world of possibilities with Instagram Stories for business as well as personal use—all you need is some beautiful photos (we’ve got you!) and Adobe Photoshop.


