Creating a project in After Effects can feel like a daunting task. Once you’re done learning the ins and outs of how the program works, you’ll reach the last step of creating your next video project: rendering. Learning how to render in After Effects is straightforward, but does take some practice.
The rendering and exporting step is crucial for delivering a polished, correctly formatted project. It’s the final leg of the race and it’s the one thing that can make or break your finished product. Between incorrect codecs and formats, to quality issues and unnecessarily large file sizes, just a few simple rendering tips can help you avoid any wrong turns you might make before you save and export your video. Let’s hop into After Effects.
How to render in After Effects
1. Checking composition settings
Before we get started, we want to first make sure our composition settings are accurate to the quality and format we’re wanting as the exported video. Here, you can change the overall aspect ratio, quality and length of your project.
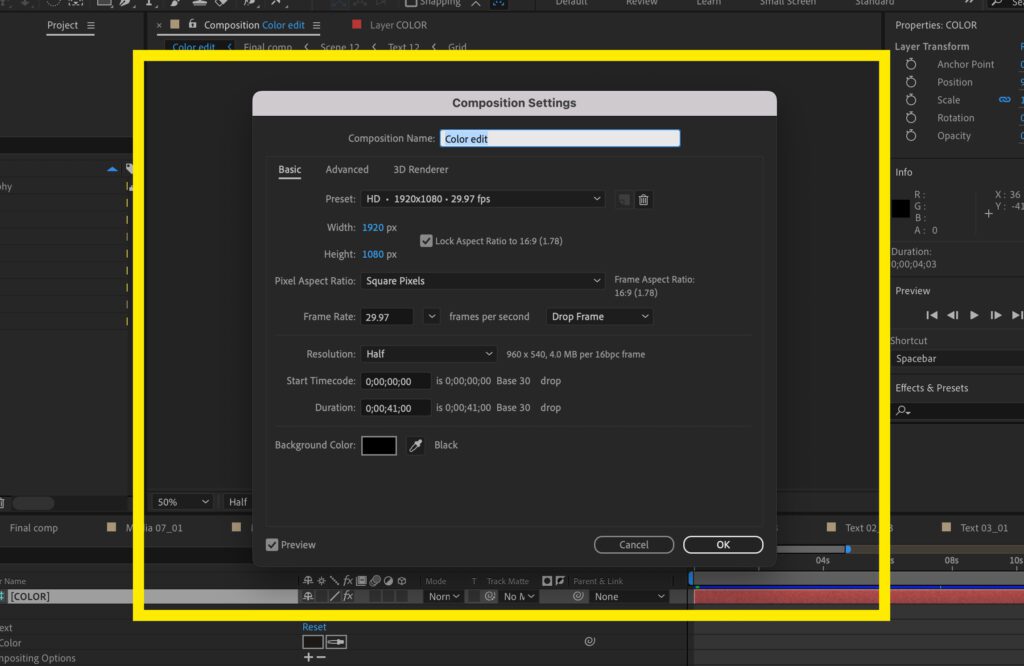
Then on your timeline, select the exact length you want to render by dragging the blue tab just below the timestamps.

Now that you have your timeline set and the project is complete, let’s get to rendering.
2. Using the Render Queue
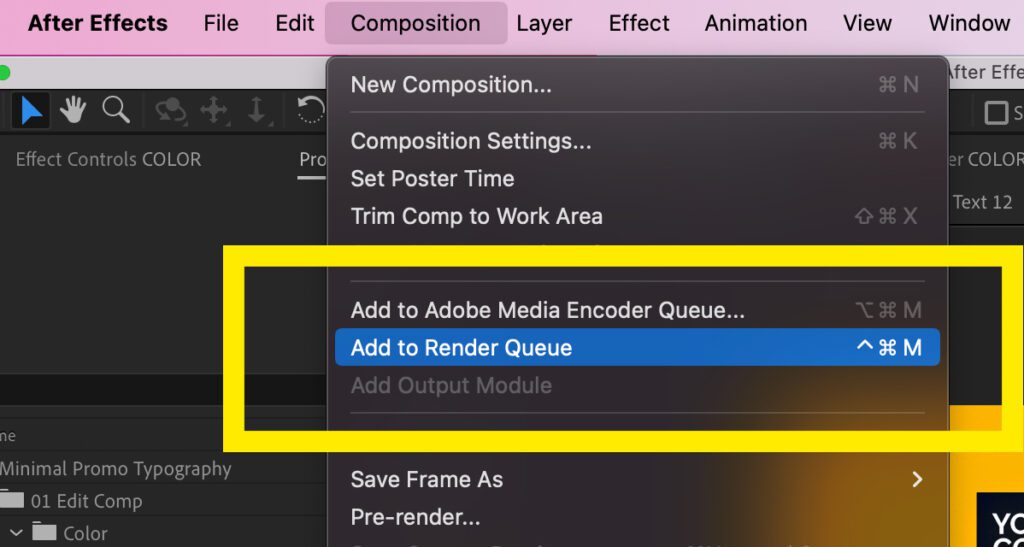
First, make sure you have your final composition open and selected, then go to Composition > Add to Render Queue. Once you click this, you will be taken to a new section of the export preferences panel with different settings for starting the rendering process.
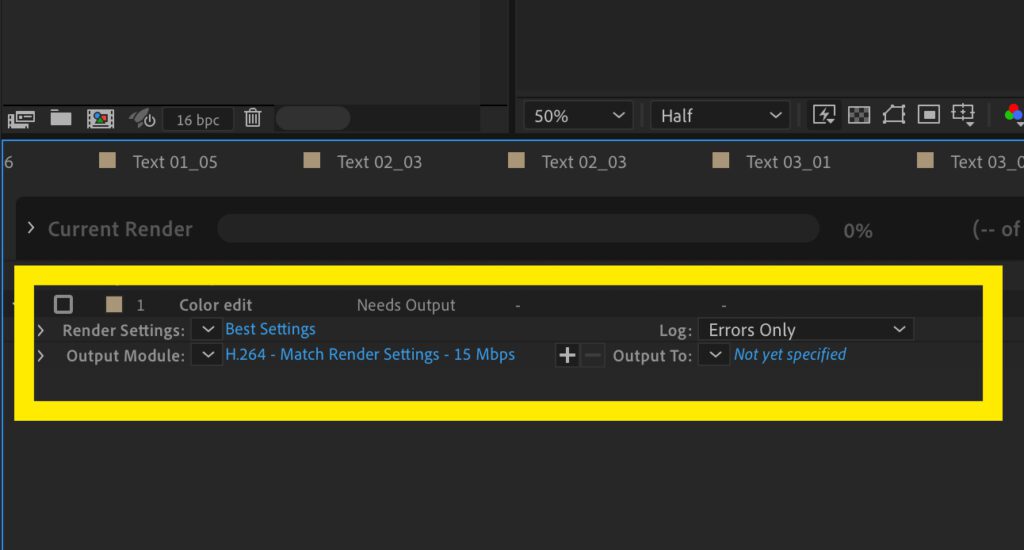
With this new tab open on your timeline, you’ll see three options to choose from: Render Settings, Output Module, and Output To. Each one of these options controls a specific aspect of how your project is rendered, allowing you to customize the format, length, location and quality.
Let’s start by clicking on Render Settings.
3. Choosing your render settings
First you’ll see a dropdown to select the overall Quality of the export. Most of the time, you’ll choose Best to get the best possible quality version of your project, but there are two other options as well: Draft and Wireframe.
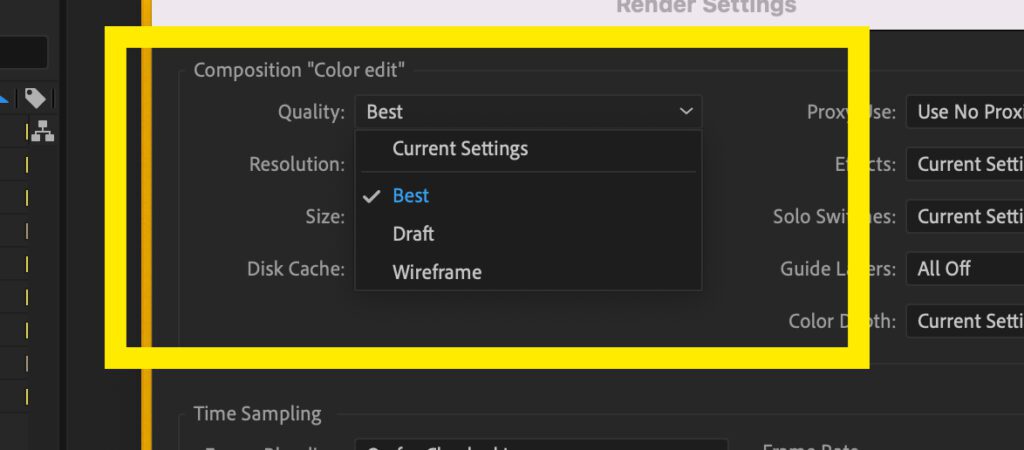
Draft will render your project faster, but it also reduces the quality of your export. This rendering option comes in handy when you just need a quick render to show your client or get a better idea for how the project is coming along.
Wireframe is for 3D projects, specifically rendering out a wireframe of the three dimensional composition that you created. Again, this is only meant to reduce the render time and give you a stripped down version of what you created for time’s sake.
Underneath Quality, you have Resolution. This is where you can choose the Resolution of your video based on the pixel dimension you set the composition as when you created your project.
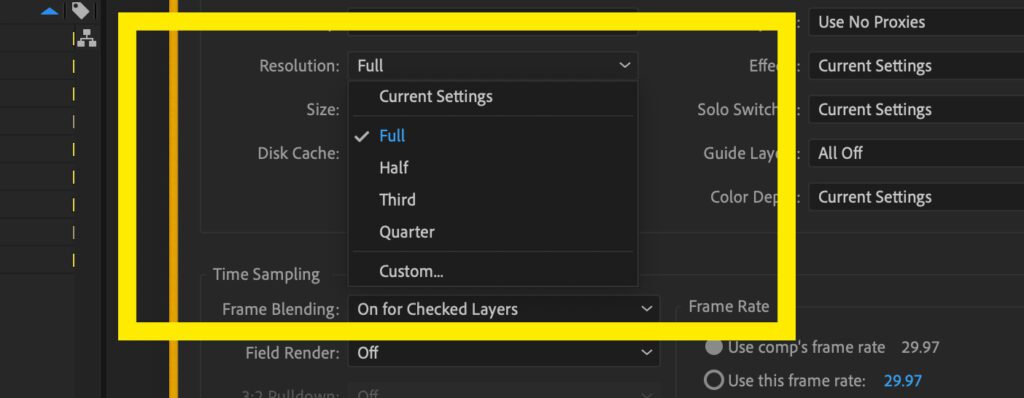
So if your composition is 1920 x 1080, the Full resolution option would render out a 1920 x 1080 video. If you choose “Half”, the resolution would be 960 x 540.
Proxy Use

You’ll see the Proxy Use dropdown over to the right of the Render Settings menu. Proxies are low resolution duplicates of high resolution files that would slow down the process of creating inside After Effects. This setting is where you will choose to either swap out the big files with your proxies for the final render, or leave the proxies in to speed up the render if this is just a test render for you.
Setting Frame Rate
Next, you’ll see a section in the bottom right for Frame Rate settings. This allows you to change the overall frame rate of your project. The two frame rates most commonly used for motion graphics and animations are 24 and 30 frames per second. As seen in the image above, After Effects tends to show you the exact frame rate to the tenth degree, in this case 29.97.
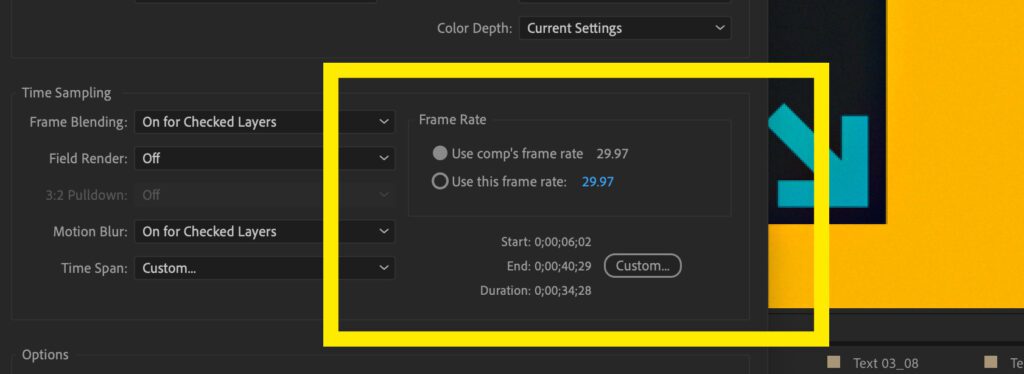
The lower the frame rate, the choppier your video will be. 24 and 30 frames per second are the norm for YouTube and Film standards. If you’re working with camera footage, you’re beholden to whatever frame rate it was shot at which is most likely 24 frames per second.
However if your project is motion graphics heavy, meaning a lot of animation full of 2D shapes and text effects, then 30 frames per second will give you smoother movements between those graphics. Because there are more frames per second, there are literally more frames of the images being played per second therefore the movements appear more fluid with less motion blur.
If you’re working with a client, be sure to ask which frame rate they want the final deliverable to be.
You’ll notice that by changing the frame rate, on top of how the animations or effects move within your project, the duration of the project also changes.
Finally, in the bottom right you’ll find the Start, End, and Duration setting which allows you to change the exact duration of your composition. By clicking Custom and entering in the exact time you’d like to render out, you can set the exact time you want the project to play for. This is just another way to control the length of your project.
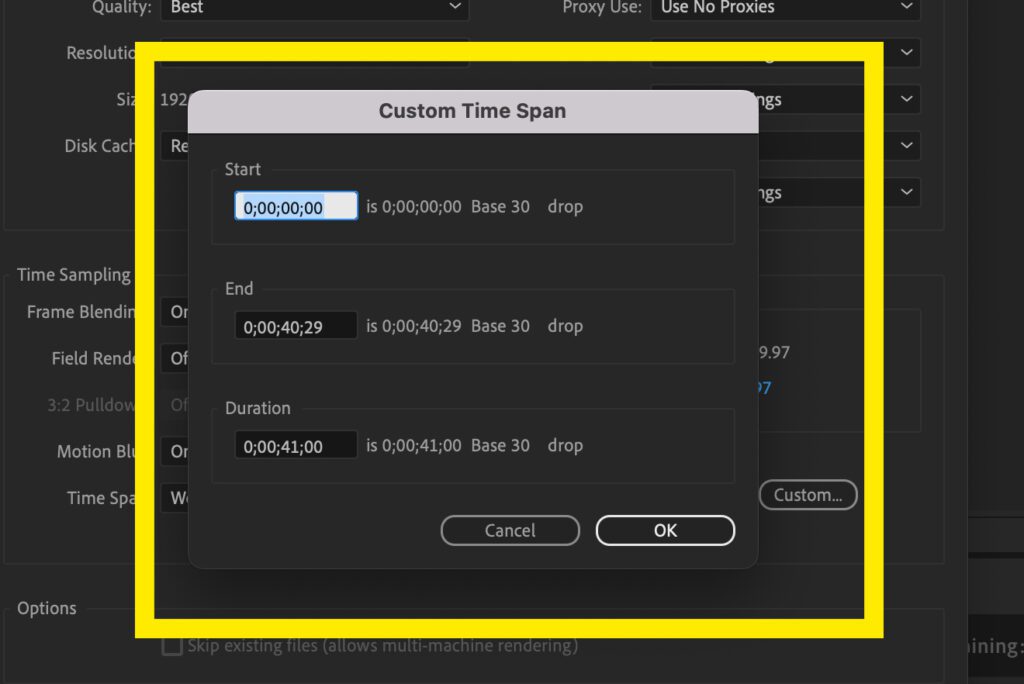
Now that you have Render Settings in order, hit OK and let’s move on to the Output Module.
4. Finalizing your output module settings
Let’s start by clicking on the Output Module and choosing the codec or the Format that we’d like the rendered file to be. Typically you’re going to need either a H.264 (mp4), or QuickTime (MOV).
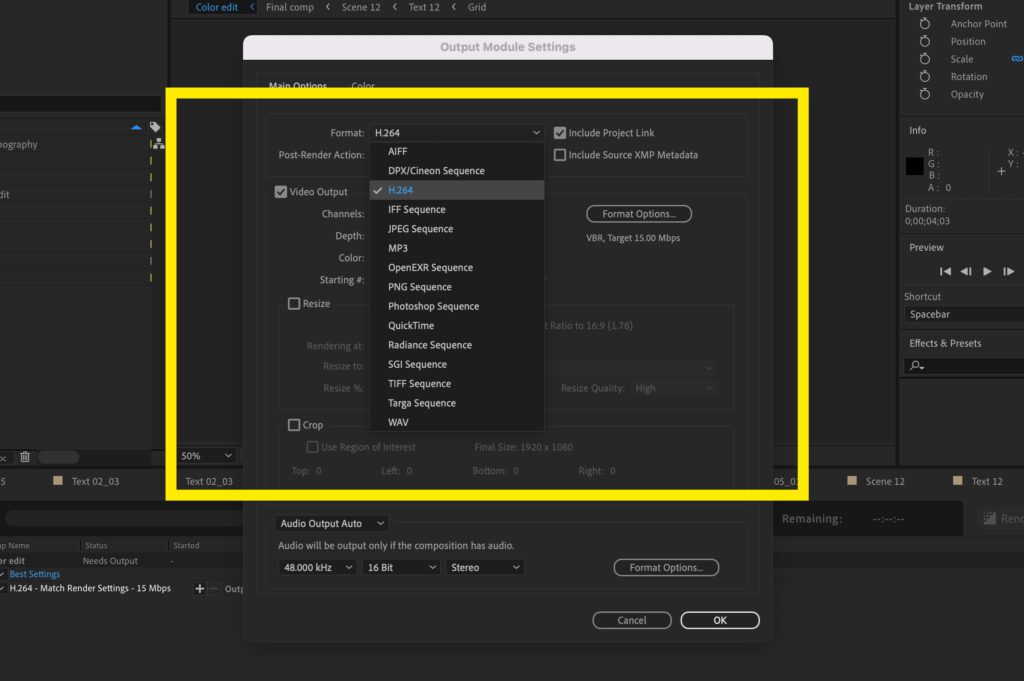
The main difference between mp4 vs MOV comes down to compression and file size. MOV files are typically larger and exclusively work with QuickTime, which is used by Macs. If you’re uploading to YouTube or sending your video to a client, we recommend sticking with mp4 as the upload and delivery will be easier due to more compression.
Understanding Channels
Underneath you’ll find Video Output with the Channels dropdown. Color information holds three channels: Red, Green, and Blue. There is also an invisible fourth channel called Alpha.
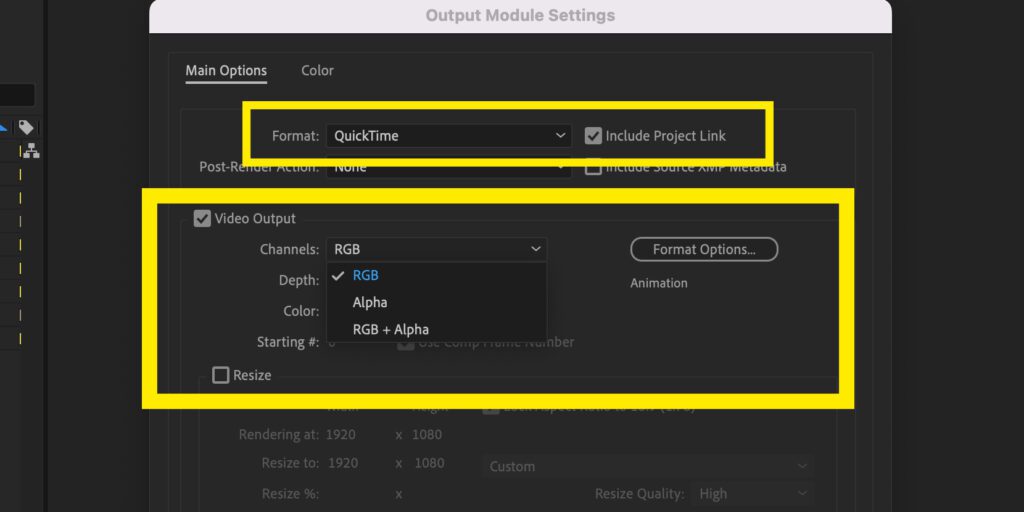
The first option, RGB, is the entire composition on your timeline. So that’s the background and the foreground, whatever your animation is plus whatever the animation is playing on top of. The invisible (transparent) Alpha channel is not included in this.
The second option, Alpha, is exclusively a transparent layer. When you combine the RGB and Alpha channels, your file size tends to be much bigger, so exclusively exporting the Alpha channel allows you to use this transparent layer as a matte in other editing programs.
The third option, RGB + Alpha is your animation with the transparent layer added to it. Let’s say you created an animation that you need to drop on some footage in another timeline in Premiere Pro, DaVinci Resolve or whatever other NLE program you’re using. Think of this as saving your animation as a PNG. You’ll start by selecting Quicktime for the format, then clicking Channel and choosing RGB + Alpha, which will retain that transparent layer. Be sure to click on the blue Format Options button and check that the Video Codec is set to Animation.
The next section below, Resize, allows you to change the aspect ratio and overall size of your project. If you’re rendering your video for different social platforms, this is where you can make adjustments for different ratios or switching from a horizontal to vertical layout.
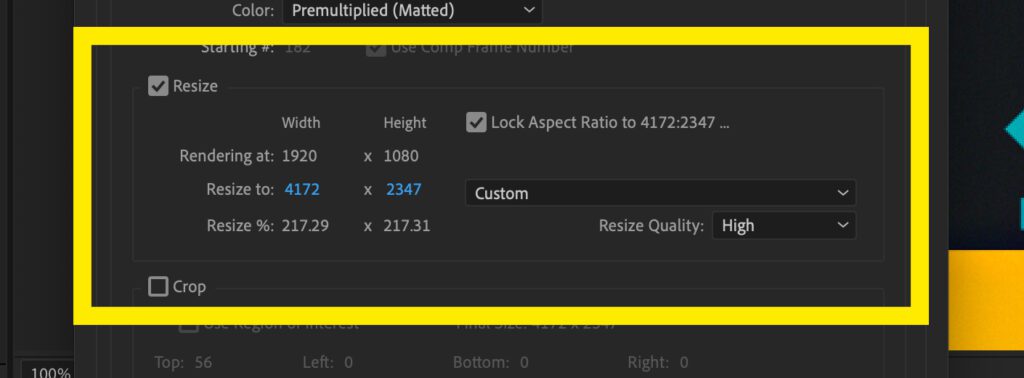
Crop allows you to adjust the aspect ratio of the composition as it stands before rendering. Check the box and drag the Top, Left, Bottom and Right sliders to crop that specific side of the image.

Underneath this you’ll see the option to export Audio. Depending on your project, this will allow you to exclude or include the attached audio file to the project. You also have the option to select Mono or Stereo, which determines the number of channels (one or two) the audio will play through.

5. Choosing a Location to Export
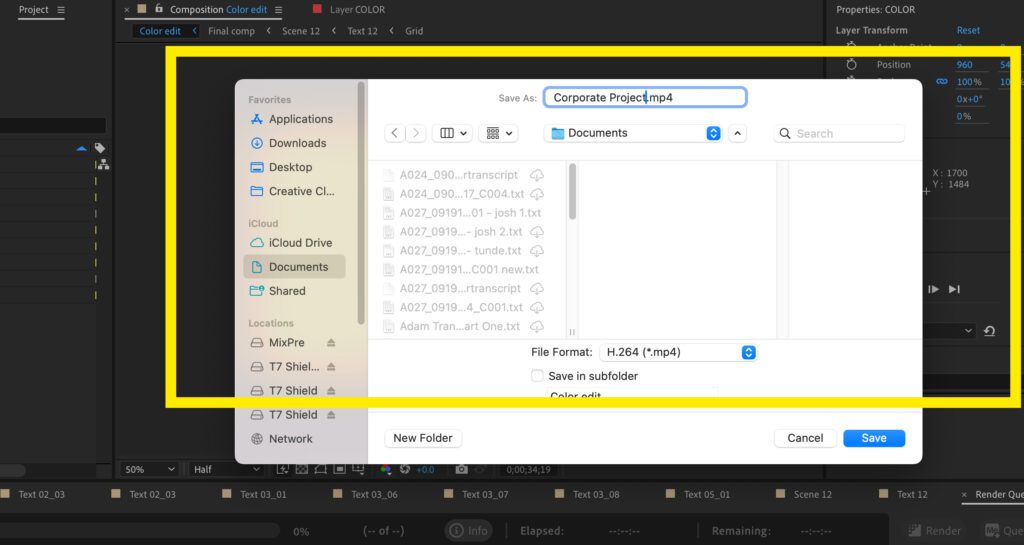
Finally, let’s click on Output To. This is where your project will live after you export it, so pick a location on your machine, or the hard drive you store your projects on. The file size of your project will depend on the footage you’re working with or the length of your timeline and the various assets used. Be sure to set up a Folder with a specific name to help identify the project.
Okay, now we’re ready to hit that Render button!
6. Rendering your project

Once you hit render, your final comps will begin to render frame by frame. A status bar will appear on the screen, allowing you to see how far along the rendering is. Check on your project from time to time to make sure there are not any errors inside your comps. You’ll hear the iconic noise that we’ve all grown to love when the render is complete.
Once it’s done rendering, be sure to watch your rendered project all the way through, and then watch it again. Always look for dropped frames or any weird mishaps that could have slipped by in the editing process.
With that, your project has been successfully rendered! Now it’s time to save and export your project.
Advanced Rendering Tips
Render faster by using proxies
A simple way to speed up your render times is by using Proxies. These proxy files are lower resolution replacements for the footage or animation you’re working with on your timeline.
To enable proxies for your animation, find the clips or sequences that are slowing the playback down and right click on them. Choose Create Proxy > Still… This will disable or freeze your animation from playing on your timeline.
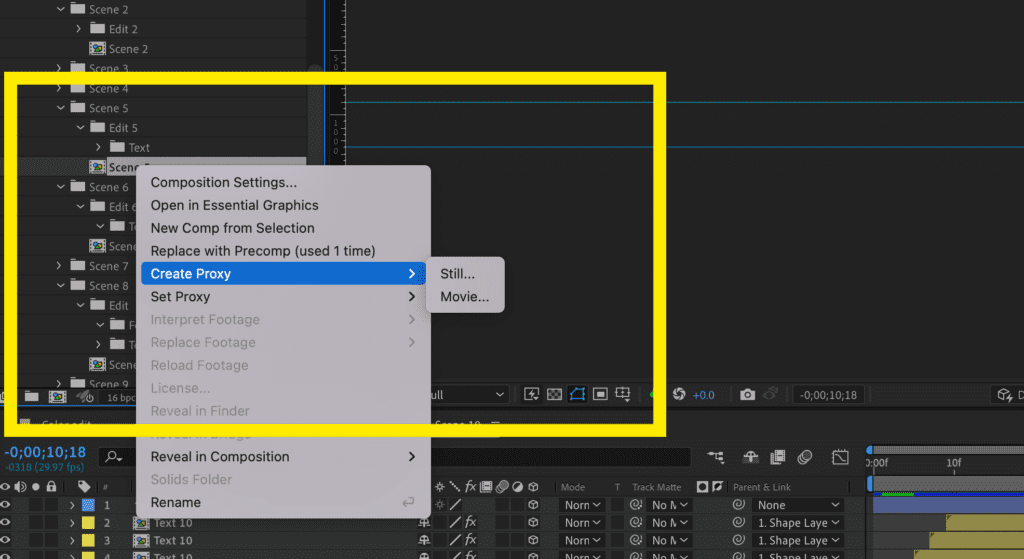
You can also select Set Proxy for video footage to be able to swap the low quality footage with the high quality footage that’s slowing your timeline down.
Once it’s time to render, you can choose to Use All Proxies and save time as your project renders out those lower quality assets. This is useful for test viewings of the final product.
Enabling GPU Hardware Acceleration
Another way to save time on your render is to enable GPU Hardware Acceleration. Some effects and animations that require more GPU processing than normal footage.
To do this, go to File > Project Settings then click the dropdown and select Mercury GPU Acceleration. While older computer systems might not have this capability, enabling your GPU to assist your CPU will exponentially accelerate render times.

Render faster with Multi-Frame Rendering
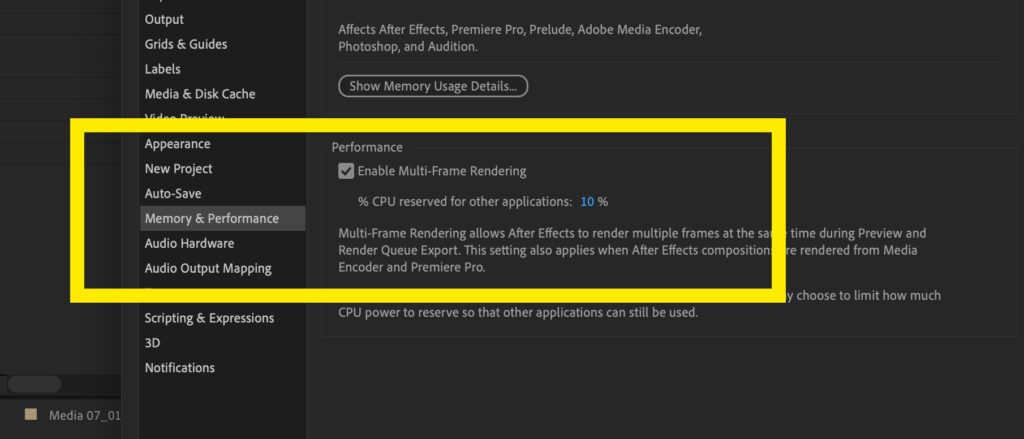
Want to have a faster render time as well as faster playback? Be sure to enable Multi-Frame Rendering. This allows After Effects to utilize the cores in your CPU and render out frames simultaneously. Just go to After Effects (Edit, if you’re on PC) > Memory and Performance and click Enable Multi-Frame Rendering.
Clear your Disk Cache
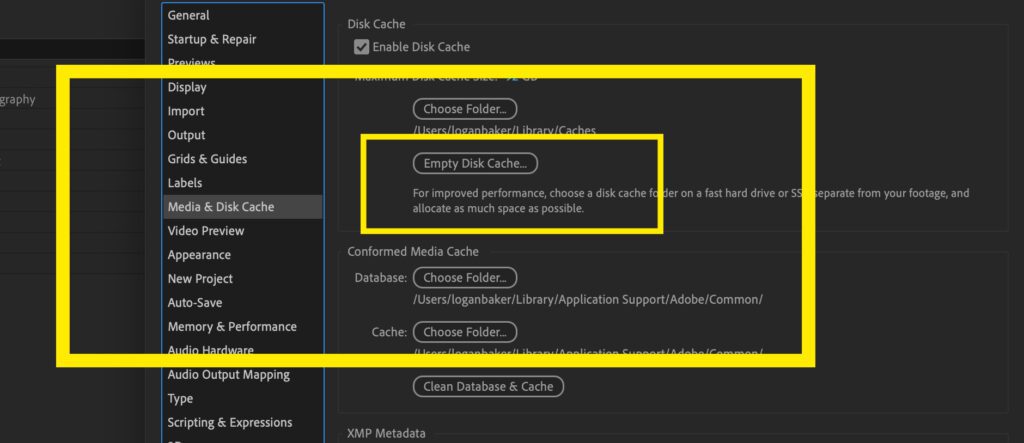
You can also clear your Disk Cache to speed up your render, which is a folder that holds every frame you’ve ever worked on. Having a full disk cache slows After Effects as well as playback on your timeline. To clear your disk cache click on After Effects (Edit, if you’re on PC) > Media & Disk Cache and hit Empty Disc Cache.
Troubleshooting common rendering issues
To avoid any rendering issues, make sure that you have enough storage where you’re rendering your project to, that your system meets AE’s requirements, and that you aren’t running too many other applications while your project is rendering. These are the most common culprits that cause After Effects to cancel a render or create issues in the final rendered version of your project.
Create faster with pre-made After Effects templates
Ready to start creating even more in After Effects? Check out our library of customizable After Effects templates to easily and quickly add in advanced effects and graphics to your projects. With a Storyblocks subscription, you can unlock unlimited downloads of templates, 4K and HD footage, music, sound effects, and much more. Plus, you can get access to our plugin for After Effects to bring our entire library right inside your editor to help you create even faster.
Editor’s Note: This post has been updated to include additional information. It was originally published on April 1, 2018.


