It might sound counterintuitive, but adding some blur to images can make them look more realistic – especially in a video. As your eyes move, your brain naturally blurs images. So if images look too sharp in a video, people might think it doesn’t look real. Using a motion blur effect in Premiere Pro adds realism to your video footage or projects.
In this Premiere Pro tutorial, we’ll teach you how to create a motion blur effect that you can easily add to your next video. If you’re new to Adobe Premiere, you can find tons of step-by-step tutorials for Premiere Pro in our Resource Center.
What is a Premiere Pro Motion Blur Effect?
A motion blur effect is a motion effect that blurs an image. Video editors frequently use this effect to make their videos feel more fluid and realistic. If your video needs more motion, a subtle motion blur can give the impression of movement.
The motion blur effect can be customized to fit your needs. You can adjust settings like the direction of the blur to make it look more dynamic, believable, and interesting.
How to add a Motion Blur in Premiere Pro
You want the motion blur you add to look natural. Follow these steps to add a motion blur effect using Premiere Pro.
1. Use the Transform Effect
After you have imported your video footage into Premiere Pro and navigated to the clip where you want to add motion blur, add a Transform effect.
Adding motion blur with the transform effect
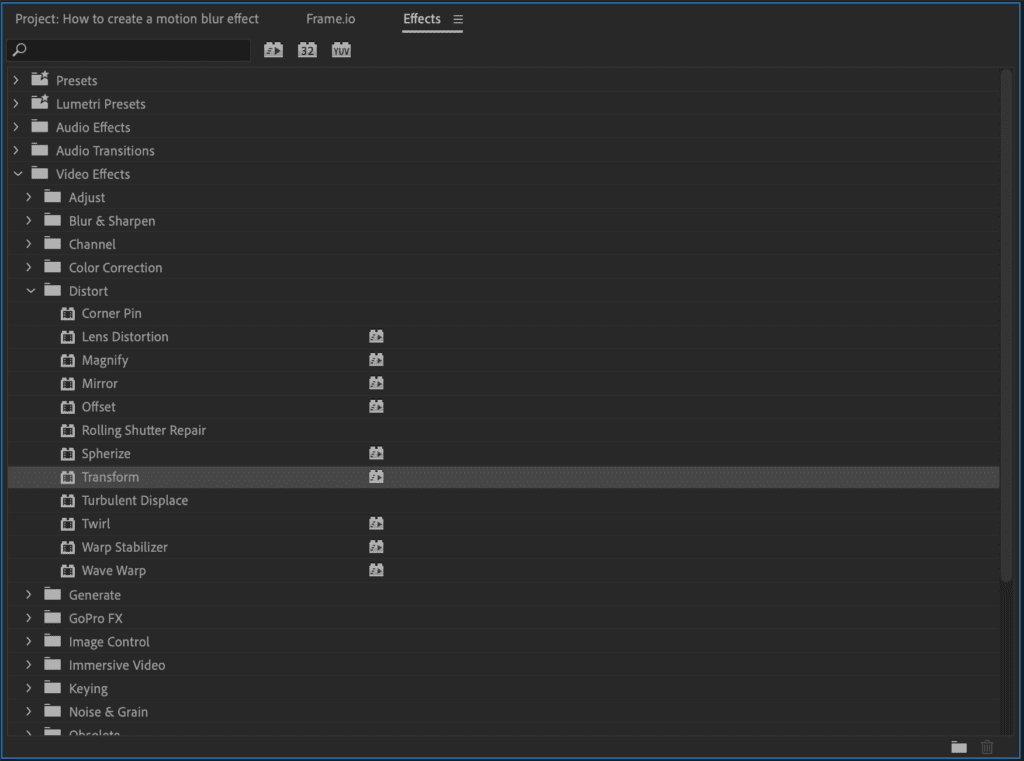
To do this, navigate to Effects > Video Effects > Distort > Transform. Add this effect to your selected clip in the timeline.
2. Animate the Transform Effect
Once you’ve added Transform to your selected clip, you will see the available settings to keyframe in the Effects Controls panel. These include:
- Anchor Point
- Position
- Scale
- Skew
- Skew Axis
- Rotation
- Opacity
- Shutter Angle
You can adjust the keyframe positions of each setting by toggling the stopwatch icon to the left of each value, then adding a keyframe at the beginning and the end of your clip.
3. Adjust the shutter angle in Premiere Pro
To achieve a motion blur effect, navigate to the “Effects Controls” window, then select the “Transform” effect. Then adjust the Premiere Pro shutter angle to your desired setting.
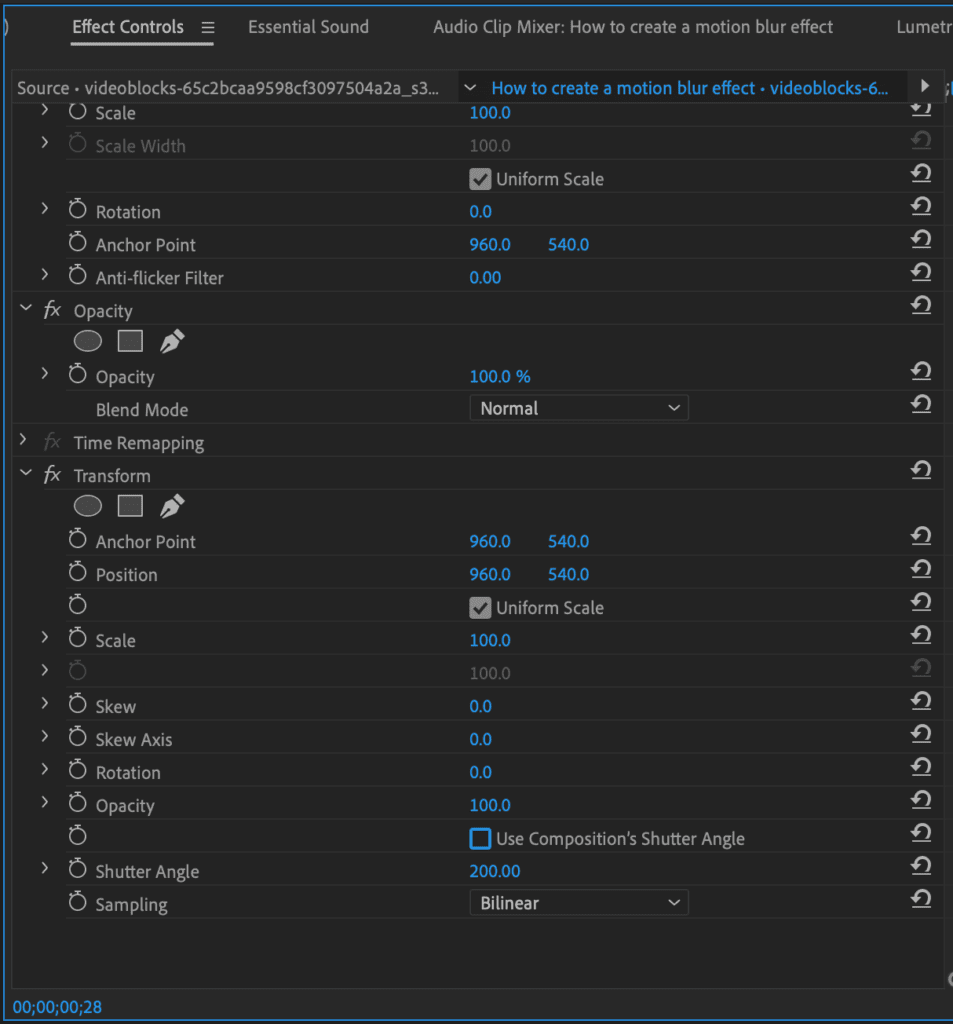
The default setting is 180 degrees – the higher you set the angle, the more blur you will get. Test your setting a few times to make sure you get the look you want. Adjust any of the other Transform settings you want to see how it looks.
4. Create a preset for adding Premiere Pro motion blur effects
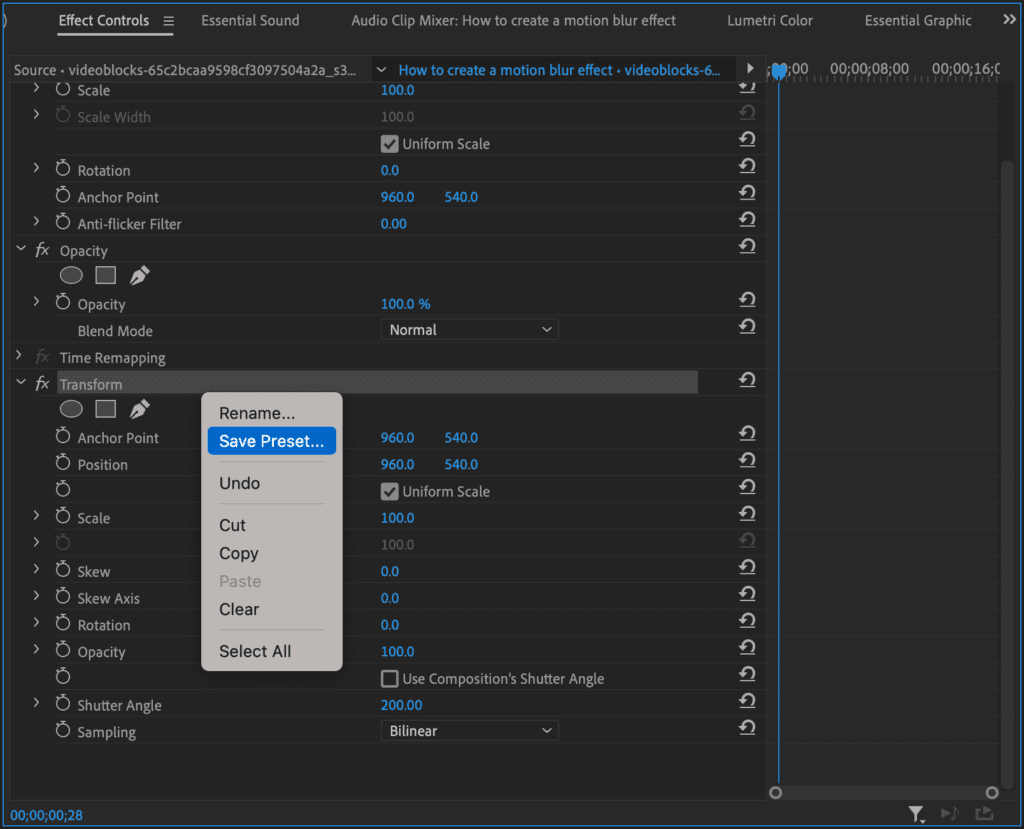
If adding motion blur is something you will likely do frequently, saving your settings as a Preset can help you work much faster. Once you have the settings you want, right-click on the Transform Effect and select Save Preset. Choose an easily identifiable name, and you’re ready to go.
Download this clip of driving through a tunnel with motion blur
What does the Premiere Pro Motion Blur effect do?
The Premiere Pro motion blur effect works by giving moving objects a natural-looking blur. The human eye naturally blurs objects that are moving quickly. Blurring also happens naturally when shooting at the standard 24 fps. The higher 30 fps rate smooths out motion and is frequently used for sporting events and live broadcasts.
If shot at the right shutter speed, the motion blur in a recorded video should look good. If there is not enough blur in your video footage, it can give viewers an unnatural feeling. Adding motion blur makes your videos look professional and realistic.
Visual effects artists use motion blur most frequently on things like:
- Text animation
- Graphic animation
- Pans and zooms on still images
- Digital effects
- Animated models
Add a Directional Blur in Premiere Pro
There may be instances where you want to blur only a specific area within a video clip, like the background. Follow these steps to add a directional blur in Premiere Pro.
1. Import your video clip
Import the video footage you want to use and add it to the timeline.
2. Use Directional Blur
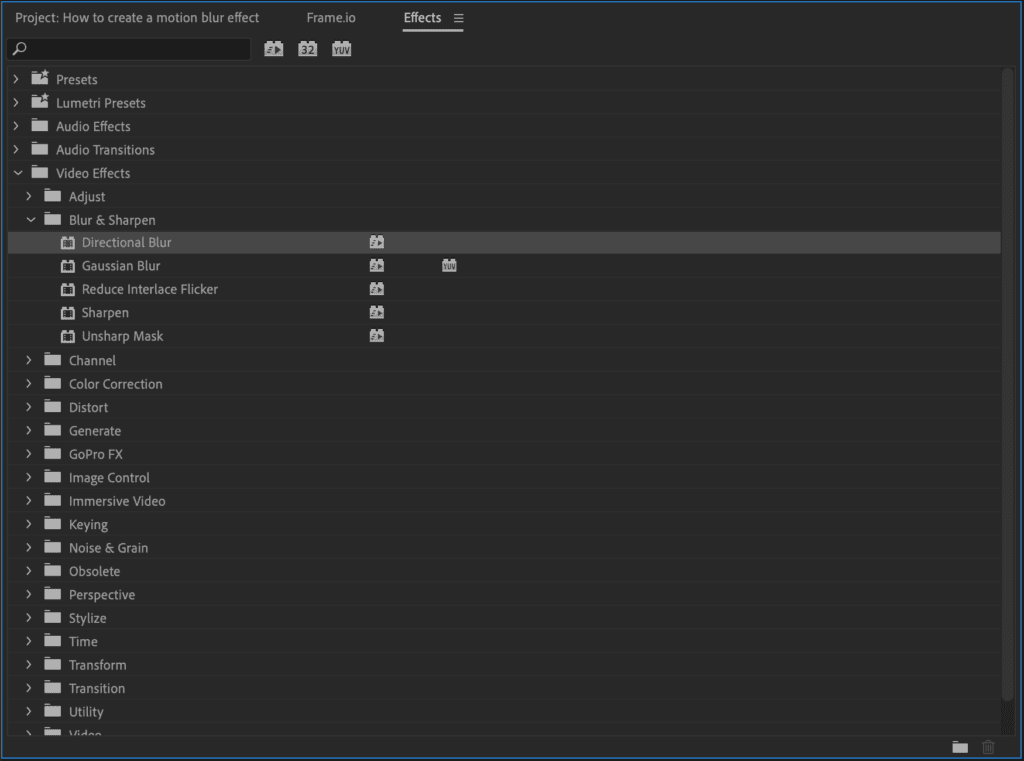
In the Editing workspace, select the Effects panel. Navigate to Video Effects > Blur & Sharpen > Directional Blur. Add this effect to your clip.
3. Create directional blur mask
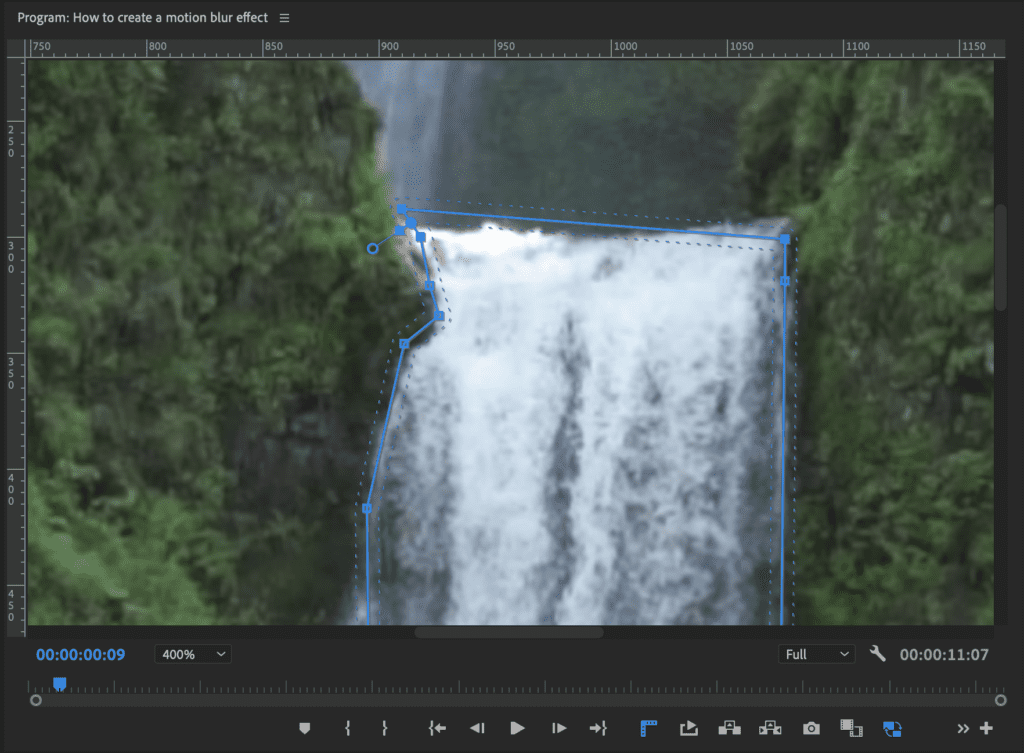
Within the Effect Controls panel, you will need to create a Directional Blur mask around the area you want to blur. For example, if there is a waterfall in your scene, you would trace around the edges of the waterfall within the Program Monitor to create a mask. You may need to zoom in to ensure you are accurately following the outline.
4. Track the mask
If the object you want to blur moves within the scene, you will need to track the mask. If it is static, you can skip this step.
To track the mask, click on the Track Mask arrows.
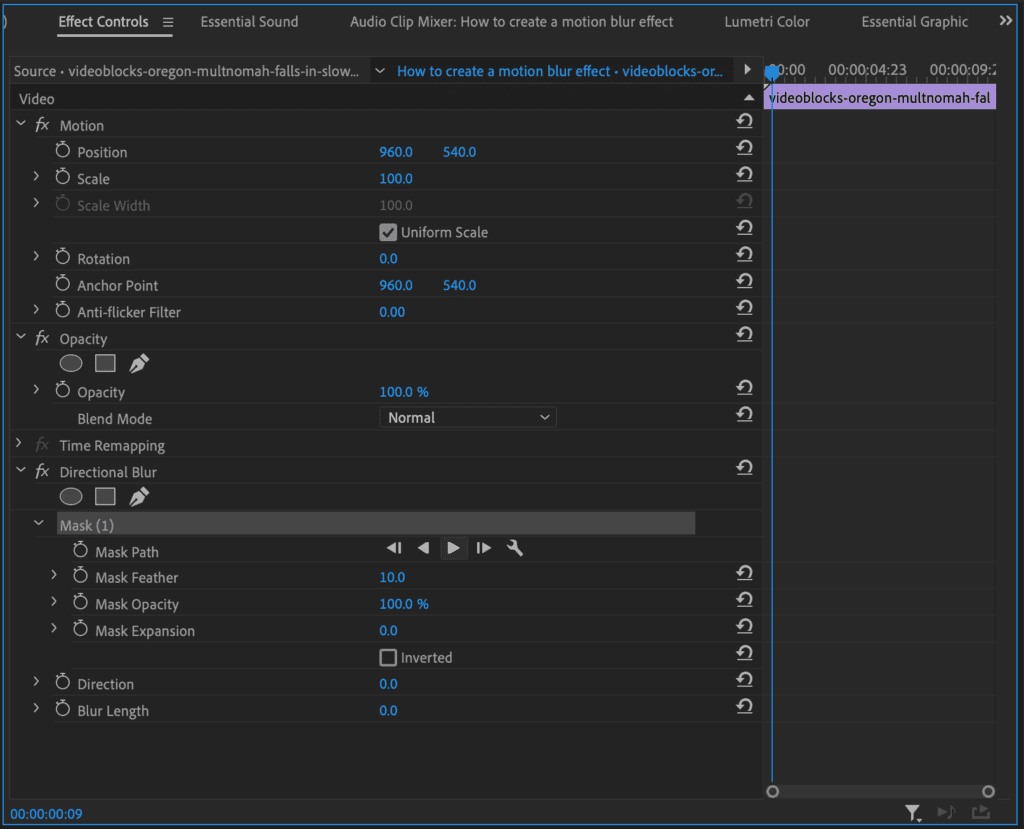
Stop, if needed, to adjust the mask if it drifts off of the object. If your object enters or exits offscreen, it will likely be easier to start tracking in the middle and go backward or forward to finish the track. You will need to track one frame at a time to fine-tune the process. Play the sequence to verify your mask stays on track.
5. Adjust Blur values
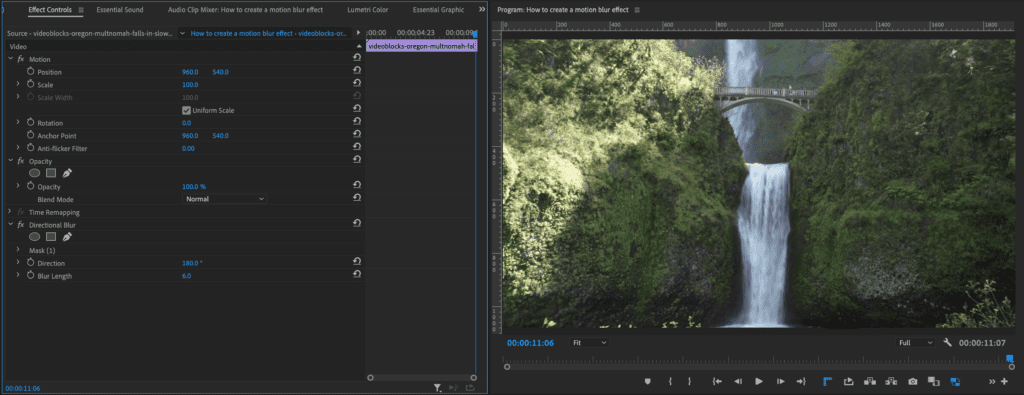
In the Effect Controls panel make any needed adjustments to the Directional Blur values to achieve your desired motion blur. Set the direction of the blur to follow the motion of the action. If you need to soften the edges of the mask, increase the Mask Feathering setting.
6. Evaluate your work
Play back your sequence to check your work and make adjustments, as needed. Once you’re happy with how it looks, your Premiere Pro motion blur effect is ready to go!
Use Storyblocks templates to easily add advanced effects into your videos
Learning how to add motion blur in Premiere Pro takes you one step closer to producing high-quality video footage. To accelerate your video content creation, you use pre-made, customizable video templates for Adobe Premiere Pro, Adobe After Effects, DaVinci Resolve, and Apple Motion.
These templates combined with royalty-free stock video footage can help you improve your skills and produce even more video projects.
Storyblocks offers subscriptions to stock video footage, audio files, video templates, and still images. We have subscription plans for both individual creators and businesses. With a Storyblocks subscription, you get unlimited downloads of over 2 million high-quality, royalty free assets along with access to our plugin for Premiere Pro and After Effects.
Editor’s Note: This post has been updated to include additional information. It was originally published on September 13, 2022.
