For years it has been possible to remove unwanted objects from your photos using Adobe Photoshop, but for video, it has always been a challenge — until now! Adobe After Effects has a new feature called the Content Aware Fill that removes unwanted objects from your footage.
In this tutorial, we’ll show you how to use it by removing people walking on the beach.
New to After Effects? Check out the Beginner’s Guide to Advanced Tools and Techniques for a primer. And if you’re looking for stock footage to use, head over to Storyblocks Video for endless options, like the clip we used here.
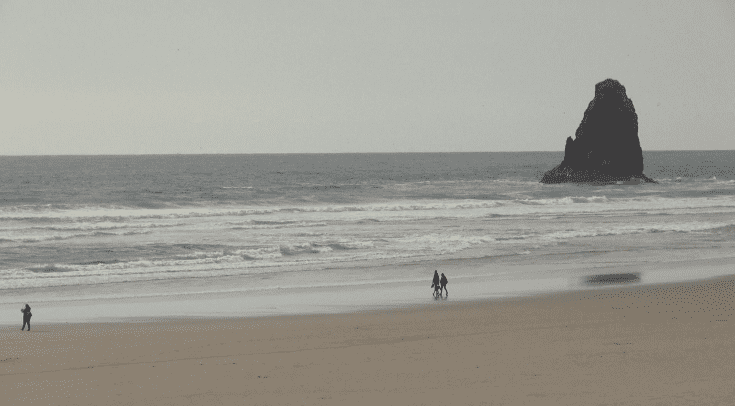
Here’s a still frame from the footage we will be working with:
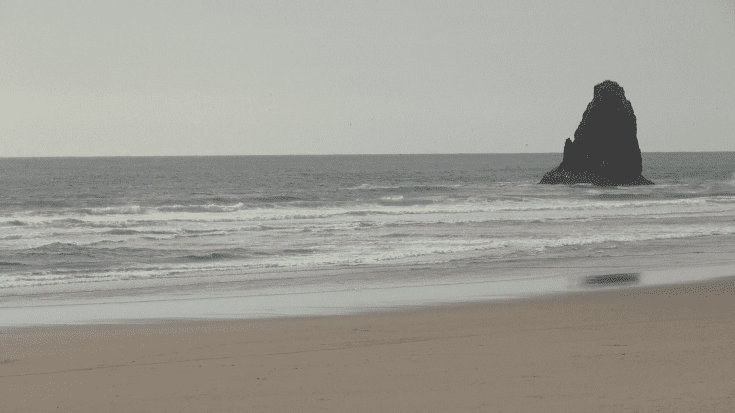
And here is a still frame of the same footage after Content Aware Fill has been used:
Let’s get started!
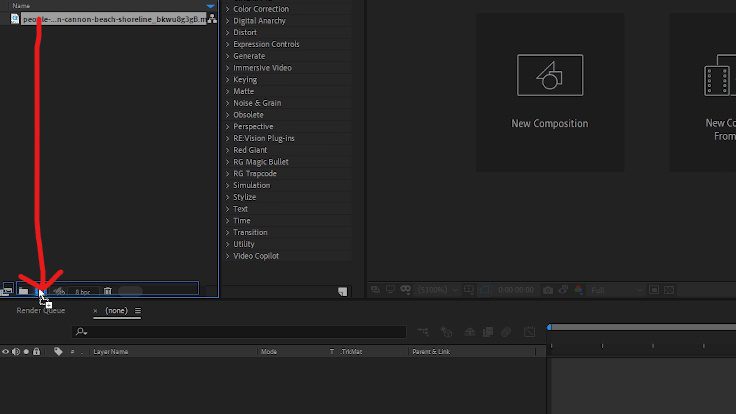
1. Once your footage is imported into After Effects, drag it down to the Composition button at the bottom of the Projects panel. This will create a composition with the same settings as the footage.
In this clip, there’s nothing that interferes with the people walking since the background throughout the frame is very consistent. Since there’s a person near the left side of the frame, as well as two people and a dog toward the middle of the frame, we’ll use Content Aware Fill twice.
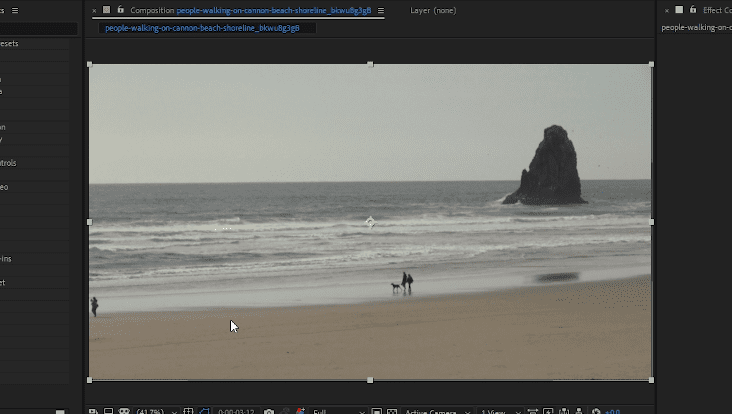
2. With the layer selected in the composition, switch to the Pen tool (G on the keyboard), and scrub through the footage to find the best place to create a mask. In our case, it would be where the dog moves away from the people. The idea is to draw a mask with the Pen tool that is large enough to cover the elements you’d like to remove from the scene.
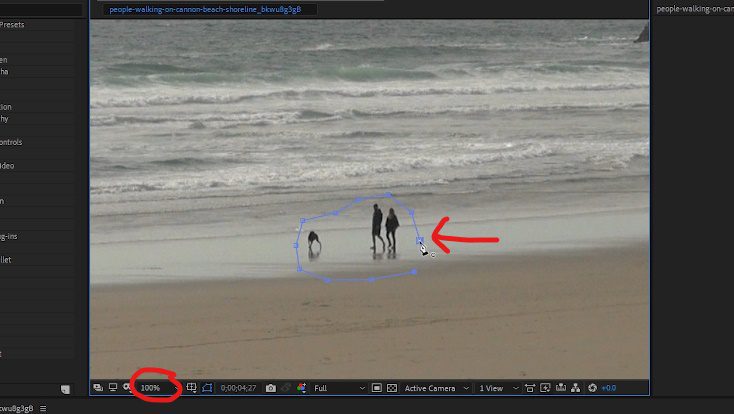
Once your mask selection is complete, you will now have an area that includes your elements, and everything else has been removed. On the mask layer in your composition, set the mask to None for now.
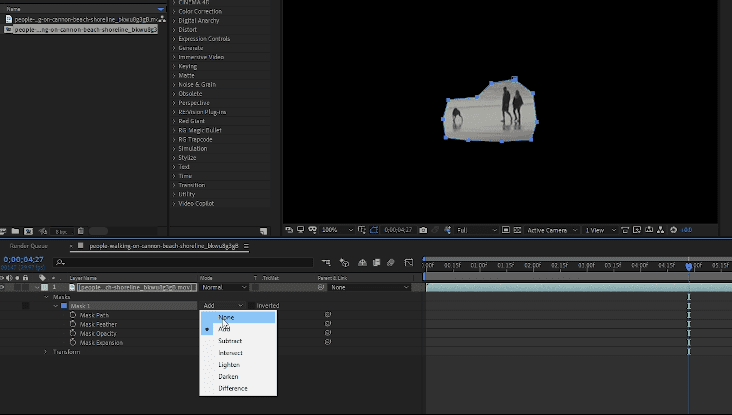
3. Next, with the timeline cursor still on the same frame that you’ve made your mask selection on, inside your mask layer, click the keyframe stopwatch to create a keyframe.
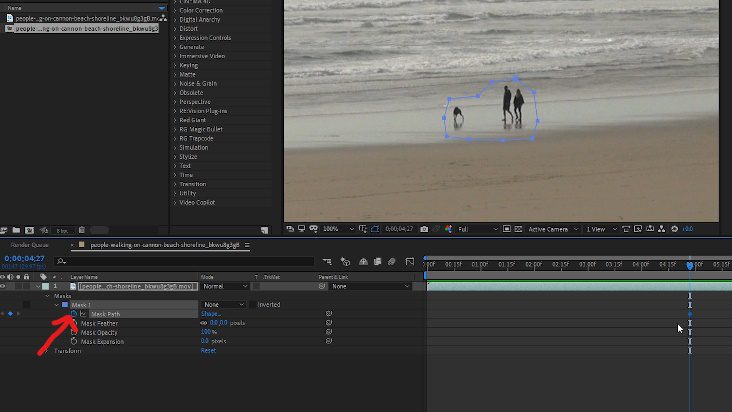
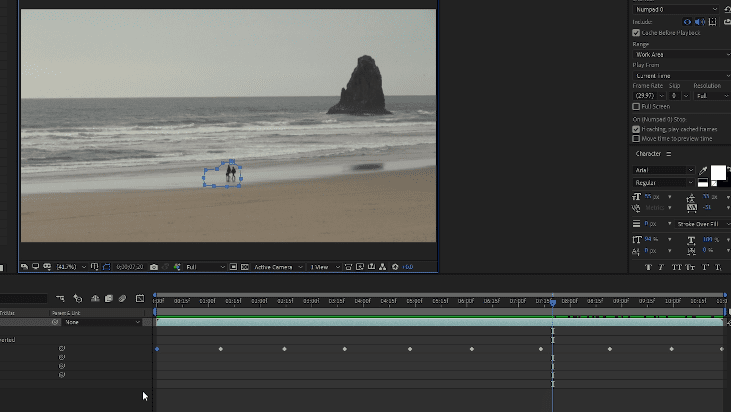
Switch back to the primary cursor tool, then move your timeline cursor to different frames throughout your composition. Anytime that the mask isn’t surrounding the elements you’d like to remove, reposition the mask.
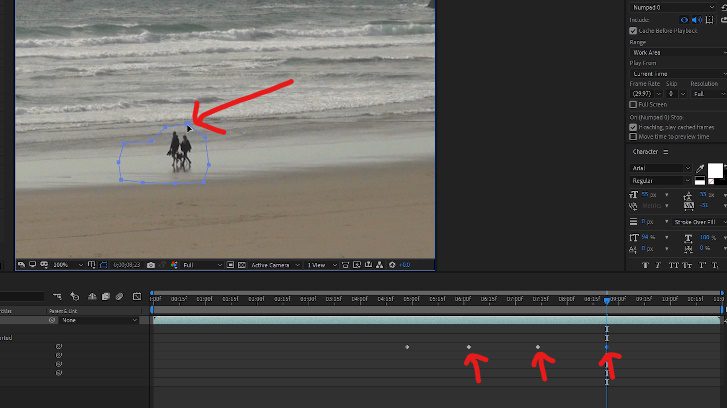
Repeat the pattern until you’ve created enough keyframes that the mask follows the selected elements throughout the composition.
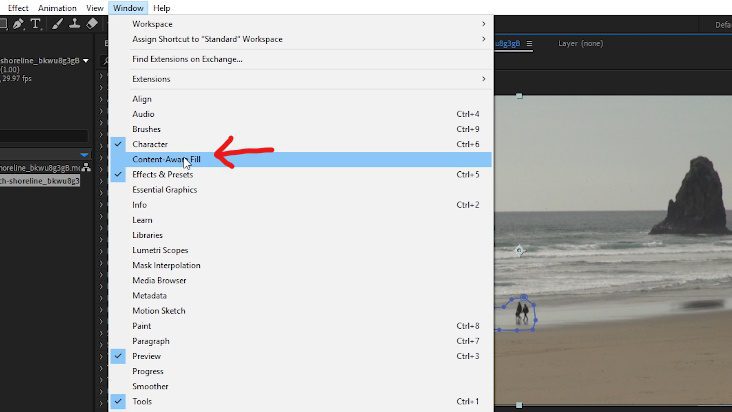
4. Next, go to Window > Content Aware Fill.
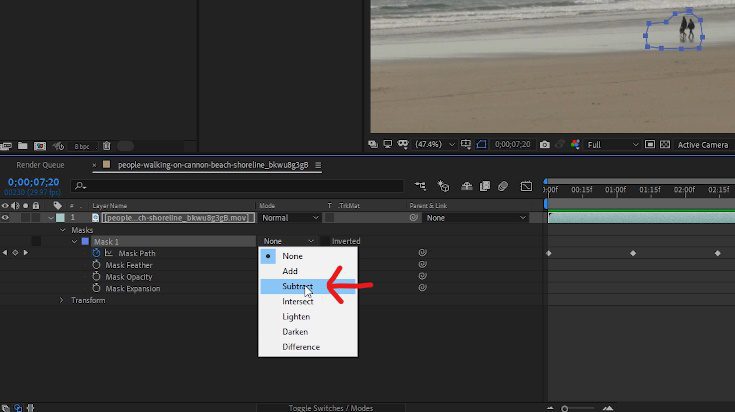
Then, on the mask, change it to Subtract.
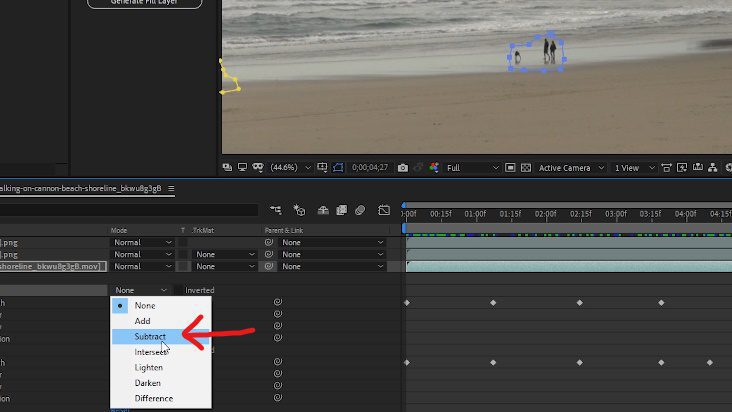
5. At this stage, with the mask set to Subtract, we could click on Generate Fill Layer inside the Content Aware Fill panel, and it would do its best job to fill in the mask with what it thinks should be there. However, I’ve found that the result is often not accurate in doing it this way. It’s best when you provide Content Aware Fill with more information to work with.
To give Content Aware Fill more data, change the mask back to None like we did in Step 2, then inside the Content Aware Fill panel, click on ‘Create Reference Frame.’
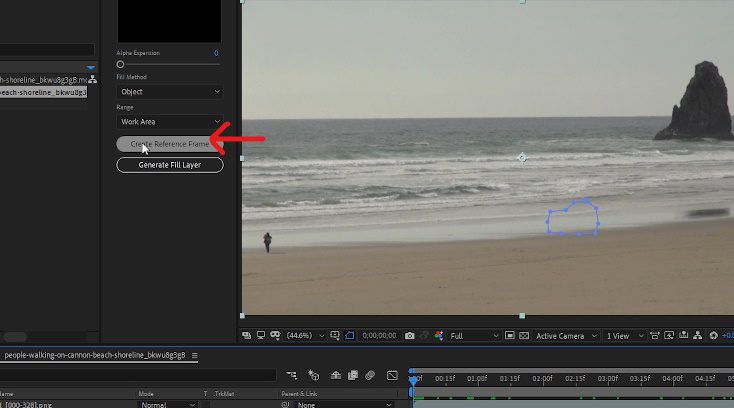
This will open Photoshop. Change to the Lasso tool.
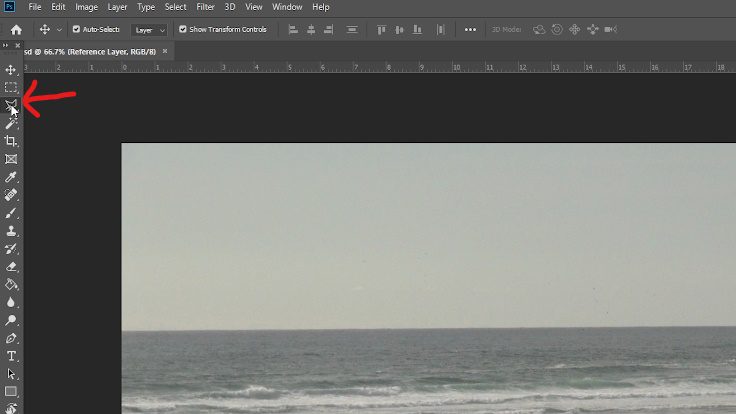
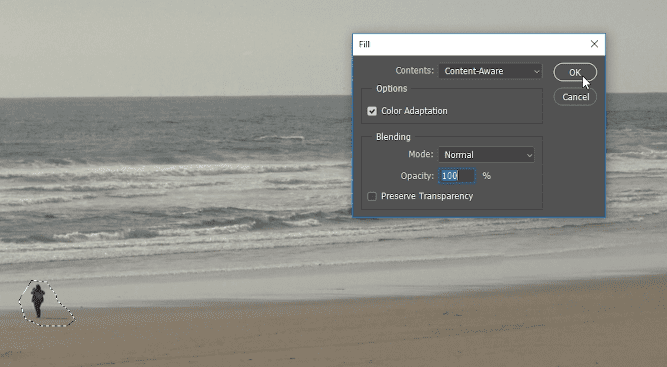
6. With the Lasso tool, I will make a selection around the people (excluding the dog for now.)
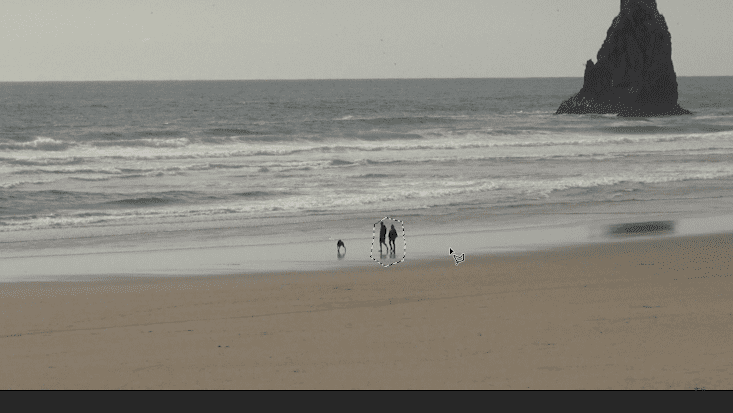
Then press Shift + Backspace (Shift + Delete on Mac) on your keyboard to open the Content Aware Fill panel in Photoshop. Press OK.
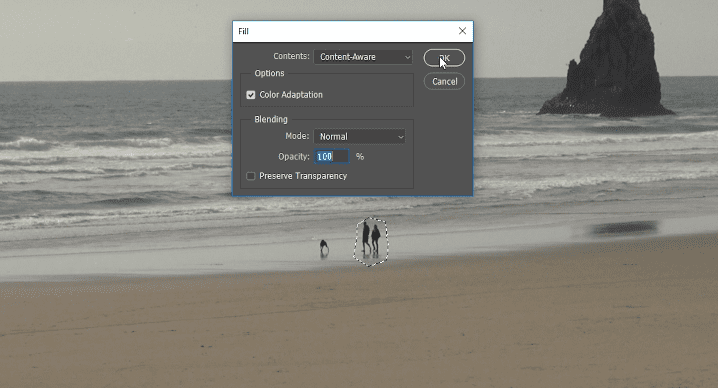
That will remove the people from the scene. Now do the same for the dog.
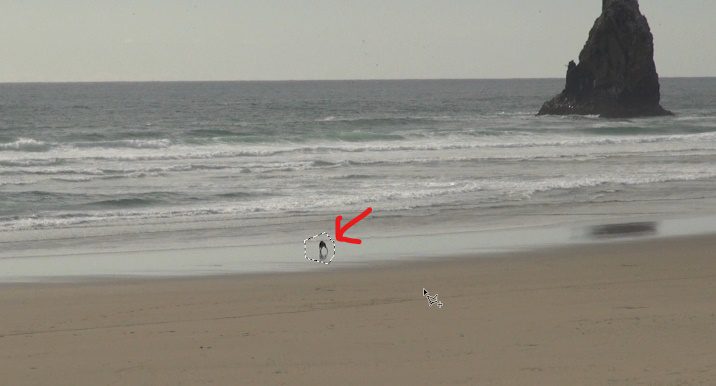
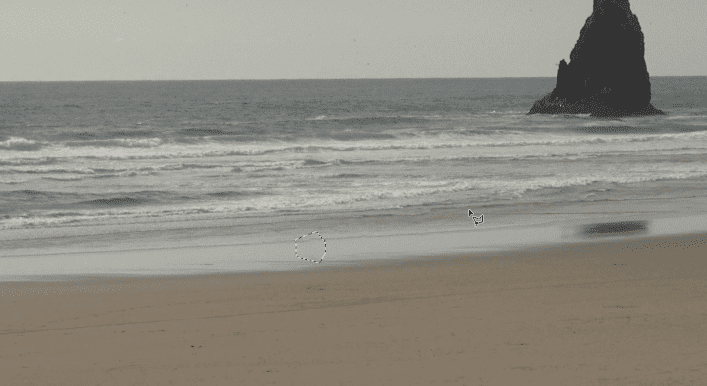
7. Go to File > Save, and switch back to After Effects. You’ll notice back in After Effects that a new layer has appeared called Reference Frame. This will provide clean data for your mask selection in After Effects that the Content Aware Fill feature can utilize to create a better result.
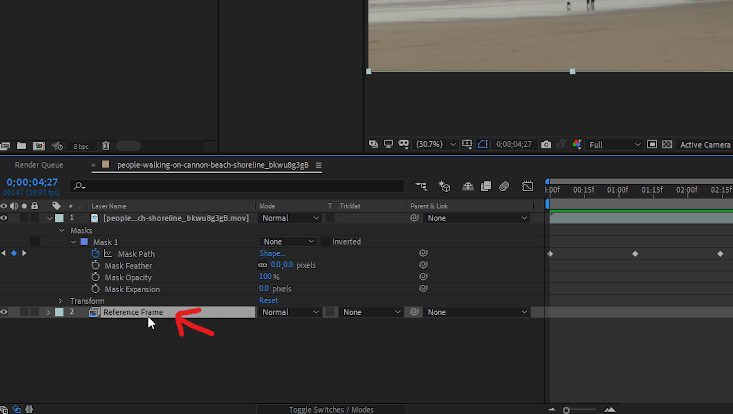
Let’s set our mask back to Subtract like we did in Step 4. The effect will look complete, but that’s only because of the reference frame. Every other frame in the composition still needs to be completed.

8. In the Content Aware Fill panel window, click ‘Generate Fill Layer,’ and wait for the effect to analyze and complete.
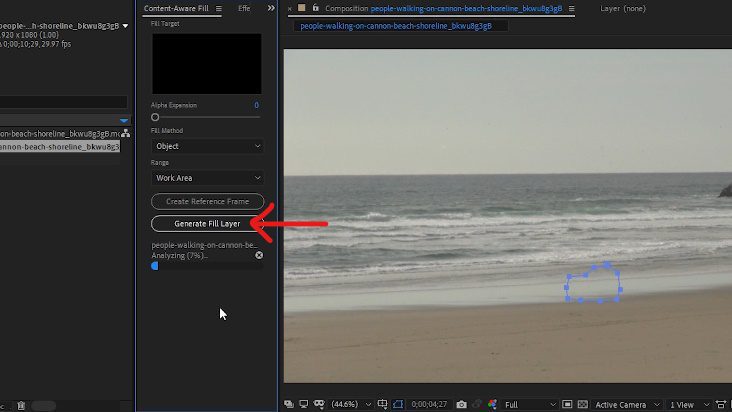
Once complete, it will show a new .png layer in your composition above your footage. The effect is now complete for the people and the dog in the middle of the scene.
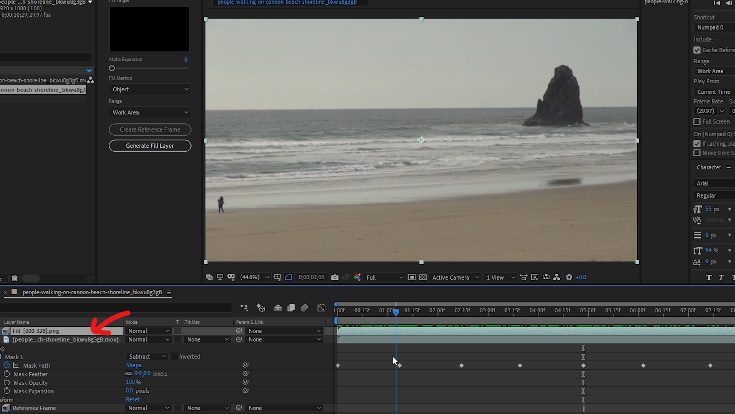
If you only have one element in your footage to remove, those are all the steps that are required!
In our footage, we have another person on the left of the frame, so we will repeat steps 2 to 8. This time, we will select the person on the left.
9. I will create a second reference frame, then when Photoshop opens, I will remove the person from the shot, Save and return to After Effects.

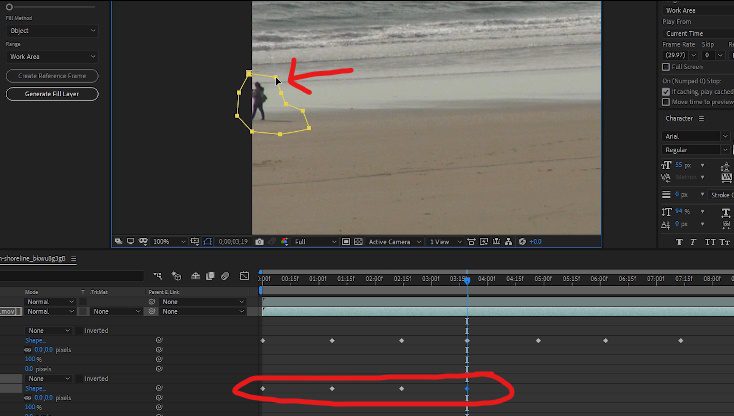
10. Back in After Effects, I will draw a second mask around the person and will make sure both masks are set to None. From there, I will create keyframes throughout the composition and reposition the mask as needed.
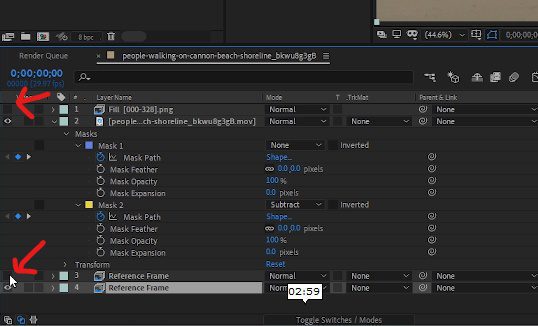
Since we are using the Content Aware Fill feature twice in this project, I will turn off the first generated Fill layer, and the first generated Reference Frame layers.
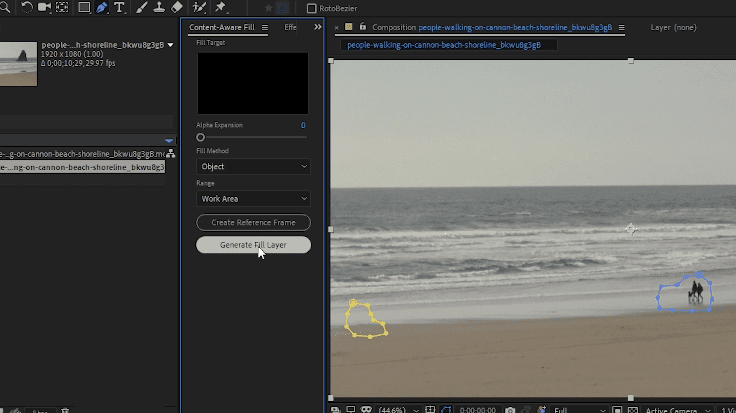
11. Once again, let’s go to the Content Aware Fill panel window and click on ‘Generate Fill Layer.’
12. Next, I will turn all of the layers back on, and make sure the two masks that were created are set to Subtract.
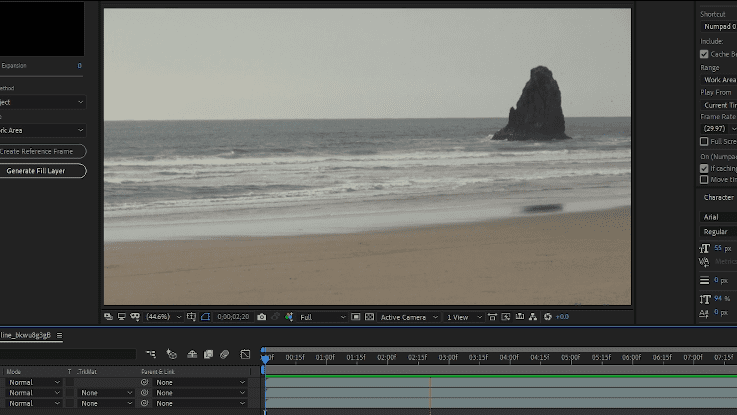
And now we’re done!
The Content Aware Fill workflow has its limitations, as a lot depends on the footage you’re working with. However, once you’ve attempted it a few times, you’ll have an understanding of what footage you can use with the feature. It’s a beneficial tool that can help you achieve the perfect look in your clips and drastically reduce your editing time!
Want to see more from Will Bartlett? Look for more tutorials to come on the Storyblocks blog or subscribe to his YouTube Channel, Alli and Will.


