
Are you a YouTuber or Vlogger? If the answer is yes, then showing your social media handles in your videos is a must! Using simple social media icon overlays with text is an easy way to tell your audience where to find you and stay connected.
In this tutorial, you’ll learn a quick way to create Follow hooks by customizing a social media overlay After Effects template. You can use the same template I am using in this tutorial, or you can search the Storyblocks library to find one that works for you.
Let’s get started!
1. Download your After Effects social media template and open it up in Adobe After Effects CC.
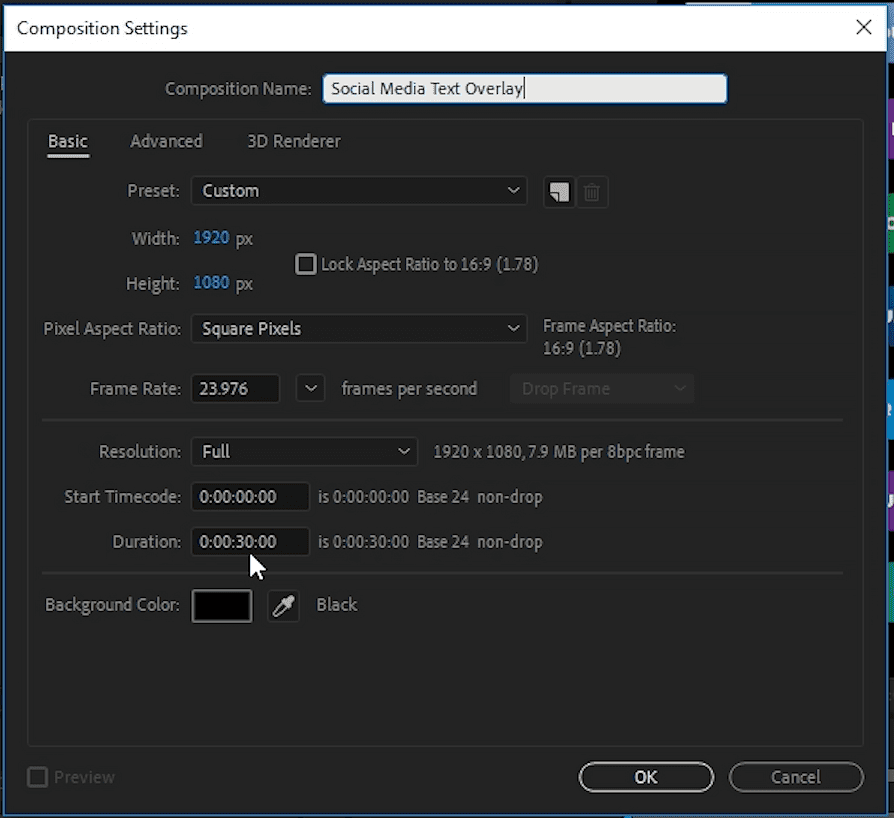
2. Click on the Composition tab > New Composition. This opens up a Composition Settings box. Name it ‘Social Media Text Overlay.’ Choose your composition settings based on the video resolution and frame rate of the footage that you plan to use your overlay with.
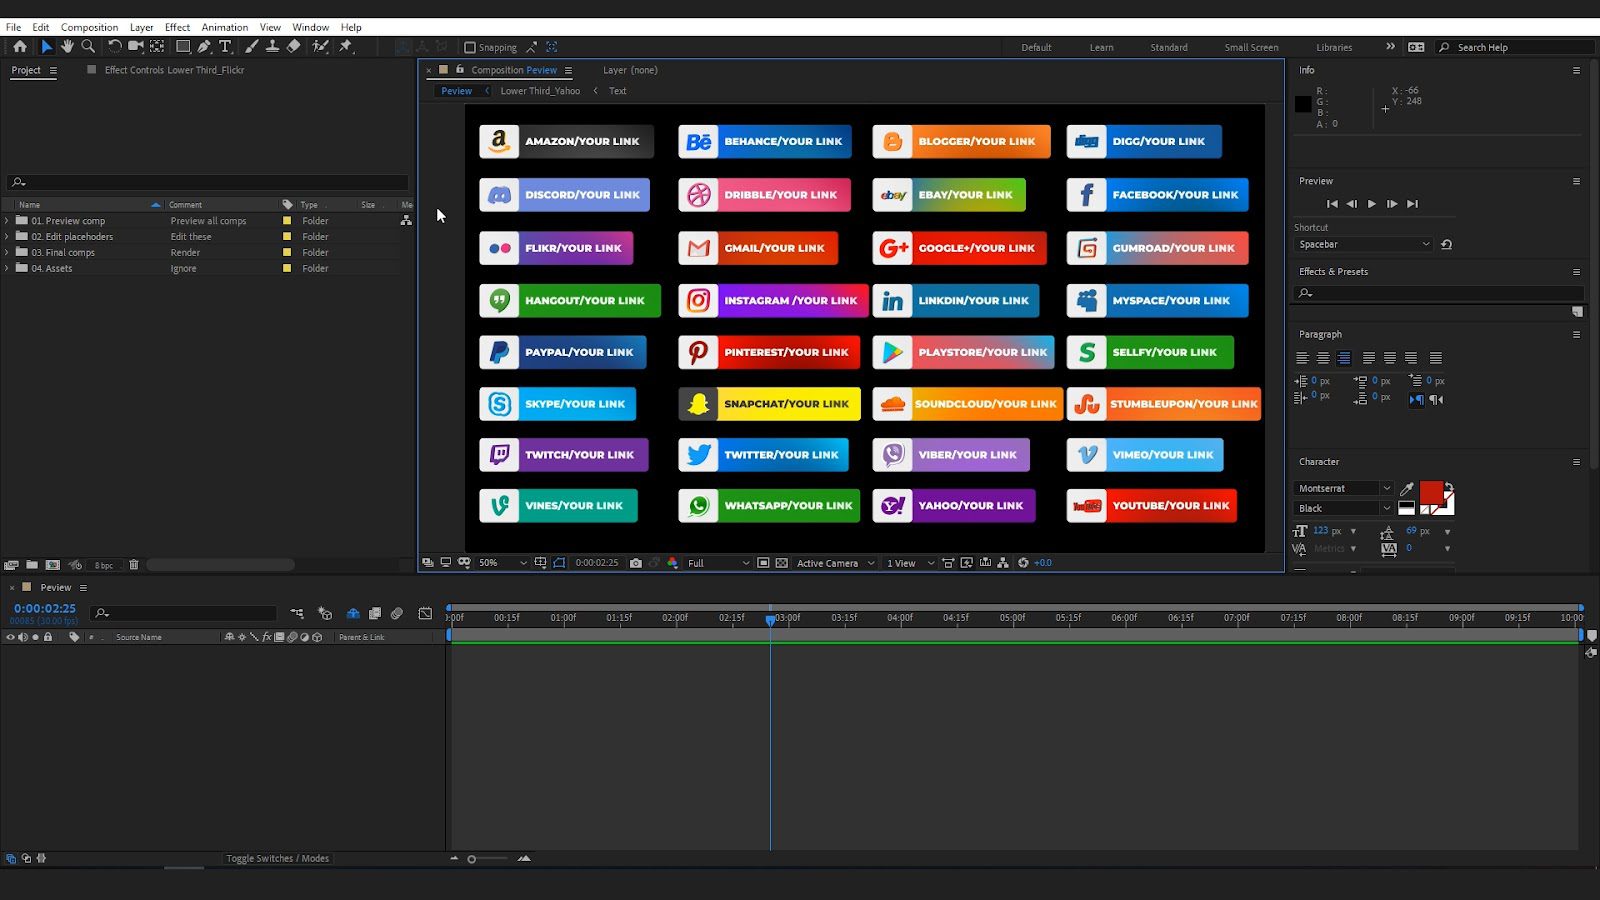
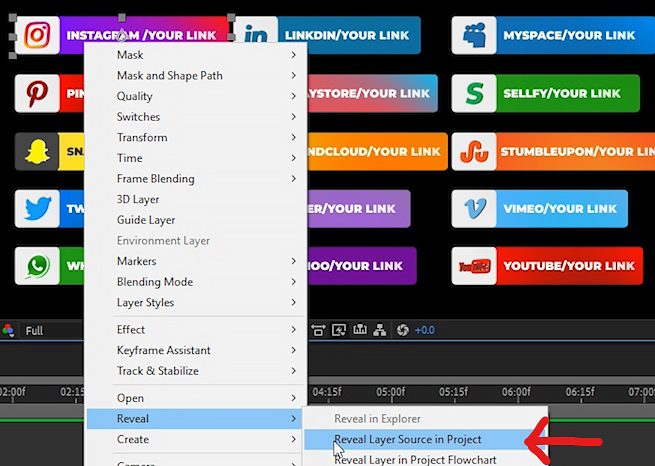
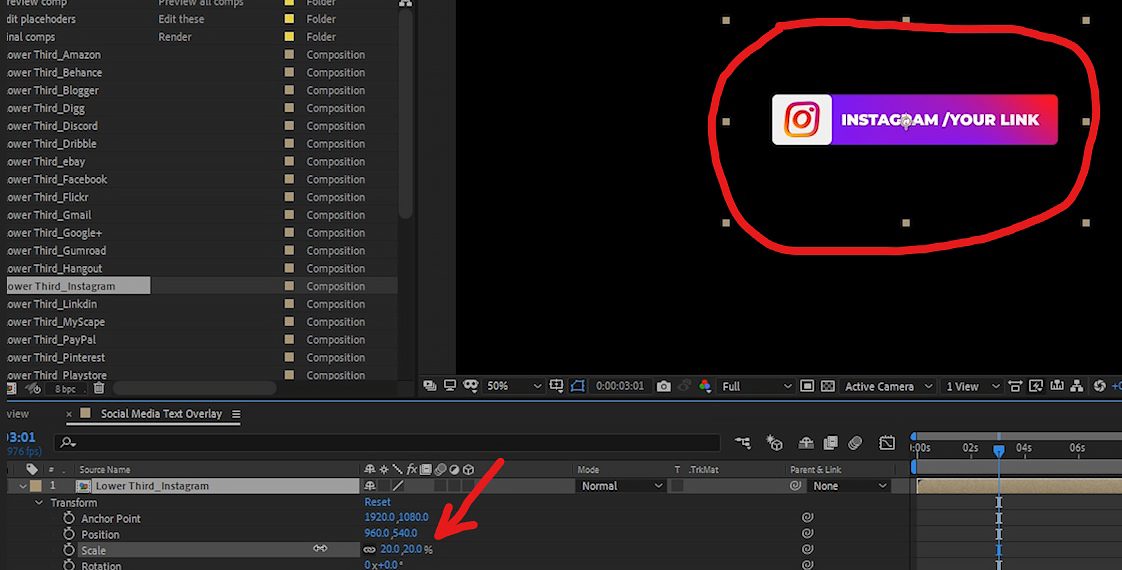
3. Click the Preview composition that contains the social media template options and right-click the graphic you’d like to customize. Click Reveal > Reveal Layer Source in Project. This highlights the specific pre-comp you chose.
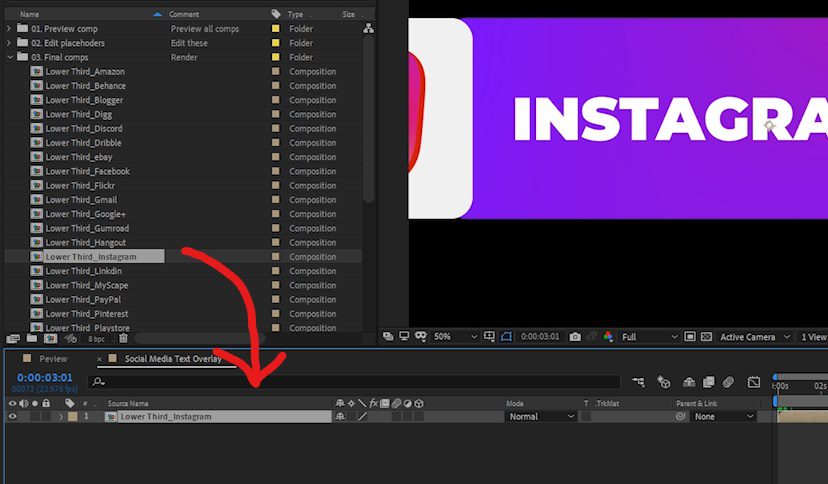
4. Drag the highlighted social media comp you revealed, onto your Social Media Text Overlay composition.
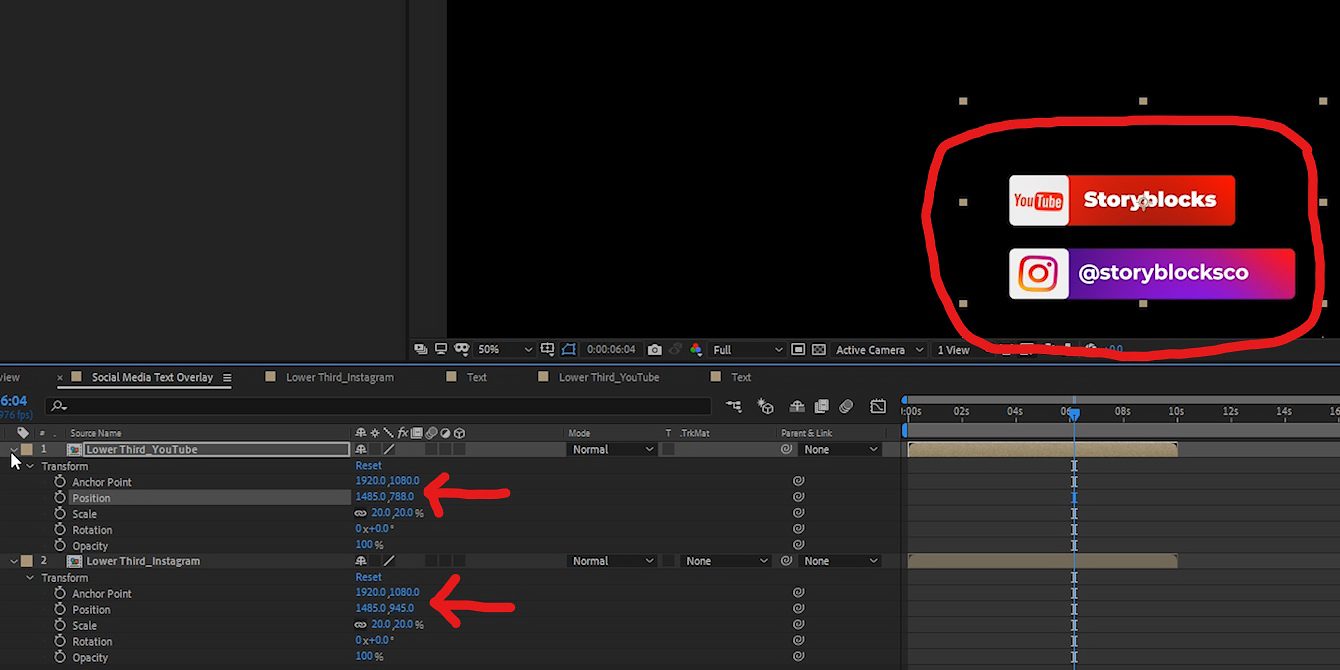
5. To adjust the size of this pre-comp, click on its dropdown menu as well as the Transform dropdown menu, and adjust the Scale to 20% so that it’s sized more like a lower third title.
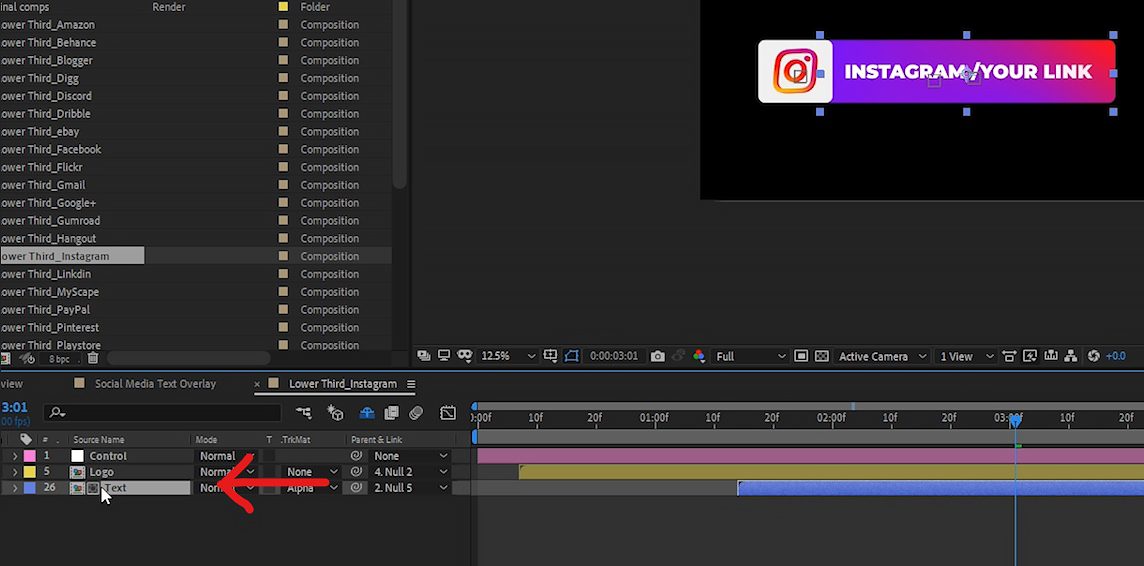
6. To customize your text, double-click on your pre-comp to open up the pre-comps within it.

7. Now you can double-click on the Text pre-comp to customize your text.
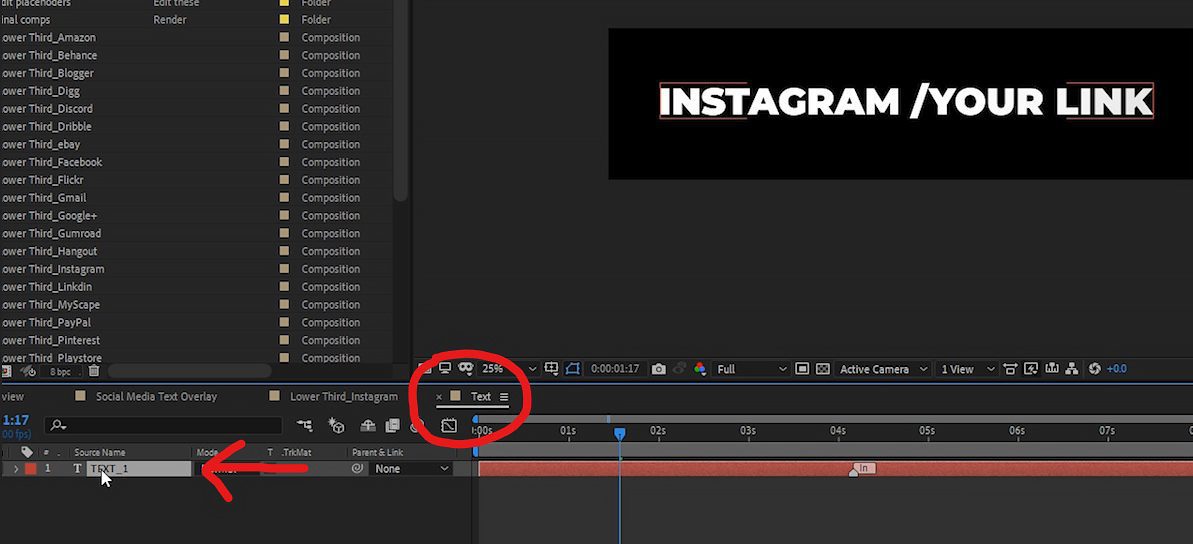
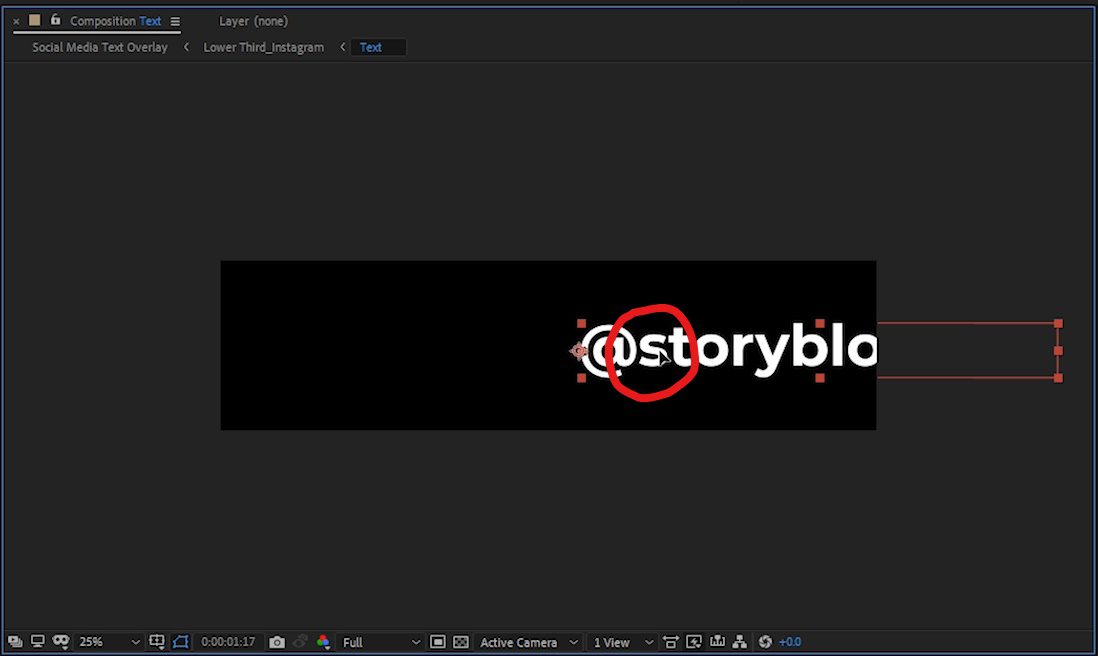
8. Click on the Text layer to select your text, and in the Preview window, type in your social media handle.
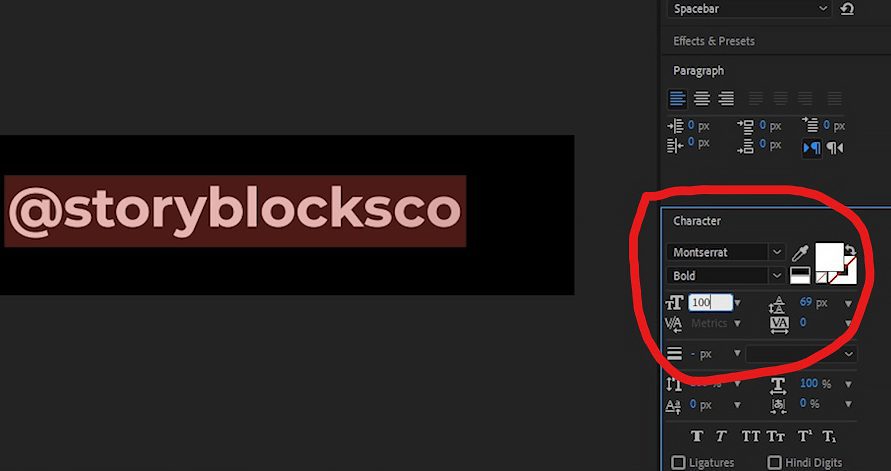
9. With your text selected, in the Character panel, you can adjust the font, color, and size of your text to your liking.
10. Using the Selection tool, click on your text in the Composition Preview and adjust the position of it to your liking. Make sure you don’t move your text outside of the frame parameters because those parameters indicate the area that your text must remain within to be visible in your social media comp.
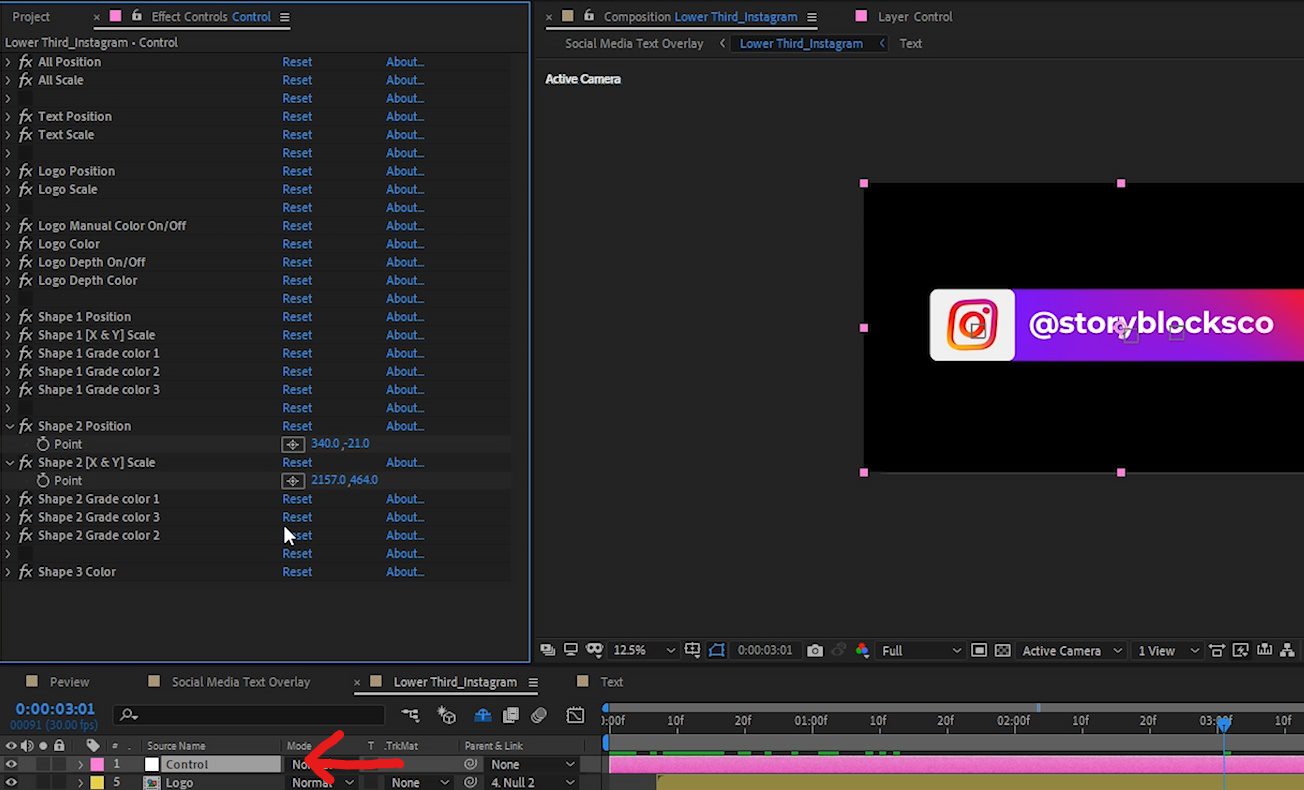
11. In the social media tag comp, click Control to open the effects applied to this overlay. In the Effect Controls window, you can adjust the effects as well as the shape and color of this overlay.
12. To add a second social media handle to your Social Media Text Overlay comp, click the template comp to see other available options. Like before, right-click on the next social media tag you’d like to add, then click Reveal > Reveal Layer Source in Project.
13. Drag the second pre-comp onto the Social Media Text Overlay composition, above the first pre-comp.
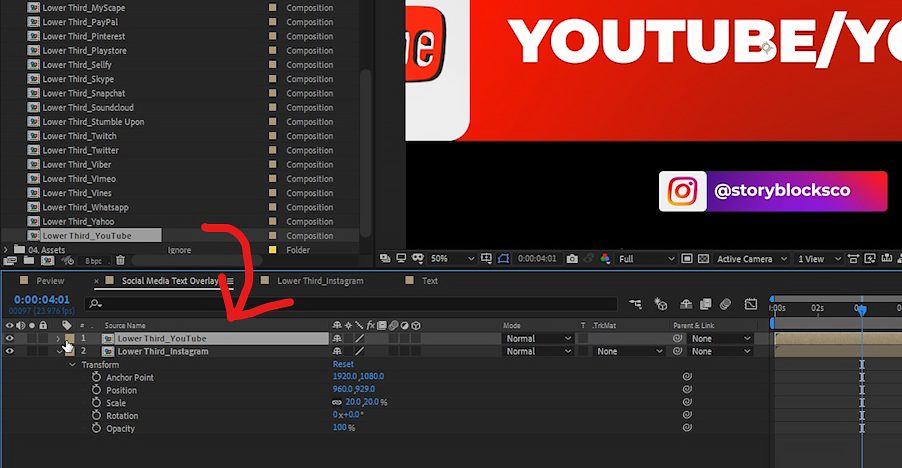
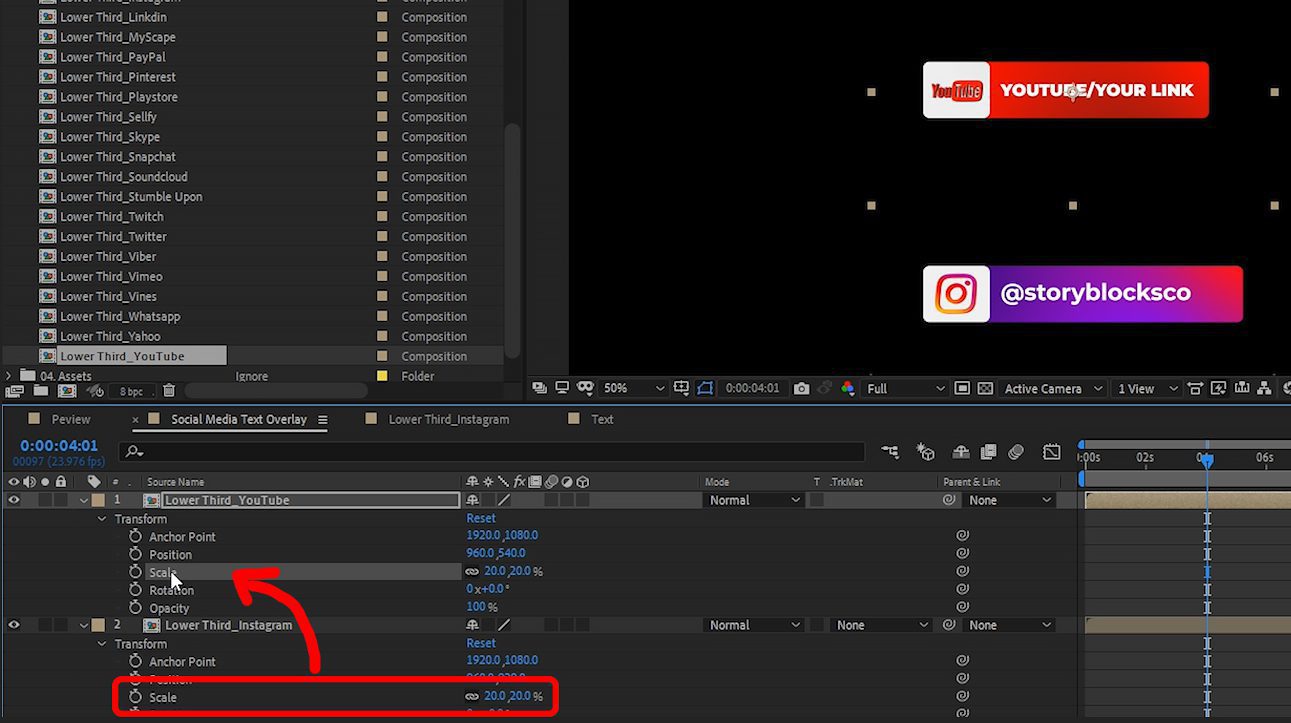
14. To make the second social media pre-comp the same size as the first, click the first tag’s dropdown menu, then click the Transform dropdown menu to reveal the Scale option. Click Scale and press Command or Control-C on your keyboard to copy the scale attribute. Now, on the second social media pre-comp, click the dropdown menu and the Transform dropdown menu, click Scale, and on your keyboard press Command or Control-V to paste the Scale attributes.
15. You can now follow the same steps with the second pre-comp, to customize the text, shape, and size of this second pre-comp template.
16. Adjust the X-axis and Y-axis position of both of your social media tags to the bottom right of your composition frame, one above the other.
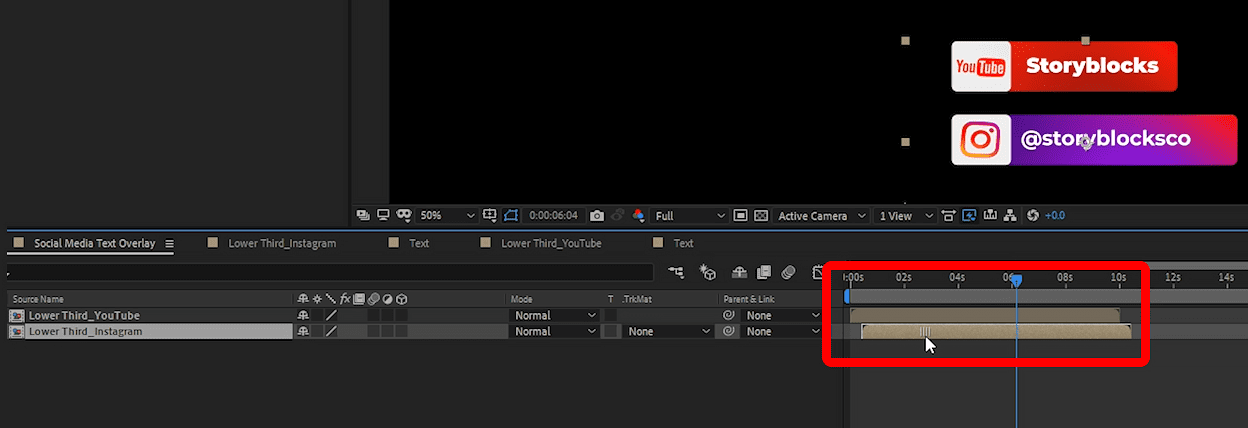
17. To make the overlay animation more interesting, you can drag the second social media tag to the right, a few seconds so that the first social media tag animates on screen before the second.
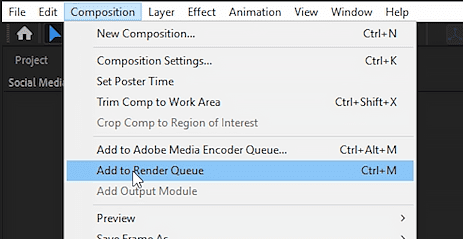
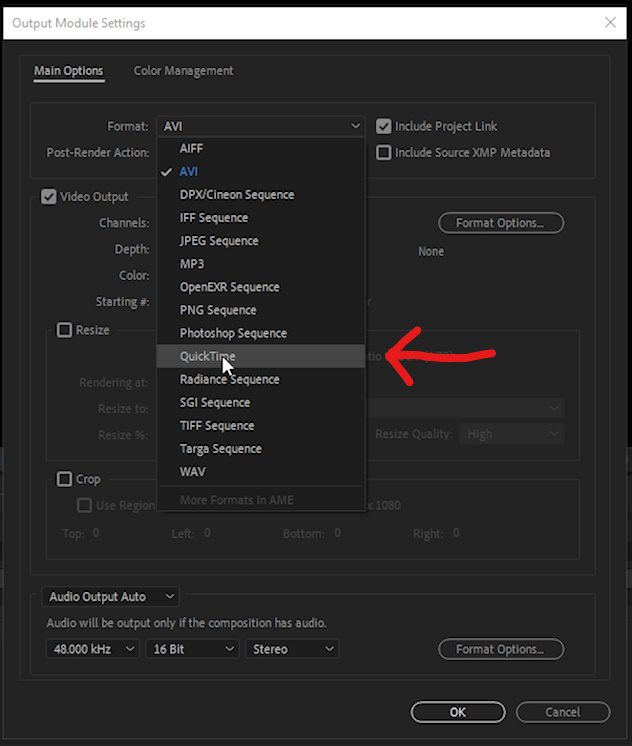
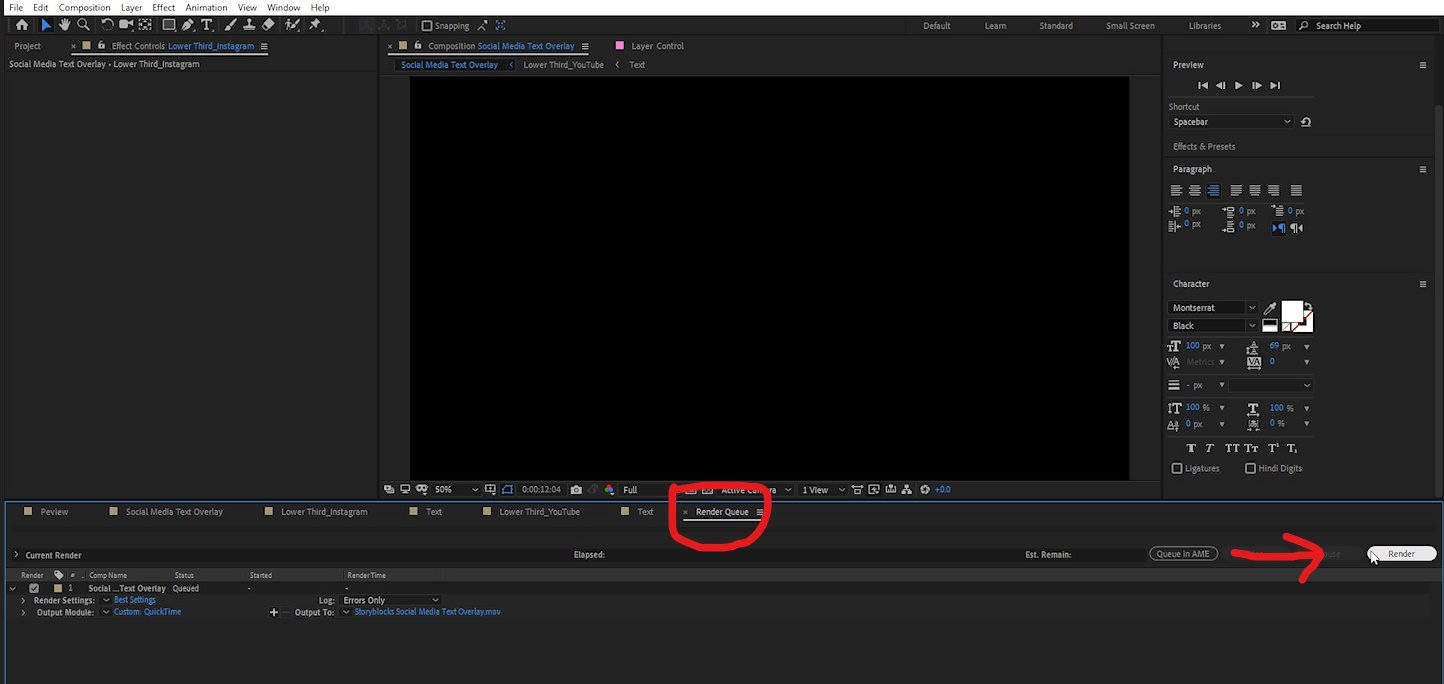
18. When you’re happy with the look of your social media tags, you can render the Social Media Text Overlay by going to Composition > Add to Render Queue.
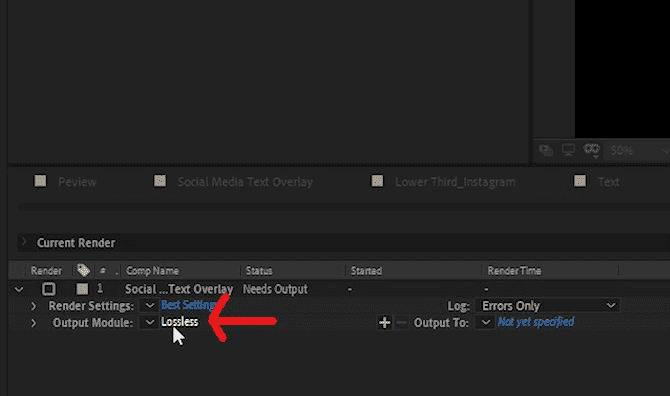
19. In the Render Queue tab where it says Output Module, click Lossless.
20. For this Social Media Text Overlay to work correctly in your editing program, you’ll want to export with a transparent background, which is known as an alpha channel. In the Output Module Settings Box, click the Format dropdown menu. Change the format to QuickTime. If you don’t have Quicktime, you can try installing the Quicktime player or select a different video format that allows for ‘RGB + Alpha,’ as shown in step 22.
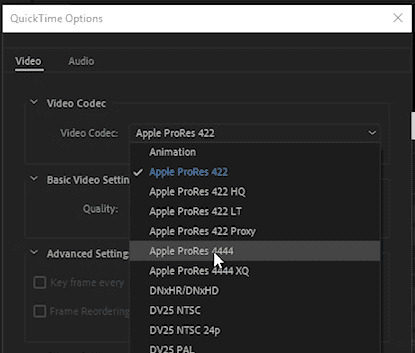
21. Next, click Format Options, and in the QuickTime Options box, click the Video Codec menu. Select Apple ProRes 4444 and press OK.
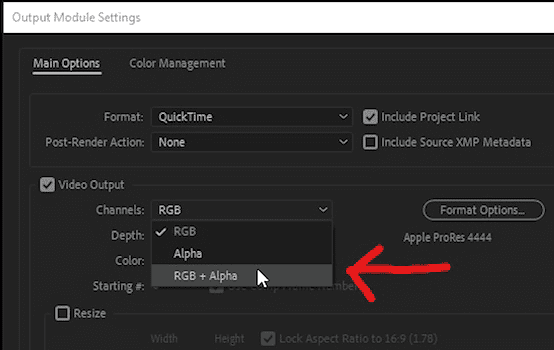
22. Click the Channels dropdown menu and select RGB + Alpha.
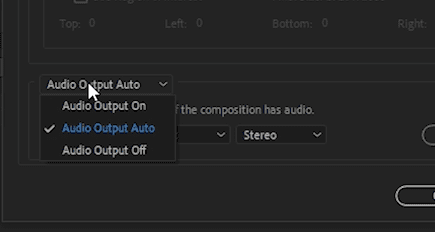
23. Click the Audio Output Auto dropdown menu and change it to Audio Output Off. Press OK.
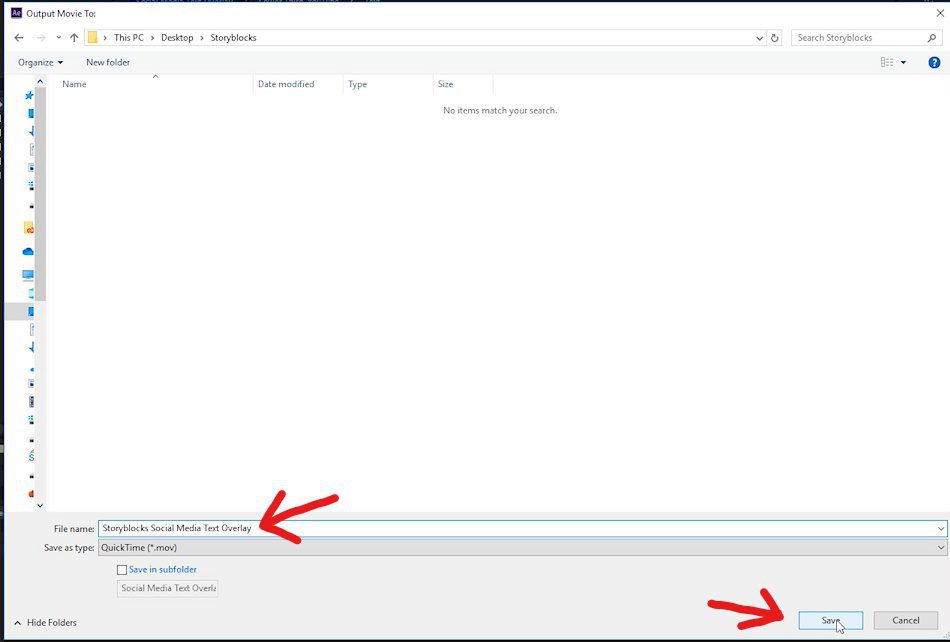
24. In the Render Queue, where it says Output To, select Not Yet Specified, and choose a place on your computer to save this Social Media Text Overlay. You can change the file name and press Save.
25. Press Render to export your Social Media Text Overlay composition.
26. Now you’re done!
You can use this overlay on any of your YouTube or vlog videos so your viewers will know how to stay connected with you! And with the template I used in this example, and many of the templates available, there are icon options for almost any social media platform you can think of.
That sums up this tutorial on How to Create Social Media Icon Overlays using After Effects! For more AE template options, check out what Storyblocks Video has to offer.

