Looking to add a fun, colorful vibe to your video? In this tutorial, you’ll learn how to create a popular, on-trend effect in Premiere Pro — a gradient overlay.
By the end of this tutorial, you will know how to create a gradient overlay, using two different methods. If you’re looking for stock footage to use, head over to Storyblocks Video to find the perfect clips.
Let’s get started!
1. Import your clip into Premiere Pro and bring it onto your timeline.
2. In the Project panel, click on the New Item icon and select Adjustment Layer.
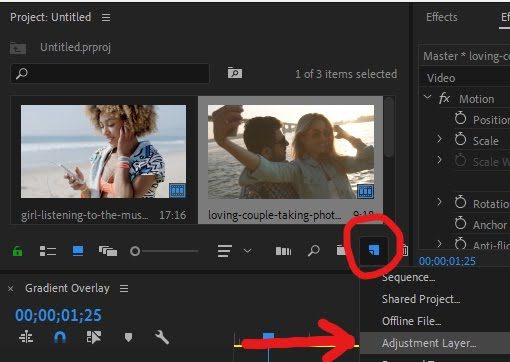
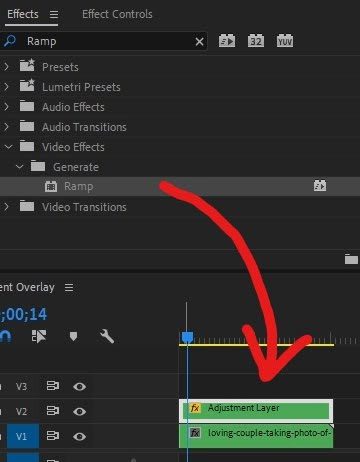
3. Drag the adjustment layer onto the timeline on the V2 track, above your clip.
4. In the Effects panel search for Ramp.
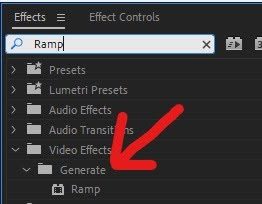
5. Drag the Ramp effect, that’s in the Video Effects > Generate folder, onto your adjustment layer.
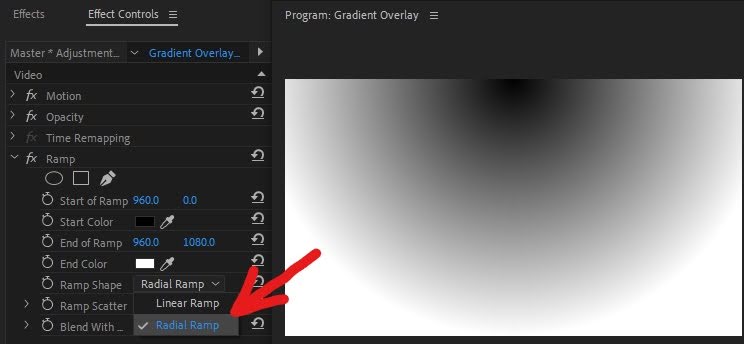
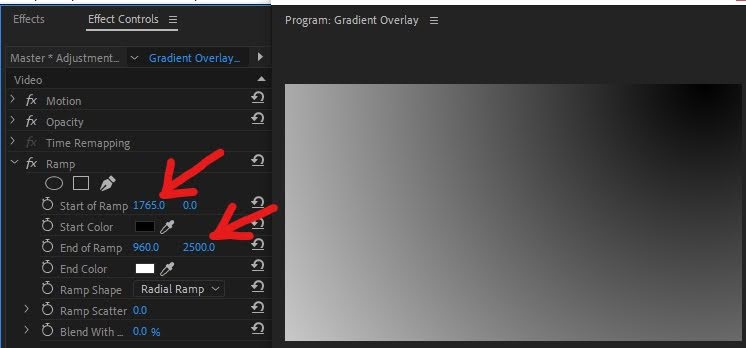
6. In the Effect Controls panel, under the Ramp effect, change the Ramp Shape to Radial Ramp.
7. Move the Start of Ramp x axis position to 1765. Move the End of Ramp y axis position to 2500. Now the gradient overly will blend more gradually.
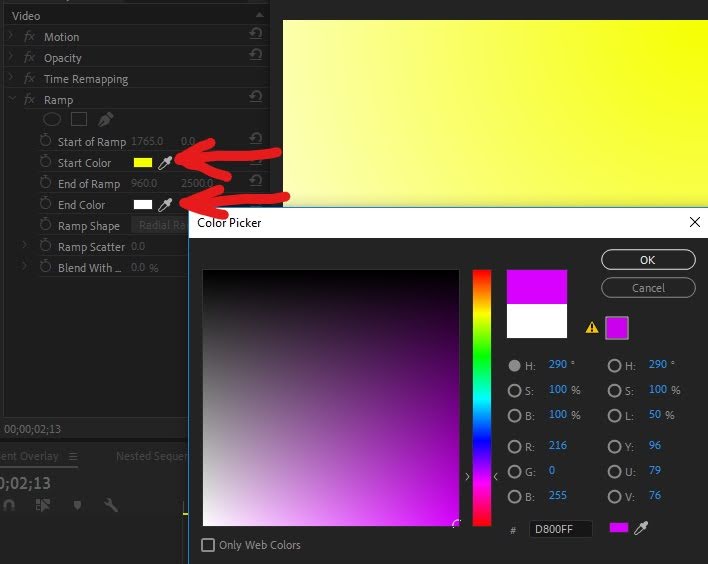
8. Change the Start color by clicking on the Color Picker Box and choosing a yellow color. Change the End color by clicking on the Color Picker Box and choosing a magenta color.
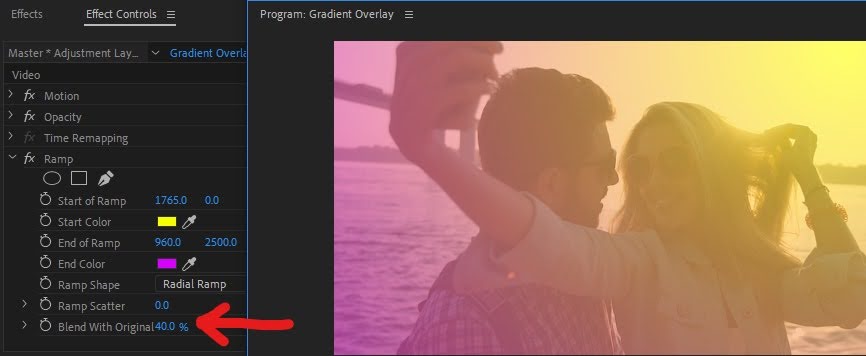
9. Decrease Blend With Original to 40% to show the clip under your gradient overlay.
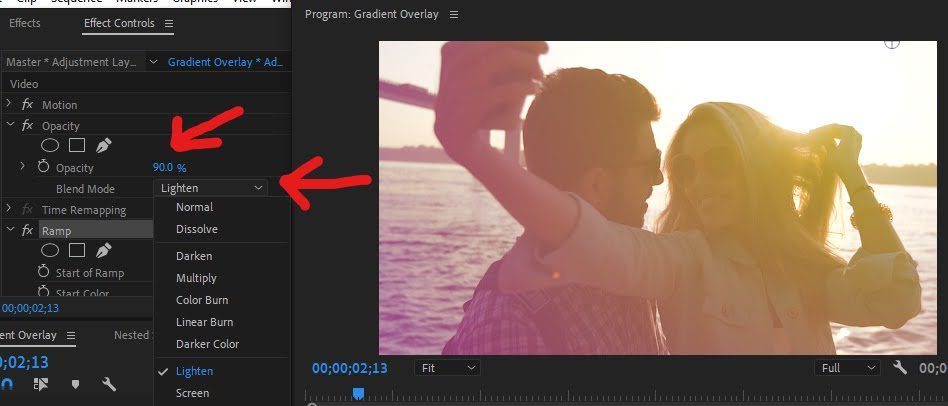
10. In Effect Controls, under Opacity > Blend Mode, click the drop down menu. You can choose any of these options to further blend the overlay. I prefer to use Lighten. You can also adjust Opacity to 90% to show more of the clip under the overlay.
And there you go!

Using the Ramp effect is just one way you can create a gradient overlay, using two colors. Next, let’s look at another method for creating a gradient overlay that will give you more color options.
1. With your clip on the timeline, drag an Adjustment Layer onto the V2 track, above your clip.
2. In the Effects panel, search for 4 Color Gradient, which you’ll find in the Video Effects > Generate folder. Drag this effect onto your adjustment layer.
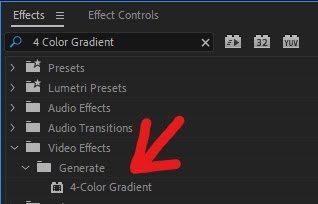
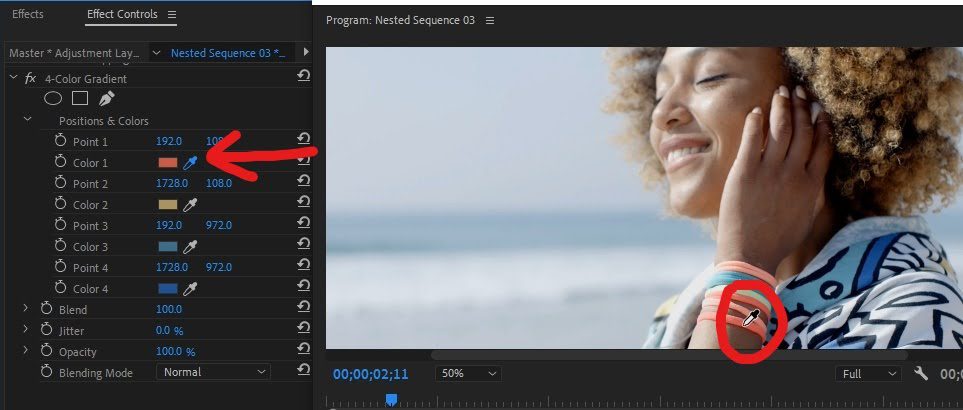
3. In the Effect Controls panel, under the 4-Color Gradient effect, you can change any of the four colors. Use the Eyedropper tool to select colors on the clip itself.
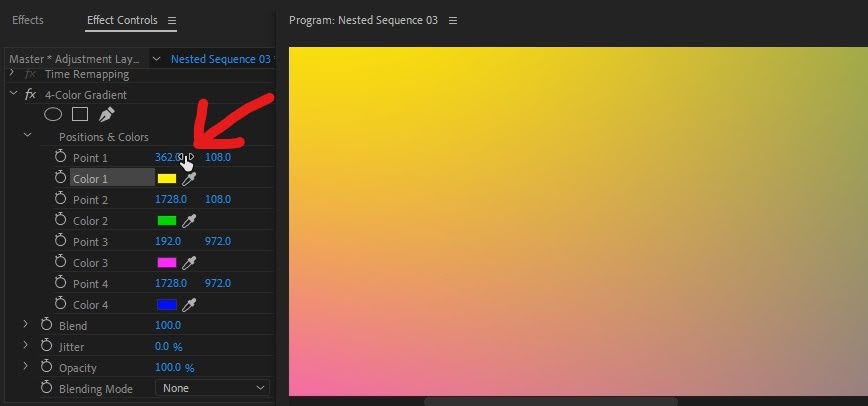
4. Adjust the x axis and/or y axis of the position of any of the colors, to your liking.
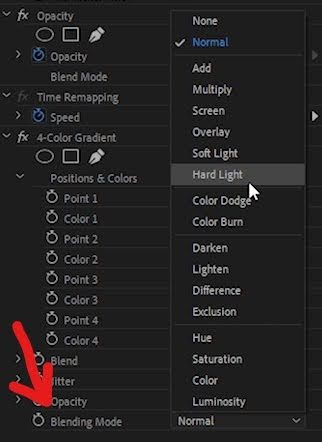
5. Click on the Blending Mode dropdown menu to choose your preferred blending option. I like Hard Light.
6. Since this video clip shows a woman’s face, let’s click on the Create Ellipse Mask icon in the effect to create a round mask.
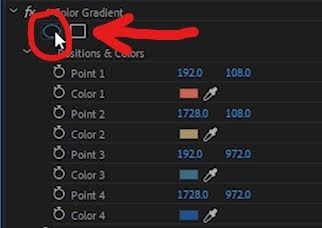
7. We can use the Hand Tool to move the mask over the woman’s face.

8. Select Inverted so that the mask shows up around her face rather than over it and adjust the Mask Feather to 500 to make the mask’s edge less sharp.
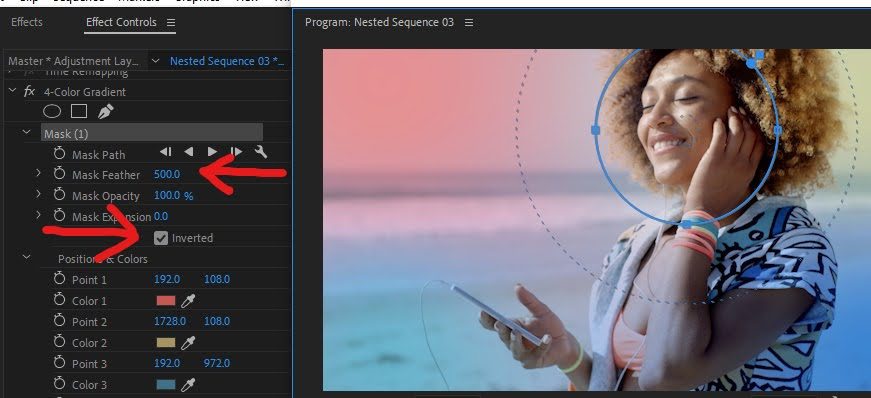
Now your gradient effect is finished!

You now know two different ways to create a gradient overlay in Premiere Pro! This dreamy effect is often used in music videos, commercials, and vlogs, to add a creative twist. When used with brighter footage, it gives a summery vibe. When used with darker footage, you’ll get an edgy effect. So go wild experimenting and make the effect unique to your work!
Want to see more from Alli Saunders? Look for new tutorials to come on the Storyblocks blog or follow Alli and Will on YouTube and Instagram.


