You don’t need a masters degree in motion graphics or computer animation to make simple animated GIFs. If you know your way around Adobe Illustrator and Adobe Photoshop—and have access to high-quality stock vectors—then you’re that much closer to creating animations that are worth bragging about. In this tutorial we will show you how to take vector graphics and transform them into delightful, animated GIFs that are guaranteed to impress.
We will begin by using a royalty free vector from our membership library. Look for vectors that are begging for animation and movement. Maybe there is an apple that could look adorable with a little wiggle movement. Or a spaceship that is dying to take flight. Remember, since we can easily isolate each individual element, you can also look at icons packs and vector compositions. Once you find your perfect fit, download the .eps to begin editing your vectors in Illustrator and animating your vectors in Photoshop.
We chose to get started with this collection of colorful flat SEO and development icons and to add subtle and simple animations like lightly bouncing elements and a simple opening of the envelope. If you want to follow along with the tutorial, just download the vector—it’s already included in your subscription. Check out our final product below.

Step 1: Isolate the Vector
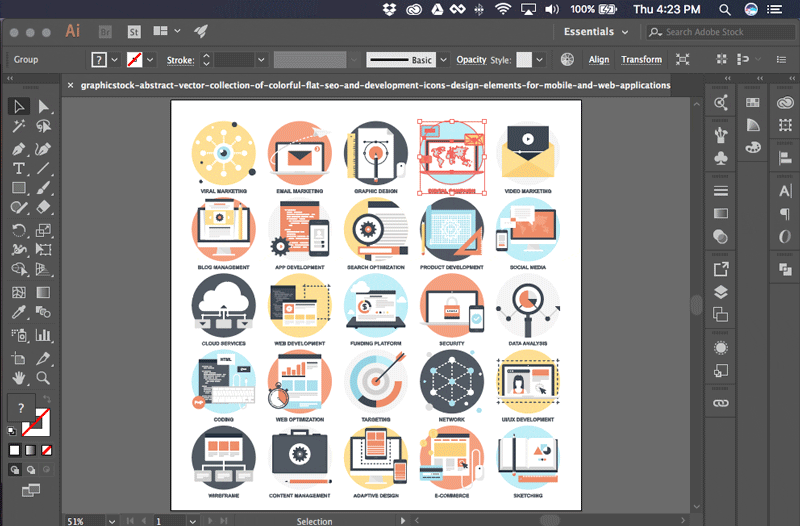
Open the .eps into Illustrator and click on the icon you wish to animate. Copy (CMD + C) and paste (CMD + V ) into a new illustrator file. Our new file is sized at 200px x 200px.
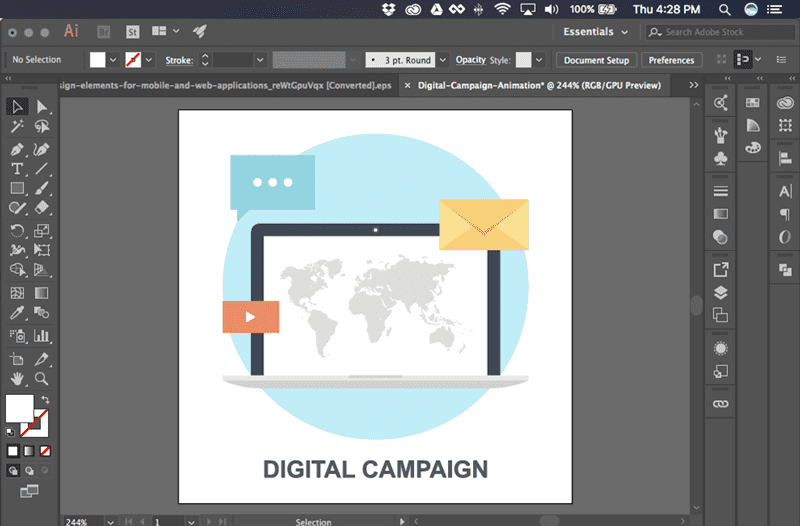
Delete any extra elements that you don’t want included. We ousted the words “Digital Campaign.”
Step 2: Duplicate the Vector
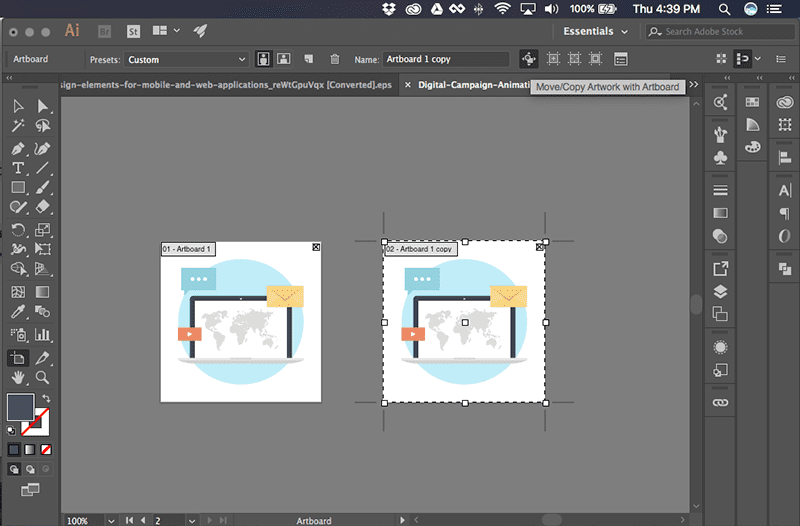
Enter your Artboard Tool (Shift + O) –making sure that your “Move/Copy Artwork with Artboard” option located to the right of your artboard name is activated—and duplicate the artboard by holding Alt and Shift while clicking and dragging the duplication to the right.
Think of these duplications as the frames in your animation. Each frame will be slightly different from the other, eventually indicating movement.
Step 3: Make Subtle Changes Frame to Frame
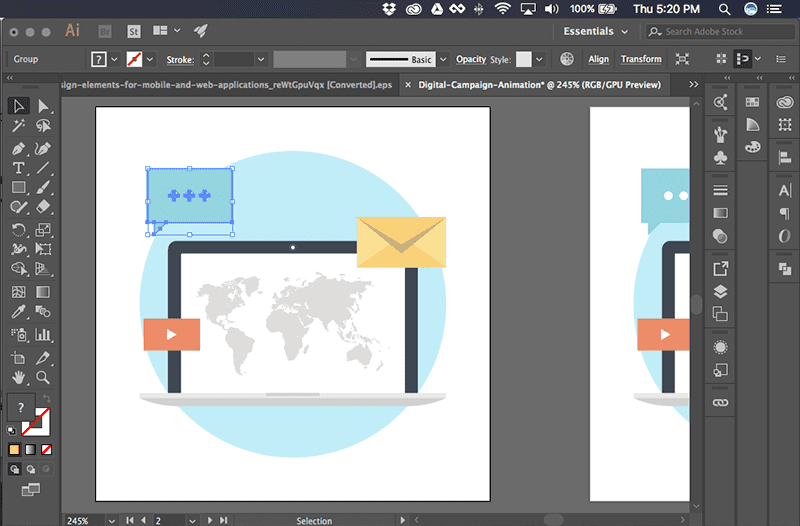
To make the process faster, ungroup your elements until they are only grouped within each object. The chat box is grouped only with the chat box, the envelope is grouped only with the envelope, etc. This particular icon only took two un-groupings.
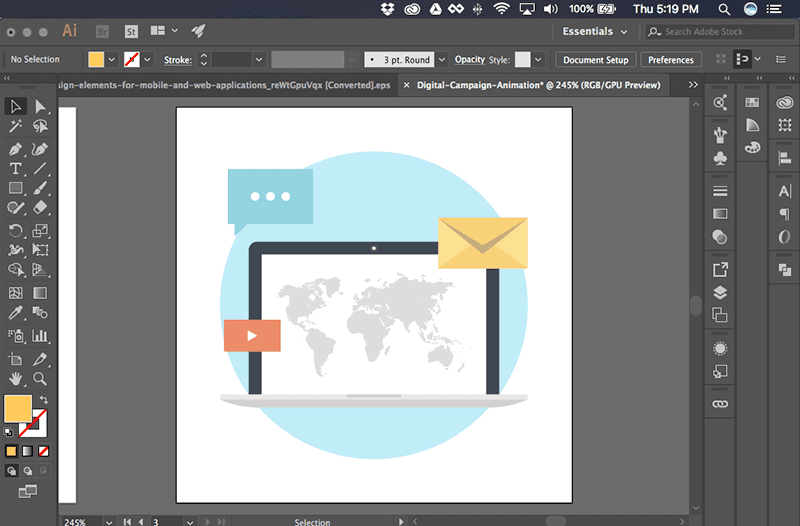
Then starting making subtle changes to each element. We nudged the chat box up pixels, the video play button to the right by 2 pixels, and used the Direct Selection Tool (A) to ease the point of the envelope up by 2 pixels, as well.
Step 4: Wash, Rinse, Repeat
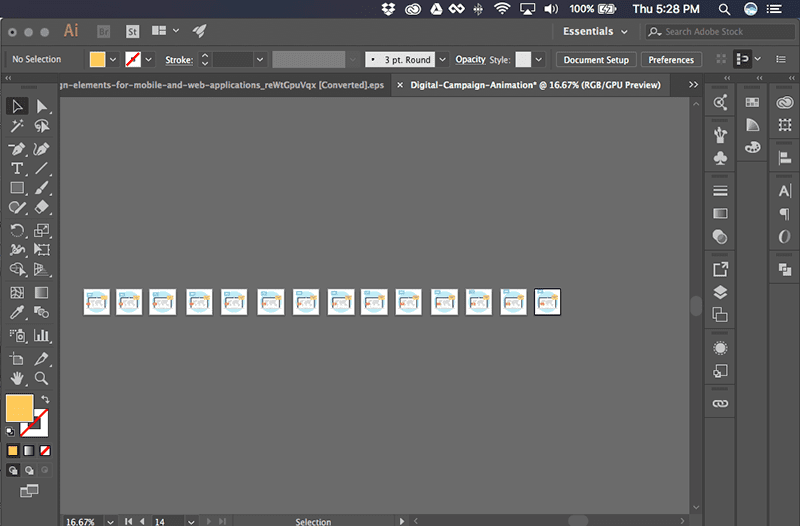
Simply duplicate the new artboard, and make the same changes as before. Repeat this step a few times until you’ve reached the full range of motion you desire. As you can see, we ended up with a large amount of artboards.
Now we’re ready to animate the artboards over in Photoshop!
Step 5: Copy the Vectors to Photoshop
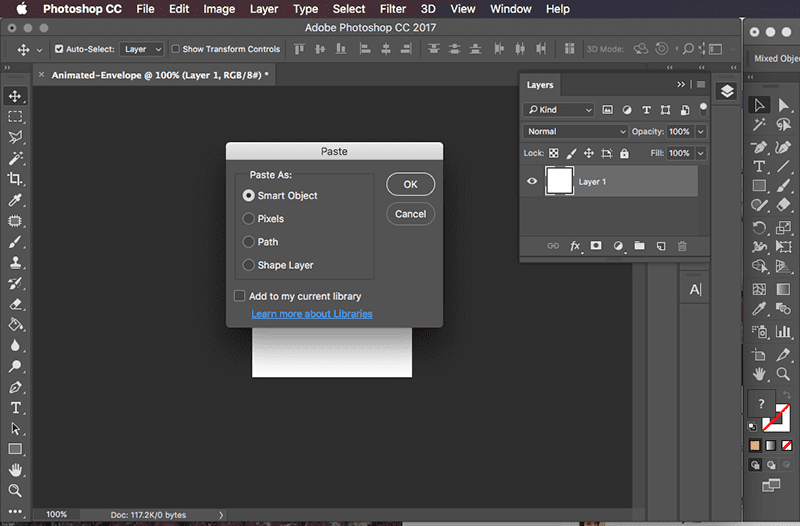
Now that you have your vectors ready, it’s time to learn how to animate your vectors in Photoshop. Start by creating a new Photoshop document. We made the file size 200px x 200px (same as our Illustrator artboards), with RGB color, and 72 dpi since this will be used for web. Now copy and paste each icon from each artboard onto a separate layer as a Smart Object to maintain its quality.
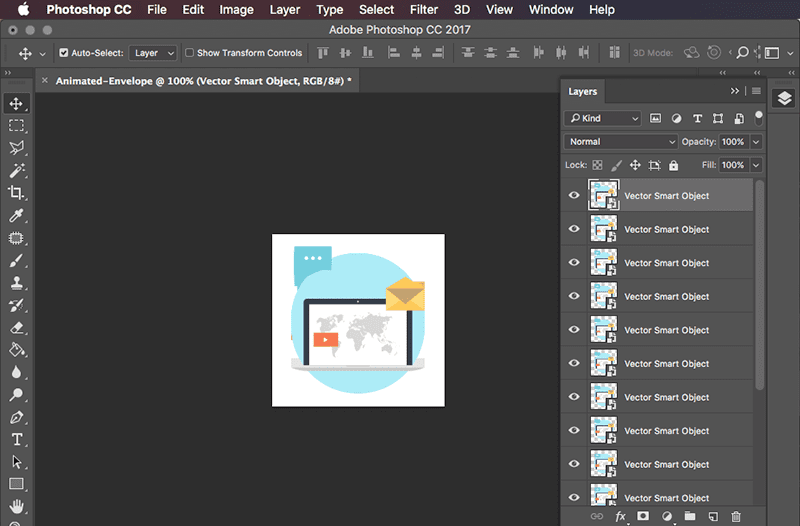
Repeat until all of the artboard elements are on their own separate layer making sure they copied over sequentially and that each element which doesn’t move is perfectly aligned with one another.
Step 6: Duplicate the Layers Into a Timeline
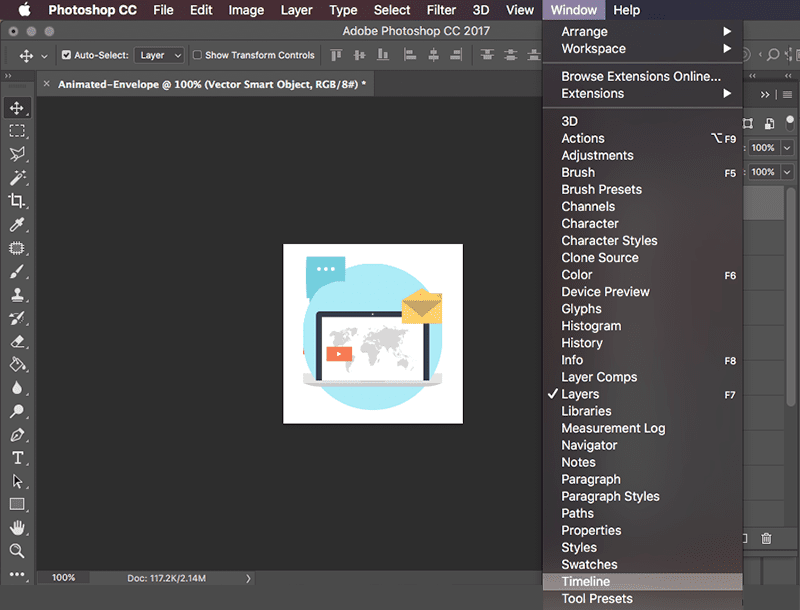
Open the Timeline panel from the Window drop down menu.
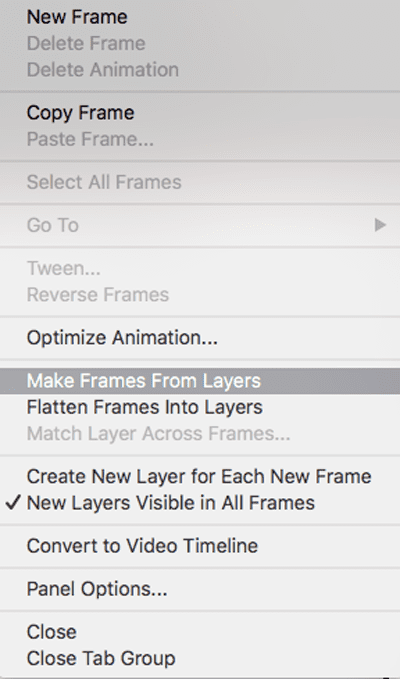
From the options drop down menu in the Timeline panel, choose “Make Frames From Layers.”Now each Smart Object Layer you dropped into Photoshop will populate your timeframe as individual frames.
If you press play, you will see that it plays once, and only moves as far as the range you dictated. If you want it to loop back and forth forever, there are a few more steps.
Step 7: Copy and Reverse the Frames
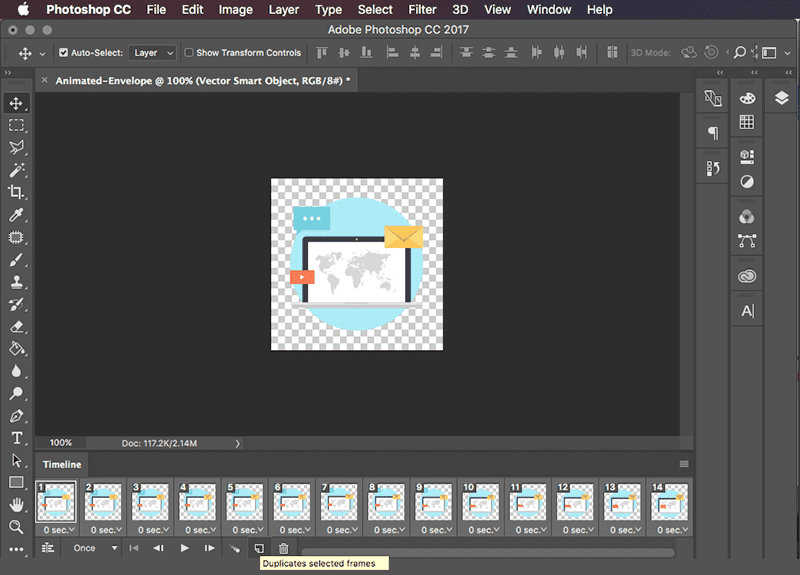
To have the motions move back and forth is simple, however a little tedious. Select all of the frames in your timeline and click the paper button with the folded corner to duplicate them. This gives you twice as many frames.
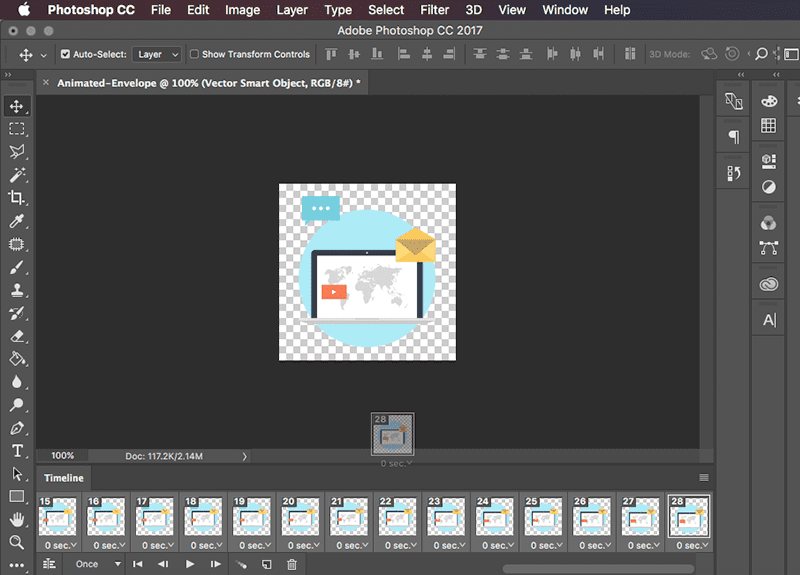
To have the animation not jump to the beginning, begin dragging and dropping the second half of the frames into the correct order. Drag frame 28 to go after 14, then after 15, then after 16, and so forth.
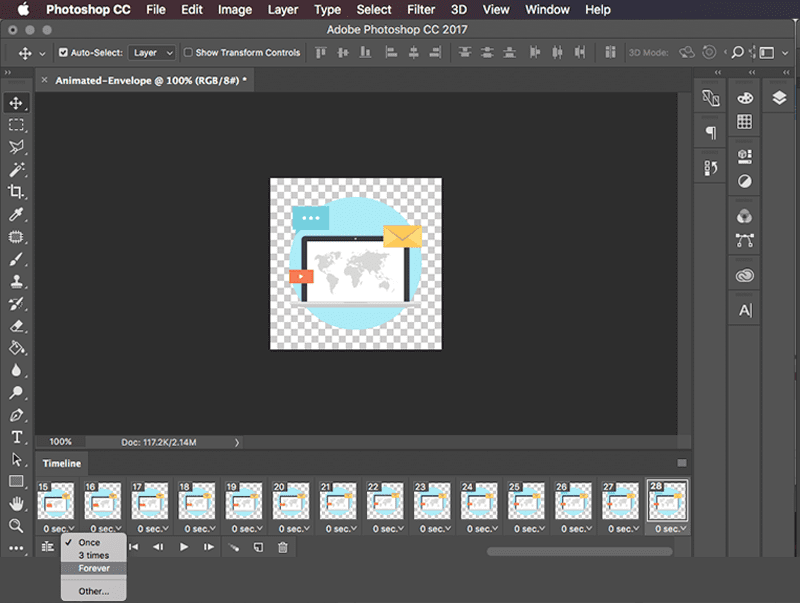
Then choose to have the animation loop “Forever.”
Step 8: Export as a GIF
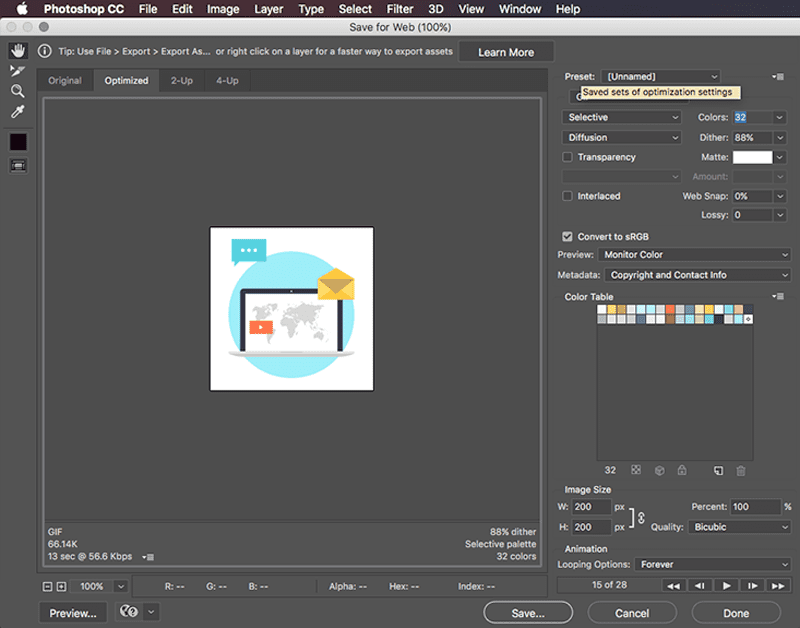
Now that your animation is complete, you’ll want to export it as a GIF. Go to File > Export > Save For Web and choose the Preset “GIF 32 Dithered” and uncheck Transparency.
Click Save and then voila! You have an animated GIF.

Now you have a rad animated GIF that you can embed into your blog posts or display on your website or banner ads—and it wasn’t all that difficult. The beauty is that you can replicate this technique over and over again with as many vectors as you desire.
Think you’ve got what it takes to wow the internet with your magical GIF powers?


