
If you’ve ever edited an interview segment or a video with a voiceover, you know how difficult it can be to mix a voice track and music track without letting one overpower the other. Editing audio tracks in a video project can be very time-consuming when there are several different files and layers involved. Up until the last few releases of Premiere Pro, the only way to make adjustments to your audio tracks was by tediously using the pen tool. However, it’s now possible to adjust and mix your audio tracks in Premiere with just a few clicks.
In this tutorial, I’ll show you two ways to adjust the volume of a music track behind a voice track. The first is the traditional method of using keyframes (which in some instances is necessary.) The second is by using the audio ducking feature to automatically adjust the music volume across your entire sequence in under a minute!
All of the footage and music I used in this tutorial can be found on Storyblocks.
Let’s get started!
Adjust Audio Using the Pen Tool
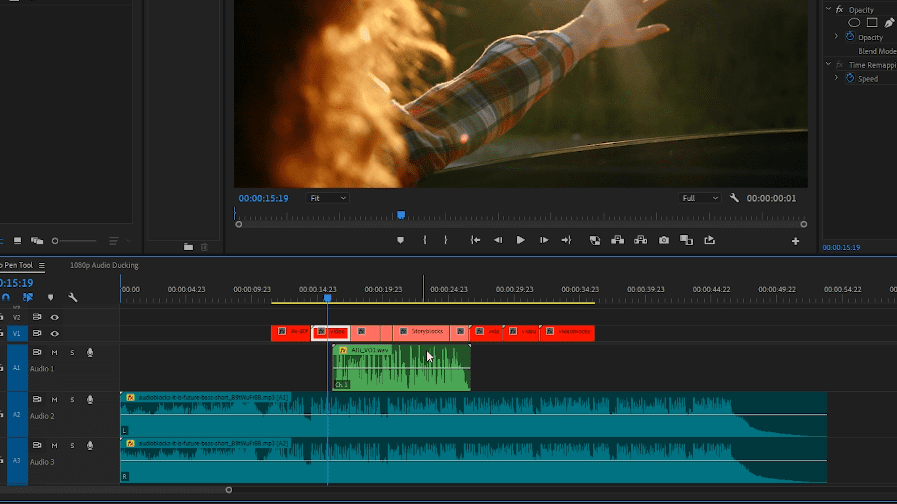
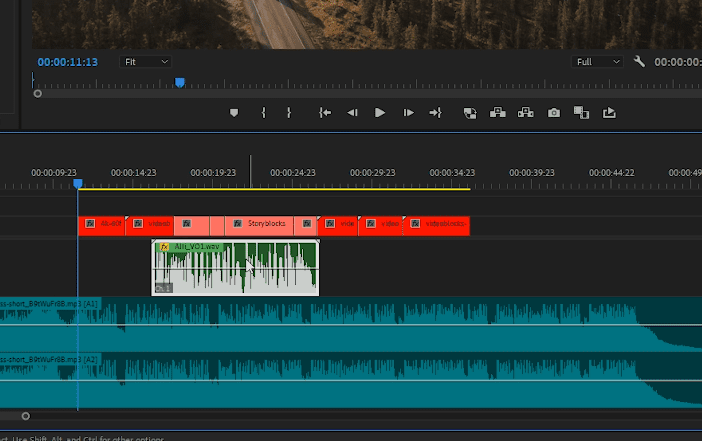
For the first music track adjustments, I’ll use the ‘Pen’ tool and do the work manually. For my example, I have a simple edit put together in a Premiere Pro sequence that includes a music track, voiceover audio, and several video clips. With no music adjustments made yet, as the sequence is played, the voiceover track (green audio below) is difficult to hear because the music is overpowering.
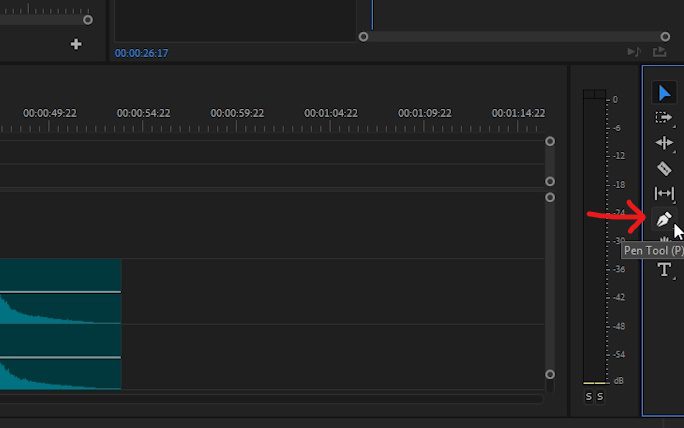
1. To manually adjust the volume of the music track, select the Pen tool in the Tools panel window or press ‘p’ on your keyboard.
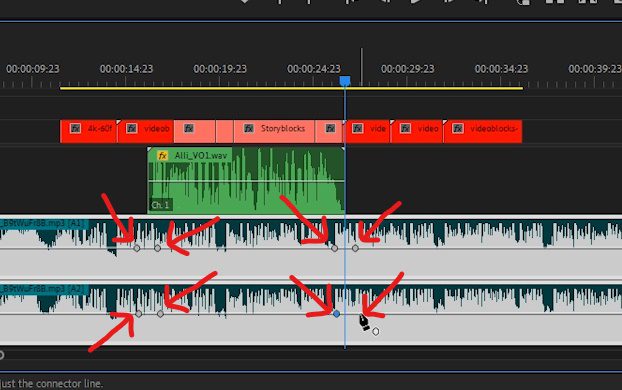
Then, on the music track (top layer), create 2 keyframes on the sides where the voiceover audio starts and ends, and do the same for the second layer.
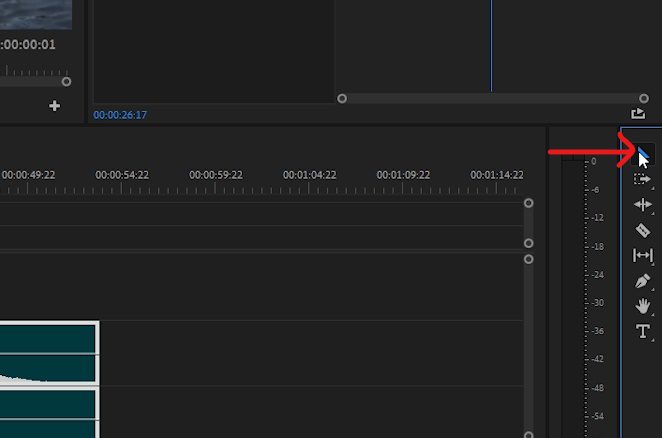
2. Next, switch back to the main ‘Selection’ tool.
On the top layer of the music track, click and drag the area between the keyframes to lower the volume. Repeat that for the bottom layer.
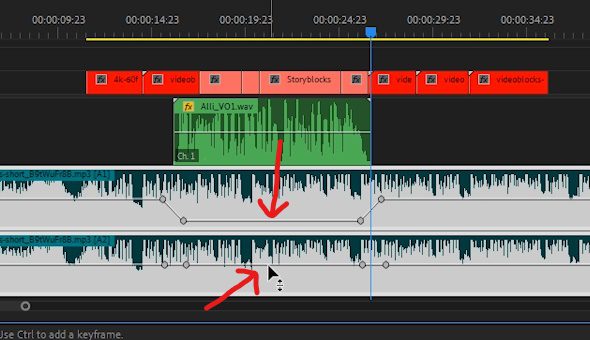
The amount you reduce the volume depends on how loud the music and voiceover tracks are. In my example, lowering the music volume between the keyframes to -18.5 is enough to easily hear the voiceover track.
3. As mentioned at the beginning of the tutorial, adjusting the volume on audio tracks manually with the Pen tool can take quite a long time. However, if there are only a few keyframes to make and adjust (our example only has 8 keyframes,) then using this method is fine.
As a quick note — to move multiple keyframes on a layer at once, you can select one keyframe, hold Shift on your keyboard, and then select the others one by one. Once you have all keyframes selected, let go of Shift, click and hold on one of the selected keyframes, then move the entire selection as needed.
Another tip — instead of switching to the Pen tool to create volume keyframes on an audio track, you can quickly create them with the Selection tool by hovering the cursor over the volume line of an audio track. While pressing and holding Ctrl on the PC (or Cmd on the Mac), you’ll notice that the cursor changes to show a + symbol. When you click, a keyframe will be made.
Adjust Audio Using the Automatic Audio Ducking Feature
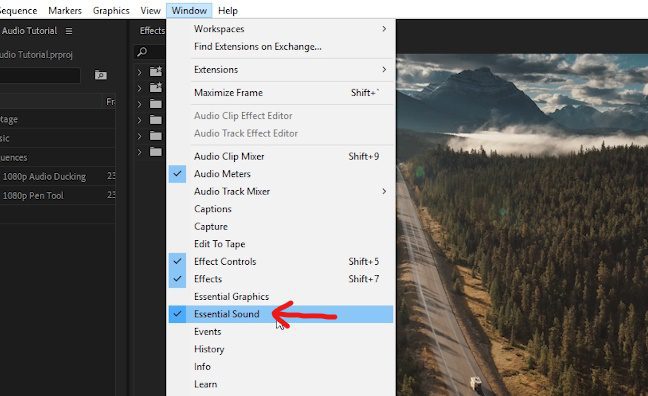
Now that you know how to manually adjust the volume of an audio track, let’s move on to the automated way — using the ‘Essential Sound’ panel window. In the Premiere Pro menu, navigate to ‘Window,’ then open the Essential Sound panel window.
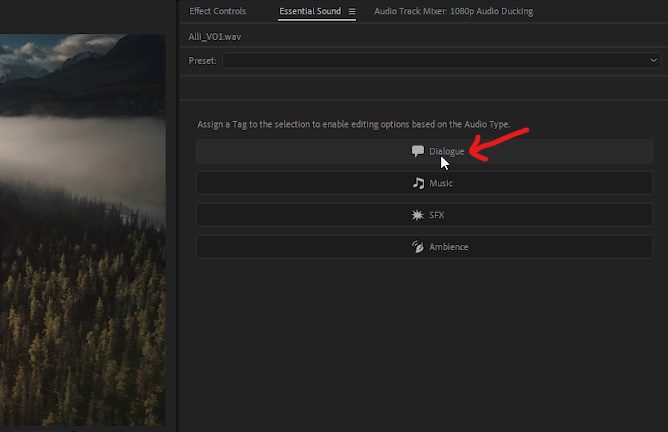
1. To automatically adjust the volume of an audio track using the Essential Sound panel, we need to tell Premiere Pro which audio clips are music, and which are voiceover. Start by selecting the voiceover track within the sequence.
Within the Essential Sound panel window, select the ‘Dialogue’ option.
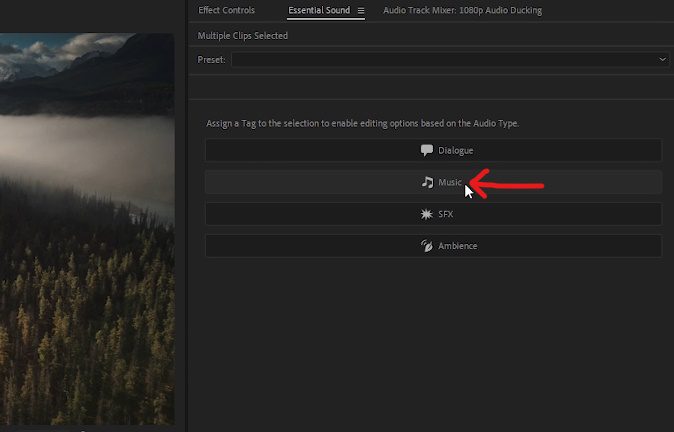
Continue by selecting the music track within your Premiere Pro sequence.
Followed by selecting the ‘Music’ option within the Essential Sound panel window.
2. With the music track still selected, turn on the Ducking section in the Essential Sound panel by checking the box.
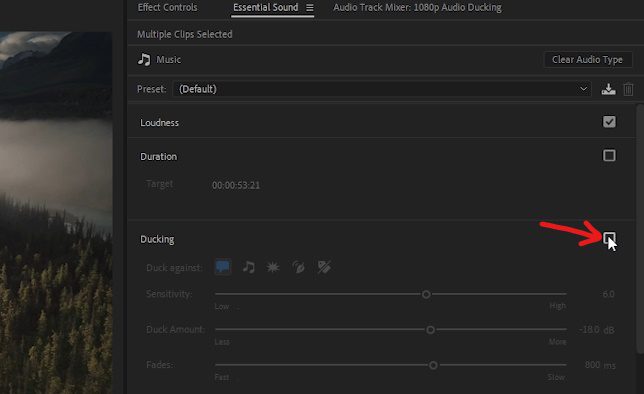
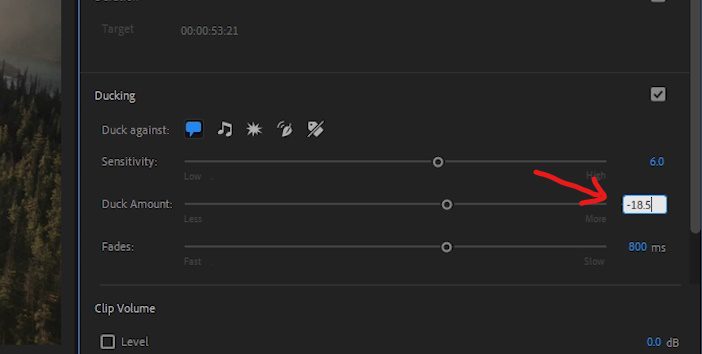
I kept the ‘Sensitivity’ at 6, then changed the ‘Duck Amount’ to -18.5 to approximately match the volume adjustment we made during the manual method. The level you choose will be dependant on the volume of your audio tracks, but in most cases, with the difference between the voiceover and music tracks, -15 to -24 will be enough. For the ‘Fades’ parameter, I left it at the default of 800 ms, but you may want to increase or decrease. This parameter represents the fade in and out duration the Ducking feature will automatically create.
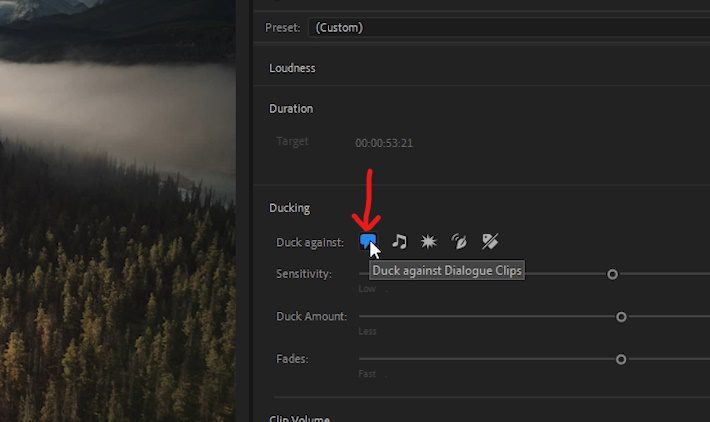
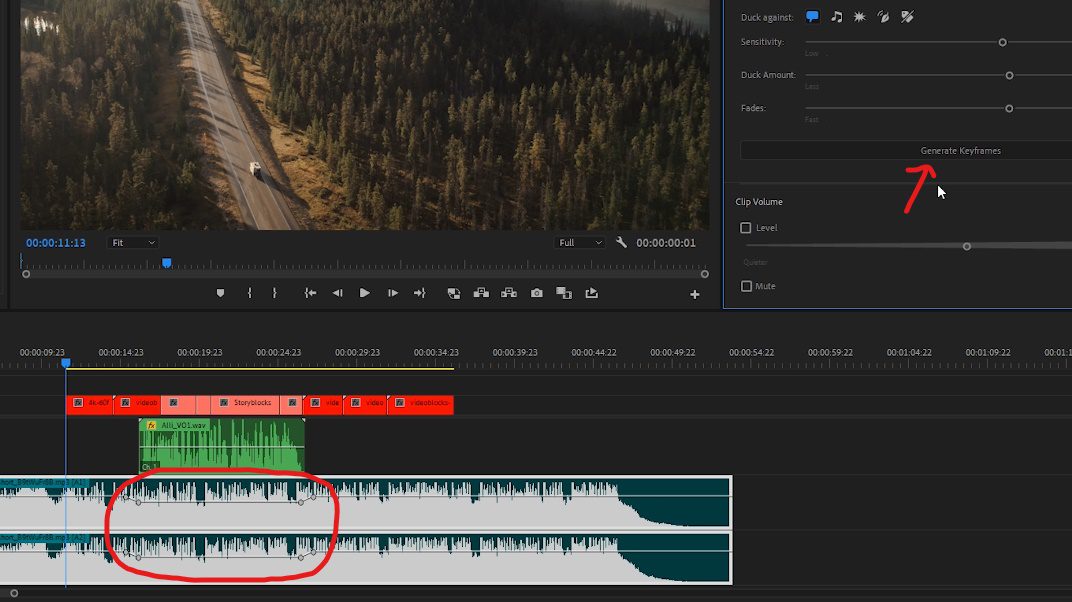
3. With the music track still selected in the sequence, confirm the ‘Duck against Dialogue Clips’ button is enabled.
4. Now that all of the settings have been set, press the ‘Generate Keyframes’ button. You may need to scroll down slightly to reveal it.
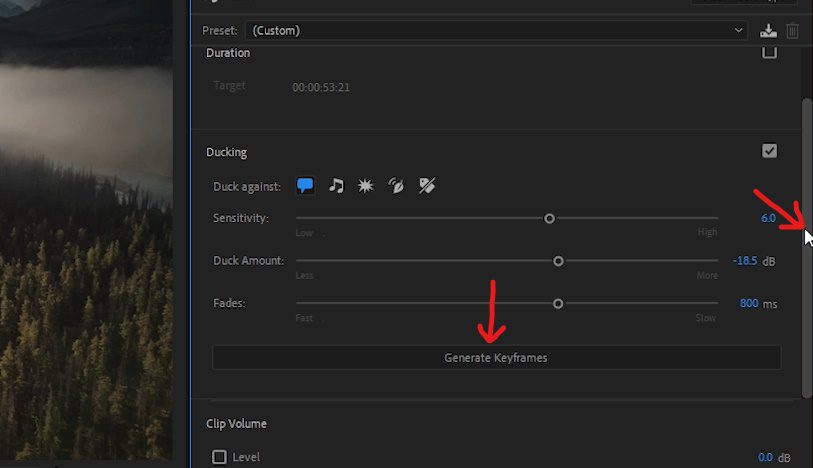
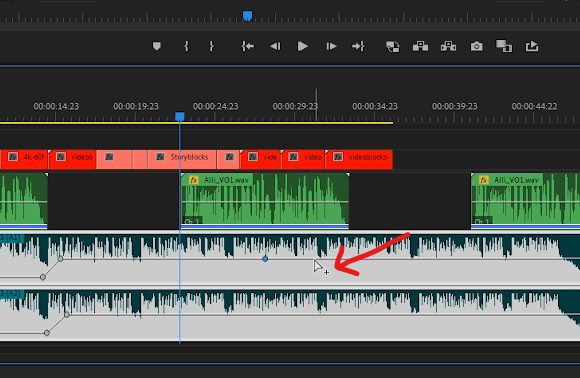
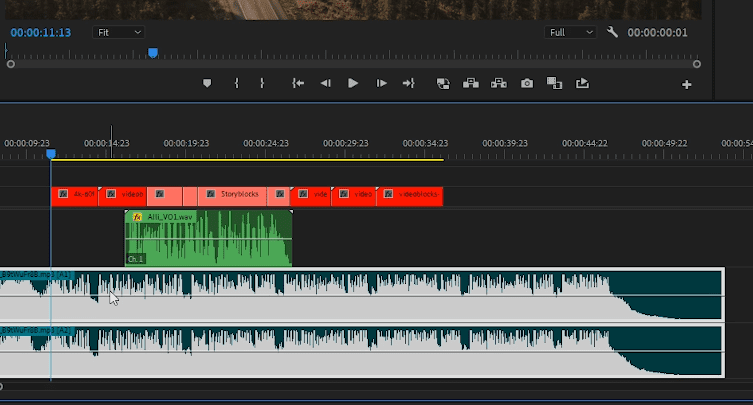
The Essential Sound feature will analyze the audio files and automatically create the keyframes needed to successfully reduce the volume of the music track and “duck” it behind the voiceover track.
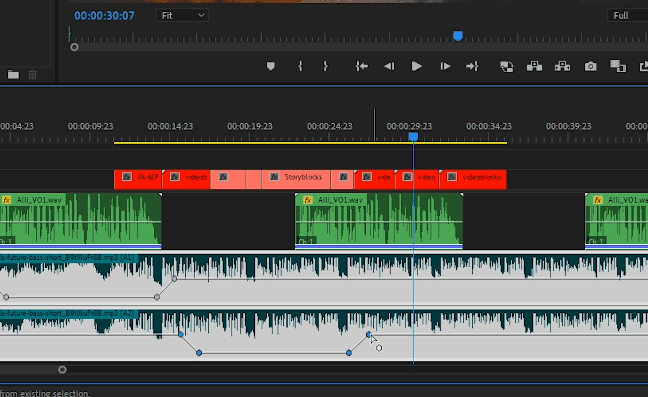
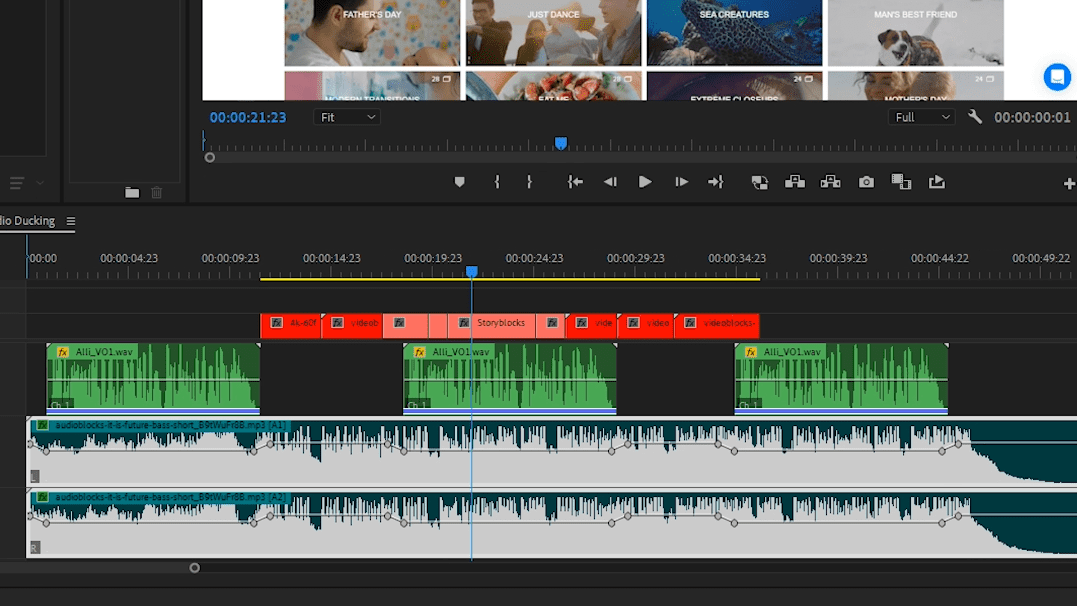
The Essential Sound panel can be utilized to automatically create keyframes across an entire sequence within a few seconds, even if you have multiple audio files in a layer! With 3 voiceover files spread across the edit, I used the same method to automatically create keyframes on the music track that perfectly ducks the music behind the voiceover track.

And we’re done!
The Essential Sound panel does have its limitations, such as making very precise adjustments. But when used in your projects to duck the music track automatically against a voiceover or interview audio, it can really speed up your editing. Something every editor needs. Plus, you can always fall back to the manual method if you want more precise control. Now, try it for yourself!

